
You're probably staring at a patch of yard that never gets used the way you hoped. Maybe it turns muddy after rain, maybe the old concrete slab is cracked, or maybe you're tired of dragging chairs across grass for every cookout. A brick paver patio solves a real problem when it's built right. It gives you a clean, durable outdoor floor that looks finished and can be repaired piece by piece instead of torn out all at once.
That said, this isn't one of those projects where the pretty surface matters more than the work underneath. A brick paver patio succeeds or fails below grade. The layout, drainage, base prep, edge restraint, joint fill, and final compaction decide whether the patio stays flat or starts shifting. Homeowners can absolutely tackle some patios themselves, but they should do it with open eyes. A simple rectangle is one thing. Curves, tight access, drainage issues, and permit questions change the job fast.
Why a Brick Paver Patio Is a Timeless Upgrade
A well-built patio changes how a yard gets used. It turns dead space into a place for a grill, a table, a fire feature, or just somewhere dry to stand with a cup of coffee. Brick pavers do this without looking temporary. They feel settled, architectural, and familiar in a way poured slabs often don't.
That lasting appeal isn't accidental. The material behind brick paving goes back a very long way. The first bricks are documented in ancient Mesopotamia around 4,000 BCE, which means the basic material behind brick paving is more than 6,000 years old, as noted in this history of brick patios and masonry traditions. That doesn't mean an ancient courtyard and a modern patio are built the same way. It does mean brick has never been a fad material.
Modern paver patios improved on old masonry by becoming modular. Instead of locking every unit into rigid mortar, installers build a prepared base and set pavers so the surface can handle movement better and be repaired more practically.
Practical rule: Homeowners usually regret a patio that was built too cheaply underneath, not one that got a little more attention in the base and layout stage.
There's also a reason contractors like pavers for residential work. If one section settles or one unit cracks, you can lift that area, correct the issue, and reset it. You're not stuck demolishing a whole slab to fix a local problem.
A brick paver patio also works across different house styles. It can look right beside a traditional brick exterior, a painted ranch, or a newer home with cleaner lines. Pattern choice, border detail, and color drive that outcome more than the word “brick” alone.
Planning Your Perfect Patio Design Budget and Permits
The planning stage decides whether the build feels smooth or turns into a string of expensive corrections. Most patio problems show up later, but they start here. Bad location, bad drainage path, bad shape, bad assumptions about labor. That's the usual chain.

Start with use and layout
Before choosing a pattern, decide what the patio needs to do. Dining space needs room for chairs to move. A lounge area wants wider circulation. A grilling zone should keep traffic away from the hottest spot. If you skip that thinking, the patio can look good and still feel cramped.
Shape matters too. Straight runs are faster to build, easier to measure, and cleaner for first-time installers. Curves take more judgment. Practical execution often involves “eyeballing” spacing and making many custom cuts, which can raise labor time and material waste, as shown in this curved paver layout demonstration. That's why curved borders, fire pit cutouts, and sweeping transitions need to be budgeted as custom work, not treated like a simple square patio.
If you need help visualizing options before staking anything out, a tool like an ai patio design generator can help you compare layout directions and styles before committing to a buildable plan.
Budgeting without fooling yourself
Homeowners often underestimate three things: excavation effort, base material handling, and cutting time. The pavers themselves are only one part of the project. Disposal, delivery, equipment rental, edge restraints, bedding material, joint sand, and saw work all count.
A realistic planning approach includes:
For homeowners comparing contractor pricing, it helps to sanity check line items with a fair price estimator for outdoor projects. It won't replace a site visit, but it does keep you from reacting to bids blindly.
A simple patio is a surface project. A complicated patio is a layout, drainage, excavation, cutting, and logistics project disguised as a surface project.
Permits and local rules
Permit rules vary widely, so no honest contractor should promise a one-size-fits-all answer. Some areas care about setback, lot coverage, grading changes, drainage discharge, or proximity to structures. Others may treat a basic patio as minor work unless retaining walls, electrical additions, or major grade changes are involved.
The right move is simple. Call your building department before you order material. Ask whether your patio triggers any permit, zoning, or stormwater review. Ask specifically about setbacks, drainage, and whether changes near a foundation require additional review.
If work has already started or you're trying to sort out an existing issue, this permit violation help resource is a useful place to understand what problems typically need attention before they get worse.
Gathering Your Paver Patio Tools and Materials
Nothing drags a patio job down like buying the pretty stuff first and realizing later you're missing the boring stuff that ensures the patio lasts. The base, bedding, edging, and compaction equipment aren't optional accessories. They are the job.

What to buy and what to rent
Most homeowners should buy hand tools and rent heavy equipment.
Buy or already own these:
Rent these if you don't already have them:
For base material selection, this guide on choosing paver base gravel is worth reading because the wrong aggregate creates problems that no amount of surface work will hide.
How to estimate material quantities
You don't need fancy software to get close. You do need to think in layers. Measure the patio footprint, then calculate each material separately instead of treating the whole build as one lump sum.
Use this cheat sheet:
| Material | Calculation Formula |
|---|---|
| Pavers | Patio square footage, plus extra for cuts and breakage |
| Base material | Patio area x excavation depth allocated to base |
| Bedding sand | Patio area x bedding layer depth |
| Joint sand | Patio area, pattern complexity, and joint volume |
| Edge restraint | Total perimeter length |
| Geotextile fabric | Patio footprint plus overlap where needed |
The exact purchase amount depends on the patio shape, the paver size, and how much cutting the layout creates. A rectangle with minimal border work is straightforward. Curves and tight radii increase waste because the offcuts don't always fit elsewhere.
A few practical notes make estimates more accurate:
If you're pricing the tool side of the project and comparing rental versus ownership, this project cost estimator for tools and labor planning can help organize the numbers before you commit.
Buy all the locking components at the same time. Pavers without edge restraint and joint sand are not a finished system.
The Step-by-Step Brick Paver Installation Process
A brick paver patio is either built like a pavement system or built like yard decor. The difference shows up after the first winter, the first heavy rain, or the first season of furniture getting moved around. The visible part is easy to admire. The hidden part is what makes it hold.
A good visual helps before the first shovel goes in.

Set the layout and excavate properly
Start by marking the finished patio outline with stakes, string, and paint. Confirm where the surface will meet doors, steps, lawn, and planting beds. This is the moment to catch bad transitions before digging begins.
For a durable brick paver patio, a proper installation requires excavating to 6 to 8 inches for patios, establishing at least a 2% slope away from structures (about 1 inch of fall per 4 feet), compacting a granular base, and screeding a bedding layer before laying pavers, according to the LSU AgCenter installation guidance. Those numbers aren't decorative specs. They control drainage and settlement.
Dig to the plan depth consistently. Don't leave soft pockets and tell yourself the base will fix it. It won't. Remove roots, organic material, and loose soil. If part of the subgrade pumps underfoot or feels spongy, that area needs correction before base material goes in.
A common homeowner mistake is digging only enough for the paver thickness. That creates a patio that looks finished for a short while and then starts moving because the support layers are too shallow.
Build the base and control drainage
The base is the structural layer. It supports loads, distributes weight, and gives water a path to move instead of staying trapped under the patio.
A major milestone in modern paver construction came in the 1970s, when concrete pavers were introduced to North America in Barrie, Ontario, helping standardize paver systems and base specifications in the region, as described in this history of pavers in North America. That same source notes typical installation practice of a 6-inch compacted base for walkways and a 12-inch base for driveways. Even if you're building a patio, the lesson is the same. Base depth is engineering, not decoration.
Spread the aggregate in lifts that can be compacted. Don't dump the entire pile in one shot and hope the compactor reaches all the way through. Check grade constantly with string lines and a long level. If you lose the slope here, you won't get it back with bedding sand.
Field note: Bedding sand is for fine adjustment, not for fixing a bad base. If you try to create your slope in the sand layer, the patio will tell on you later.
Professional methods commonly specify a 3/4-inch aggregate base compacted to as much as 95% of standard Proctor density, with pavers seated using a plate compactor delivering about 3,000 to 5,000 psi at 75 to 90 hertz, with at least two passes and a protective pad, according to these brick paver installation methods from the Mason Contractors Association of America. Homeowners don't need to become testing labs, but they do need to respect compaction as a real technical step.
For a practical contractor perspective on prep and laying sequence, R.E. and Sons Landscaping's paver tips are a solid supplemental read.
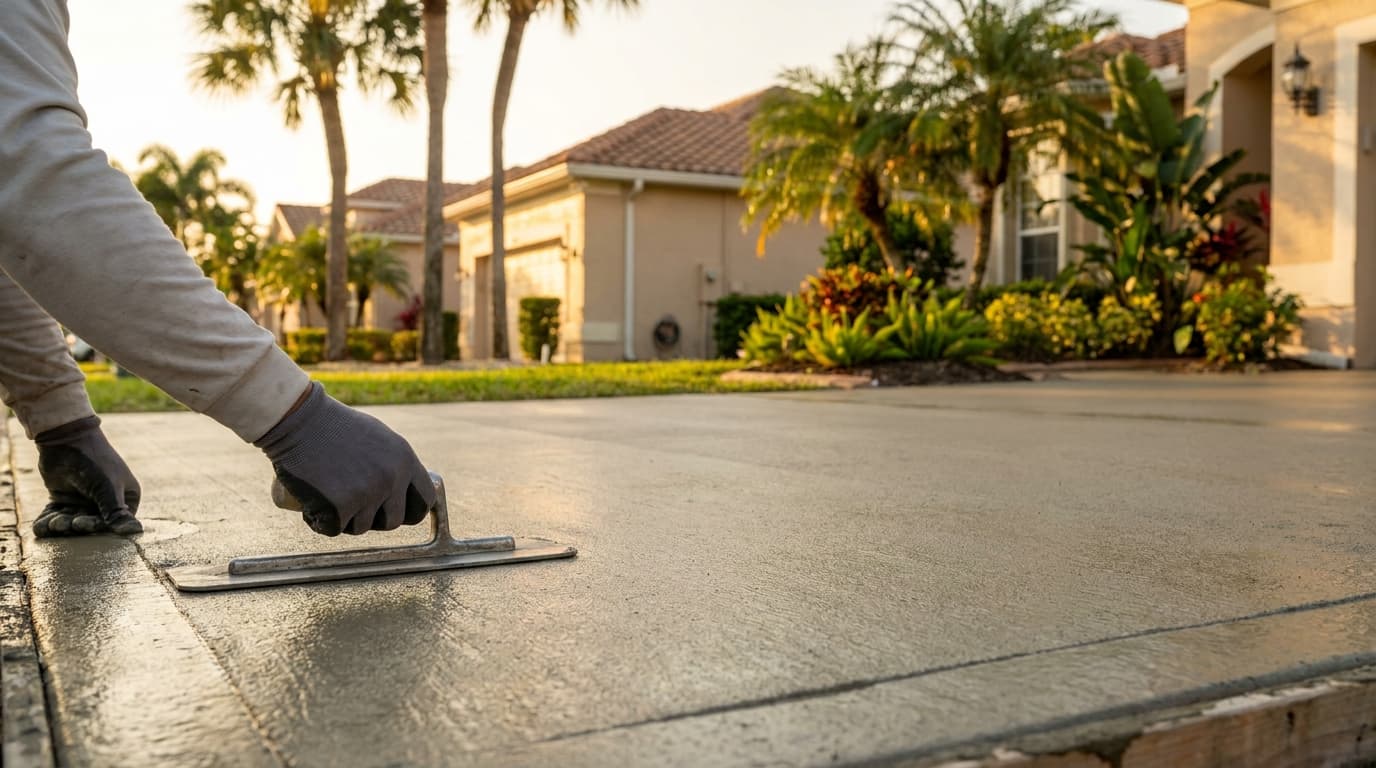
Screed lay cut and compact
Once the base is fully compacted and graded, install the bedding layer and screed it smooth. This layer should be consistent and undisturbed. Don't walk all over a finished screed bed. Work from the edge or from laid pavers as you move forward.
Lay the pavers in the selected pattern, starting from a reliable straight reference. Keep joint lines consistent. Watch the pattern every few rows, not just one paver at a time. Small drift becomes big drift if nobody checks it early.
Cutting deserves patience. Straight cuts are manageable with a proper saw and blade. Curved cuts take more time, more dry fitting, and often more cleanup if you want the edge to look intentional instead of ragged. Without careful attention to these details, many DIY patios lose their professional look.
A retaining edge, wall, or step nearby also affects your sequencing. If your patio ties into raised features or grade changes, review the details carefully. Work like this often overlaps with the same layout discipline used in brick retaining wall projects and transitions.
After the field is laid and cuts are in, compact the surface carefully so the pavers seat into the bedding layer. Then sweep in joint sand and compact again to drive the material into the joints and lock the system.
If you want to see a full visual sequence, this walkthrough is useful before starting the physical work:
Finishing Touches for a Locked-In Patio
A patio isn't done when the last paver is set. At that point, it's still vulnerable. The final steps turn a loose field of units into a stable surface that behaves like one system.

Why edge restraint matters
Edge restraint keeps the field from creeping outward over time. Without it, traffic, weather, and minor movement let the border spread. Once that starts, joints open up and the patio slowly loosens.
This is why edge restraint should never be treated as a cosmetic border only. It is part of the structural lock. Install it firmly against the pavers and support it according to the manufacturer's method and the site conditions.
A lot of failed patios still have good-looking pavers. What they don't have is containment.
How to sand compact and decide on sealer
Joint sand fills the spaces and helps stop movement between units. Work it into the joints completely, not just across the top. Then compact the surface again so the sand settles deeper and the pavers seat tighter.
Professional methods specify a final compaction pass with a plate compactor delivering about 3,000 to 5,000 psi of force. Combined with proper joint sanding, that's what fully locks the paver system and helps prevent migration and settlement, according to the Mason Contractors Association guidance on brick paver installation methods.
A few practical finishing calls matter here:
Most finishing failures aren't dramatic. They show up as slow edge spread, loose joints, and small areas that start to move because the locking steps were rushed.
How to Troubleshoot and Repair Common Paver Problems
Most repair calls start with a symptom the homeowner can see. A dip. A puddle. A loose edge. A few joints that keep opening. The mistake is assuming the visible problem is the whole problem.
Many searches are about fixing a patio that has shifted, and the underlying issue is often systemic. Diagnosing whether the fix calls for re-screeding, edge restraint repair, or base reconstruction matters because replacing a paver alone won't solve an underlying drainage or base issue, as explained in this overview of brick paver failure patterns and repair logic.
Match the symptom to the cause
Use a simple diagnosis approach before pulling anything apart.
The repair should match the cause. If one low corner settled because runoff keeps washing beneath it, a cosmetic reset won't last. The water path has to be corrected too.
When a small repair is enough
A local repair is often worthwhile when the issue is limited and the surrounding patio is sound. Lift the affected pavers carefully, set them aside in order, correct the bedding or base as needed, re-establish grade with string lines, and relay the same units if they're intact.
Bigger repairs make sense when the problem repeats. If the same area keeps sinking, if water stands across a broad section, or if multiple edges are opening, it's usually smarter to rebuild the affected zone properly than keep patching the symptoms.
A practical way to think about it is this:
If the patio changed shape, fix the structure. If the patio only lost its finish, fix the surface.
That distinction saves homeowners a lot of wasted effort.
Long-Term Care and Maintenance for Your Paver Patio
A brick paver patio doesn't need constant fuss, but it does need periodic attention. The goal is simple. Keep the surface clean, keep the joints full, and catch small movement before it becomes structural repair.
A workable maintenance rhythm looks like this:
Sealer is a preference call for many patios. Some owners like the richer look and easier stain cleanup. Others don't want the upkeep that can come with reapplication. Either choice is fine if the patio is structurally sound and the joints are maintained.
The best maintenance habit is walking the patio with a critical eye a few times a year. Most expensive repairs start as small clues.
If you're hiring out a brick paver patio, hire with proof, not guesswork. HomeProBadge helps homeowners find verified pros, review real project evidence, and make smarter decisions before money changes hands. It's also useful for contractors who want to show licensing, insurance, and documented work without relying on pay-per-lead marketplaces.