
Your house is warm, the thermostat is calling for cooling, and the vents are pushing little or nothing useful. That's the moment most homeowners jump straight to the worst conclusion: bad compressor, bad coil, expensive replacement. In practice, a lot of central air conditioning repair starts somewhere much less dramatic.
The first job is not guessing the failed part. It's narrowing the problem without making it worse. A central AC system is a chain. Thermostat, power, airflow, drainage, controls, and then refrigeration. If you start with the expensive end of that chain, you can waste money fast. If you start with the simple end, you often find the actual cause sooner.
That matters because central air isn't a niche system anymore. In the U.S., about 87% of homes have air conditioning and roughly 75% have central units, making repair a routine household need rather than a rare event, according to air conditioning market and workforce data summarized here. The same source notes projected workforce demand for HVAC mechanics and installers remains strong, which tells you something important: these systems fail in familiar ways, often enough that the trade has become highly specialized around them.
Your AC Stopped Working Now What
When central AC quits on a hot day, homeowners often focus on the outdoor unit first. They stand next to the condenser, listen for a hum, and try to decide whether the system is dead. That's understandable, but it's not the best first move.
The smarter approach is to treat the problem like a technician would. Start with what the system needs to operate in order: a cooling call from the thermostat, electrical power, enough airflow across the indoor coil, and a clean path to reject heat outdoors. If one of those basics is missing, the system can act like it has a major mechanical failure even when it doesn't.
A dirty filter is a classic example. So is a tripped breaker, a thermostat set incorrectly, a clogged drain switch shutting the system down, or a condenser packed with cottonwood, grass, and dust. None of those problems are glamorous, but they're exactly the kind of faults that trigger unnecessary service calls.
Practical rule: Don't diagnose by sound alone. Diagnose by sequence. Ask what the system is being told to do, whether it has power to do it, and whether air can move through it.
That doesn't mean every no-cool call is simple. Some are not. Refrigerant leaks, failed motors, damaged controls, and compressor trouble are real. But you don't earn anything by assuming catastrophe in the first five minutes.
What works is a clean process. Verify settings. Verify power. Verify airflow. Look for water. Look for ice. Only then should you consider opening panels or replacing parts. If the checks stay simple, homeowners can handle a surprising amount safely. If the problem moves into sealed refrigeration, high-voltage diagnosis, repeated breaker trips, or burning odors, that's the handoff point for a qualified HVAC pro.
Start Here The 5 Minute Triage
Before you touch a panel, a wire, or a capacitor, make the system safe. Turn the thermostat to off. Then shut power off at the breaker. If your outdoor unit has a disconnect box nearby, pull or switch that disconnect too. Even simple central air conditioning repair can become dangerous if you assume a unit is de-energized when it isn't.

Check the control side first
A surprising number of service calls come down to setup, not hardware.
Run this quick checklist:
If the thermostat is Wi-Fi connected, don't assume the app is right. Check the wall unit itself.
Then check airflow before parts
This is the step many homeowners skip, and it's where a lot of wasted money starts. Many expensive calls blamed on “the AC” are airflow problems such as dirty filters, duct leakage, or clogged coils, as noted in this discussion of air-delivery problems that get mistaken for major failures.
Pull the filter and inspect it under good light. If it's gray, packed, or matted with dust and pet hair, replace it. Then check supply registers and major return grilles. Don't close off half the house and expect the system to stay happy. Restricted airflow can lead to weak cooling, coil icing, longer run times, and symptoms that look like refrigerant or compressor trouble.
For a homeowner-friendly walkthrough of other common AC cooling problems, that guide is worth reviewing after you finish the basic checks here.
If the filter looks bad enough that light barely passes through it, stop there and correct that before deciding anything else is broken.
Look outside without taking anything apart
Now walk to the condenser.
Check for obvious debris around the cabinet. Leaves, grass clippings, seed fluff, and weeds restrict heat rejection. Clear the area around the unit and remove loose debris from the top grille only if power is off. Don't force tools through the grille, and don't bend the fins.
Next, check the breaker panel. If the AC breaker has tripped once, reset it once after the short shutdown period. If it trips again, stop. Repeated trips are a symptom, not a nuisance.
If you need a way to find a local contractor after triage, use a directory of verified HVAC professionals rather than calling the first ad you see.
What the first restart tells you
After a few minutes, restore power and call for cooling again.
Watch for these patterns:
This triage won't solve everything. It will keep you from chasing the wrong thing first, and that's where good repair starts.
Common DIY Central AC Repairs
Once the quick triage points to airflow restriction, drainage trouble, or a simple start issue, a few repairs are still in safe homeowner territory. I keep the line pretty firm. Cleaning is usually fair game. Clearing a clog is often fair game. Swapping a part is only reasonable when you can fully shut power off, confirm what failed, and reinstall the replacement exactly as found.

Start with the cheap causes first. A dirty coil or blocked drain can mimic bigger problems, waste hours, and push people toward expensive guesses before they have ruled out the common stuff.
Cleaning condenser coils safely
Symptoms it may fix: warm air, long run times, outdoor unit running hot, poor heat rejection. Tools: garden hose with gentle spray, soft brush, work gloves, screwdriver or nut driver if the top or side panels need removal.Shut power off at the breaker and outdoor disconnect. Remove leaves, cottonwood fluff, grass clippings, and surface dirt by hand. If the unit design gives you safe access, brush loose buildup off the coil face gently. Then rinse with low pressure. Inside-out cleaning works best when the cabinet opens safely. If it does not, a careful outside rinse is still better than leaving the coil packed with debris.
Do not use a pressure washer. It bends fins fast, and bent fins choke airflow.
Keep water away from the electrical compartment. If a panel fights you, stop forcing it. Some cabinets are simple to open. Others put wiring, fan leads, or controls in the way, and that turns a cleaning job into an electrical repair.
A dirty condenser can make a healthy system cool poorly. Clean it first, let the unit run, and check performance again before assuming you have a refrigerant or compressor problem.
Safety note: If safe access requires disconnecting fan wires, reaching around exposed terminals, or removing parts you cannot confidently reinstall, book service instead.
Clearing a condensate drain blockage
Symptoms it may fix: AC shuts off on float switch, water around the indoor unit, musty odor near the air handler, intermittent cooling. Tools: wet/dry vacuum, towels, flashlight, vinegar if your system setup allows it.This is one of the most common and least expensive failures to correct. The evaporator coil pulls moisture from the air, and that water has to leave through the drain line. When the line plugs with sludge or algae, many systems shut down to prevent water damage.
Turn power off to the air handler or furnace first. Find the drain line, the cleanout if present, and the pan area. Wipe up standing water so you can see whether the line is backing up or the pan itself is damaged. A wet/dry vacuum connected to the drain outlet often clears the blockage without taking anything apart at the equipment.
If you keep seeing rust, cracks, or overflow around the pan, this guide on fixing common AC pan issues is a useful companion because pan failure and drain clogs often show up together.
For a visual demonstration of routine AC service tasks, this walkthrough helps show the difference between careful cleaning and risky guessing:
Do not pour chemicals into the line unless the equipment maker allows it and you know where that line terminates. Vinegar is commonly used in service, but it is still worth checking your system layout before adding anything to the drain.
Replacing a capacitor with caution
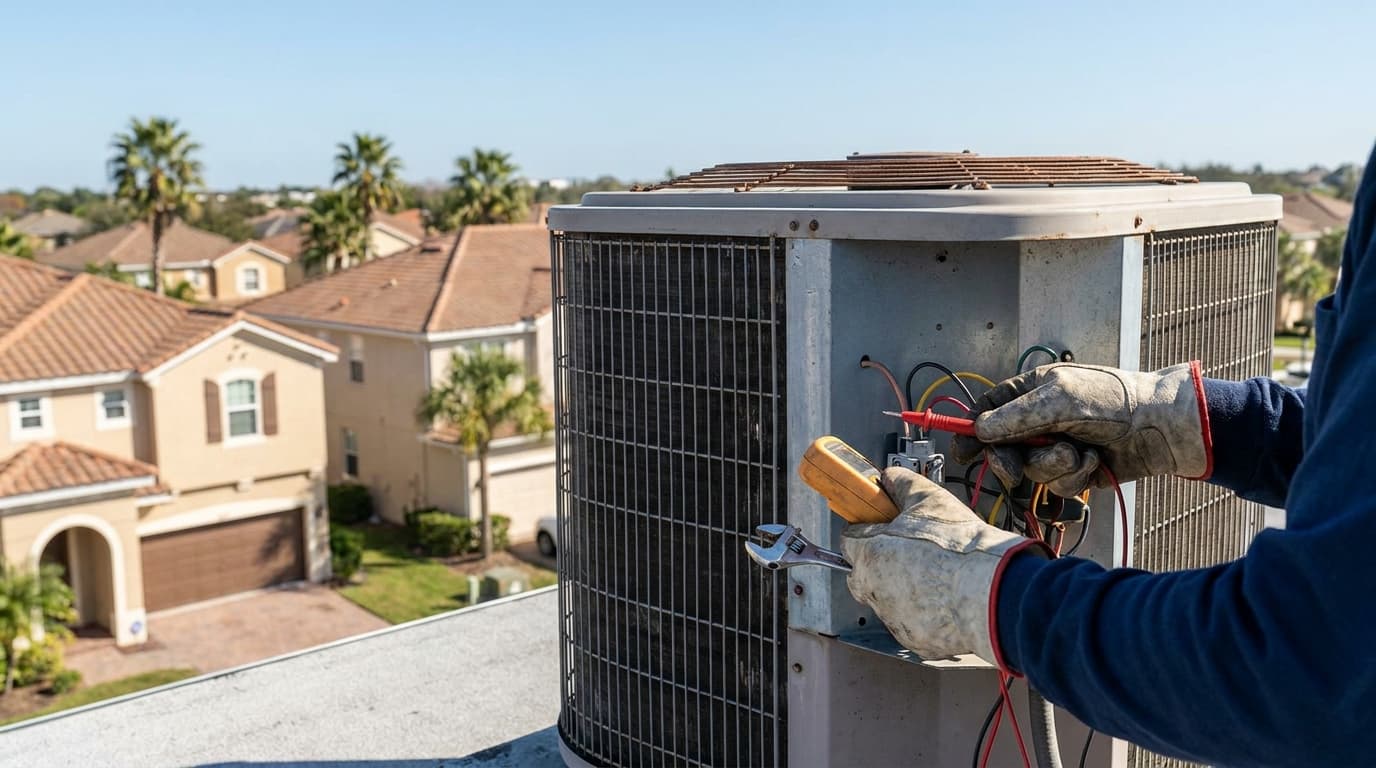
Symptoms it may fit: outdoor unit hums but will not start, condenser fan struggles to start, unit starts inconsistently, breaker may trip on startup. Tools: insulated screwdriver for panel removal, camera or phone for wire reference photos, needle-nose pliers, correctly matched replacement capacitor.Capacitors fail often enough that homeowners hear about this repair all the time. The danger is that the job looks simple from the outside. It is not harmless. A capacitor can store charge after shutdown, and a wrong replacement or crossed wire can damage a motor, a contactor, or the control circuit.
Before touching anything:
If you do not know how to discharge the capacitor safely and verify that it is safe to handle, this repair has crossed the DIY line. That is a good point to use a contractor hiring checklist for HVAC repair and get the right tech out the first time.
Once the system is safely de-energized and the wiring is documented, remove the access panel, discharge the capacitor using a safe procedure, and move one wire at a time to the new part. Reinstall the retaining strap and panel before restoring power.
If the new capacitor does not fix the start problem, stop there. At that point the fault may be in the contactor, fan motor, compressor, low-voltage controls, or field wiring, and those problems need testing, not more guessing.
When to Call a Verified Professional
Some symptoms aren't asking for another DIY attempt. They're telling you to stop before a moderate problem becomes a costly one.
If your system still won't cool after the triage steps, and the obvious airflow or drainage issues are already handled, the remaining faults tend to involve electrical testing, refrigeration diagnosis, or component replacement that carries real risk. That's where a trained technician earns their keep.

Symptoms that are no longer DIY
Call a pro if you notice any of the following:
These problems can overlap. A frozen coil might begin with poor airflow, but it can also point to refrigerant loss. A tripped breaker might start with a failed capacitor, but it can also signal a shorted motor or compressor problem. The skill is not just replacing a part. It's proving why that part failed.
If you're hiring someone, use a contractor hiring checklist so you ask the right questions before authorizing major work.
When a system shows signs of refrigerant loss or serious electrical trouble, diagnosis matters more than speed. A rushed guess often turns one repair into two.
Repair versus replace depends on refrigerant
A lot of homeowners still think the decision is simple: if the repair is cheaper than replacement, fix it. That's incomplete.
The refrigerant in the system matters. The transition away from older refrigerants has changed the long-term value of certain repairs. As explained in this overview of refrigerant phaseouts and equipment decisions, the U.S. EPA's AIM Act has pushed the industry away from older high-GWP refrigerants, and the industry is shifting in 2025 toward lower-GWP options such as R-454B and R-32 in new equipment. If you're repairing an older system, especially one tied to legacy refrigerant, you're not just paying for today's fix. You may be investing in a platform with shrinking refrigerant and parts availability.
That doesn't automatically mean replace the whole system. A solid unit with a minor electrical failure can still be worth repairing. But if the quote involves a major sealed-system repair on older equipment, ask tougher questions:
A good technician won't just hand you a number. They'll explain the ownership path after the repair.
Budgeting for Your AC Repair
A typical call goes like this: the system stopped cooling, the house is getting warm, and the first number a homeowner wants is the final price. Fair question. The hard part is that central AC repair is not one line item. You are paying for diagnosis first, then for the repair that fits what failed.
That distinction matters because the cheapest fix is often found in the early checks. Airflow restrictions, thermostat problems, tripped safeties, drain switch shutdowns, and simple electrical faults can look like a major breakdown from the living room. If those basic causes get ruled out quickly, the bill usually stays reasonable. If the problem reaches the compressor, blower motor, control board, or refrigerant circuit, the budget changes fast.
What the bill usually includes
A clean quote should break the job into parts you can follow:
Ask one simple question before approving work: what failed, and how was it confirmed?
If you want a second reference point before saying yes, a fair price estimator for AC and home service work can help you compare the quote to the kind of job being proposed.
For broader homeowner context outside your local market, this GTA homeowner AC pricing guide is helpful because repair and replacement discussions often start to overlap on older systems.
Estimated Central AC Repair Costs Professional Service
| Repair Type | Typical Budget Category | Notes |
|---|---|---|
| Diagnostic service call | Low to moderate | You are paying for testing, not just arrival at the house |
| Capacitor or contactor replacement | Low to moderate | Common electrical failures, often found early in diagnosis |
| Blower motor or control repair | Moderate to high | Indoor access and parts pricing affect the total |
| Refrigerant leak diagnosis and repair | Moderate to high | Cost depends on leak location, repair method, and recharge requirements |
| Duct or airflow correction | Moderate to high | Poor airflow can drive comfort complaints even when core components still run |
| Full system replacement | Major expense | Different budget decision from repair, especially on older equipment |
Use the table as a planning tool, not a price promise. Good technicians do not quote serious repairs by guesswork, and capable homeowners should be cautious of anyone who does. If the explanation is vague, the testing was skipped, or the repair sounds bigger than the symptoms support, pause and ask for the diagnosis in plain language.
How to Prevent Your Next AC Breakdown
Most emergency calls begin long before the day the system stops cooling. Dirt builds slowly. Drain lines narrow slowly. Outdoor coils load up slowly. Homeowners usually notice the problem only when the system finally loses enough capacity to become obvious.
Preventive care works best when it stays simple and repeatable.

The maintenance habits that actually matter
Build these into your routine:
One of the biggest mistakes homeowners make is treating airflow as a comfort issue only. It's also a system-protection issue. When air can't move across the indoor coil correctly, other components pay for it.
Clean airflow is cheaper than mechanical repair. Most systems will tell you they're struggling before they actually stop.
What a yearly pro visit should accomplish
A real maintenance visit should do more than rinse the unit and leave a sticker. A good technician should inspect electrical components, check the condensate path, clean accessible coil surfaces as needed, inspect motors and controls, and verify the system is operating normally for the conditions.
That visit is also when small concerns become useful. Mention the room that never cools evenly. Mention the occasional water near the indoor unit. Mention the startup noise that only happens some mornings. Those details help a technician catch problems while they're still manageable.
The goal isn't to eliminate every future repair. No one can promise that. The goal is to avoid avoidable breakdowns, catch stress early, and keep a minor problem from turning into a major call in the middle of a hot spell.
When you do need help, HomeProBadge makes it easier to find contractors with verified identity, licensing, insurance, and proof of completed work, so you can hire with more confidence and compare professionals on something more useful than ads alone.