



You find the crack while sweeping the driveway, basement floor, patio, or shed pad. It looks small enough to ignore, but water has started collecting in it, and the repair aisle offers tubes, tubs, powders, epoxies, and flexible sealants that all promise a permanent fix. The difficult part isn't spreading filler. It's deciding whether the crack is suitable for filler, choosing a formulation that matches the conditions, and giving the repair enough depth and cure time to hold.
A good repair starts with diagnosis. Cement crack filler works well on many stable, non-structural surface cracks, but it won't stop settlement, restore a failed joint, or solve a crack that keeps moving. Treat the crack as evidence of what the concrete is doing, not just as an empty line to fill.
What Cement Crack Filler Can and Cannot Fix
Start with the crack itself, not the product label. A shallow, narrow line running across a slab may be a cosmetic shrinkage crack caused by concrete drying. A stable surface crack around a patio or basement floor may also respond well to a compatible filler after careful preparation. Those are reasonable DIY candidates when the surrounding concrete is solid and the crack isn't widening.
A different situation appears when the crack changes direction, steps through masonry, continues up a wall, or separates one side of the slab from the other. A crack that reopens after filling, has noticeably displaced edges, or grows over time may indicate movement, settlement, loading, or another condition that filler alone can't correct. Water flowing through the crack is another warning sign. Filler applied against active water commonly loses its bond or gets washed out before it cures.
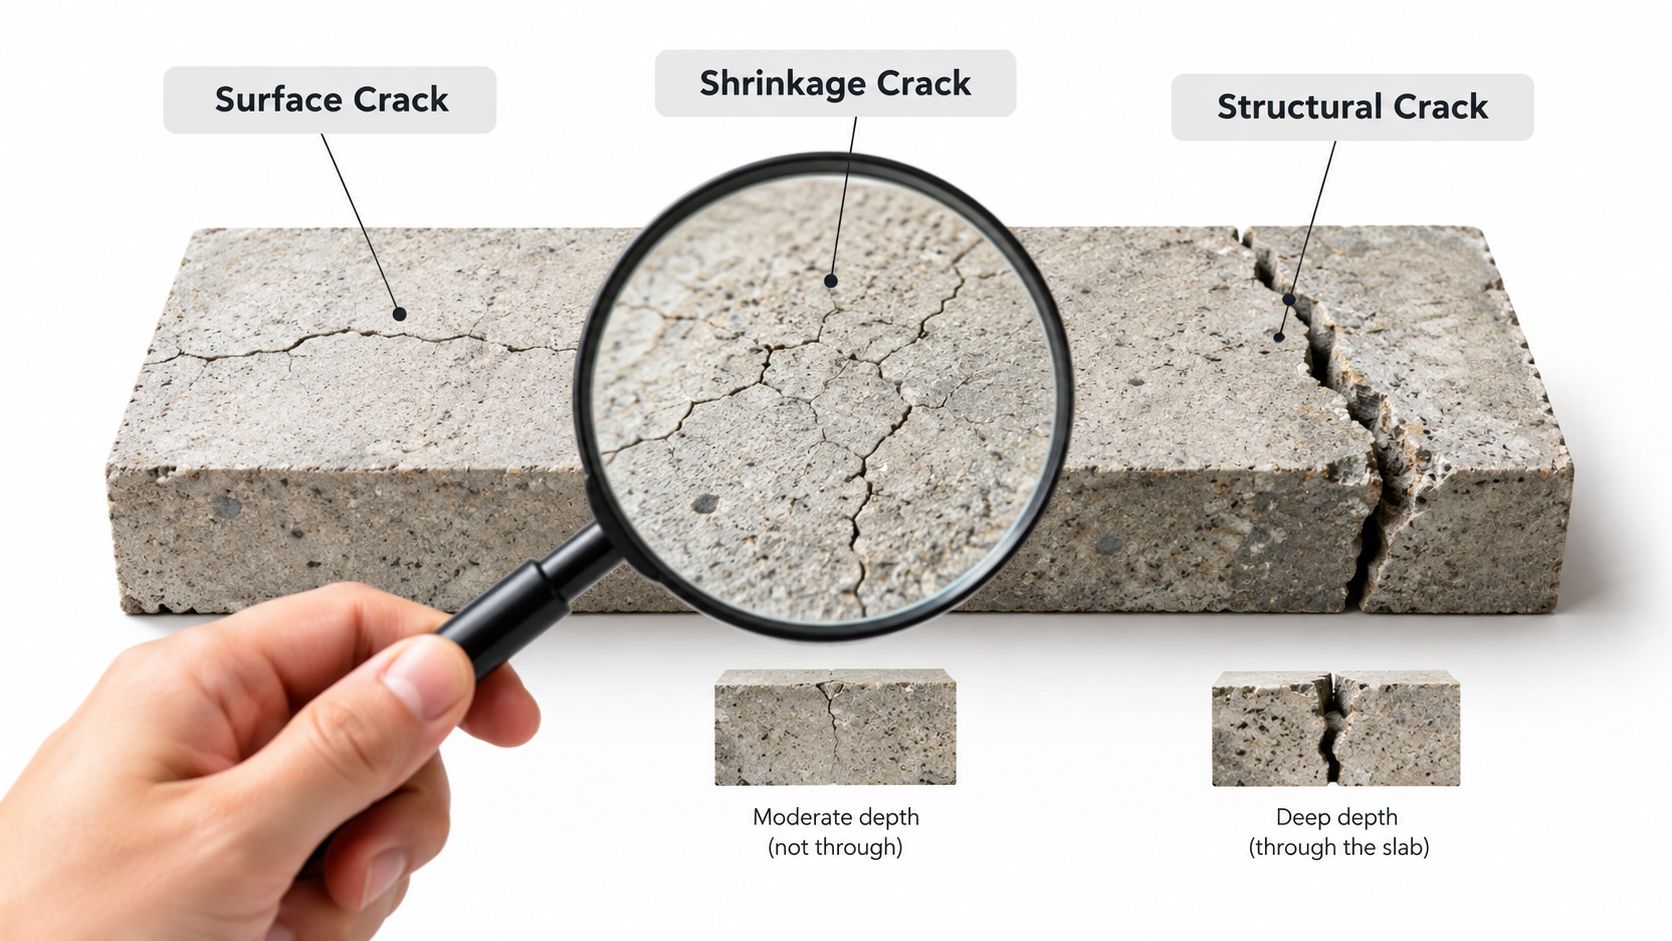
Make the go or no-go call
Use this quick screening process before buying anything:
A filler can close an opening and reduce water and dirt entry. It can't reconnect concrete that has moved, replace missing reinforcement, correct an unstable base, or make a failed expansion joint behave like sound concrete. If the crack is part of a larger problem, a neat surface repair may only hide the evidence temporarily.
For outdoor slabs, the surrounding installation matters too. Drainage, soil movement, slab edges, and the way a patio or shed pad carries its load can determine whether a patch survives. These patio and shed pad repair tips are useful when the crack appears alongside settlement, uneven bearing, or drainage trouble.
How to Identify Your Crack Type and Choose the Right Filler
Once the crack passes the basic screening, match the material to its behavior. Cementitious filler is familiar and easy to tool, but it behaves more like concrete than a flexible sealant. Polymer modification can improve adhesion and handling, while polyurethane and epoxy solve different problems rather than serving as universal upgrades.
A dry interior hairline crack and a damp exterior slab shouldn't receive the same product by default. Read the technical sheet for substrate moisture, temperature, depth, coat thickness, rain exposure, and traffic restrictions. Product names can sound similar while their installation requirements differ sharply.
| Filler Type | Best For | Moisture Tolerance | Durability Tradeoff |
|---|---|---|---|
| Cementitious | Stable surface cracks and compatible concrete repairs | Usually needs a prepared, controlled surface unless labeled otherwise | Blends with concrete, but may not tolerate recurring movement |
| Polymer-modified cement | Small to moderate repairs where improved adhesion and easier placement matter | Varies by formulation, check the technical sheet | More forgiving than basic cement, but still isn't a solution for active movement |
| Polyurethane | Cracks or joints that need flexibility | Some formulations tolerate damp conditions, others don't | Handles movement well, but may require careful joint design and surface preparation |
| Epoxy | Sound, dry concrete where rigid bonding and high-strength repair are required | Generally sensitive to surface condition and moisture | Strong and durable when matched correctly, but rigid material can be wrong for moving cracks |
| Asphalt-based | Asphalt pavement cracks and compatible bituminous surfaces | Formulation-dependent and intended for asphalt conditions | Flexible for pavement use, but not a general concrete repair material |
Match the chemistry to the crack
For a stable, shallow concrete crack on a dry slab, cementitious or polymer-modified cement filler is often the practical choice. It's easy to shape and visually compatible with concrete. A deeper crack shouldn't be filled in one oversized pour if the manufacturer specifies layers, because the material can settle or shrink as it cures.
Polyurethane is worth considering where the crack behaves like a joint and needs to accommodate movement. It isn't automatically better for a rigid, dry, unmoving repair. Epoxy can make a strong bond to suitable concrete, but its rigidity and moisture sensitivity make product selection critical. If the crack is damp, don't assume a label that says “concrete repair” means the product can be applied over water.
Material rule: Choose for crack movement and substrate conditions first. Choose color and convenience second.
Keep adjacent masonry and retaining structures in mind. A crack in a concrete slab may be connected to water management or lateral pressure around a wall, so guidance on brick retaining wall repair considerations can help you avoid treating one visible symptom in isolation.
Tools Safety Gear and Surface Preparation That Makes Repairs Last
Most filler failures begin before the filler is opened. Dust, laitance, loose grains, paint, oil, and damp debris prevent the repair from contacting sound concrete. The product may look smooth on top while the bond underneath is attached to contamination.
Gather a stiff wire brush, a narrow cold chisel or crack-chasing tool, a vacuum, a putty knife or small trowel, a mixing container, clean water if the system calls for it, gloves, eye protection, and a dust mask. A backer rod can help control depth in a wide joint or opening, but only when the selected system allows it.
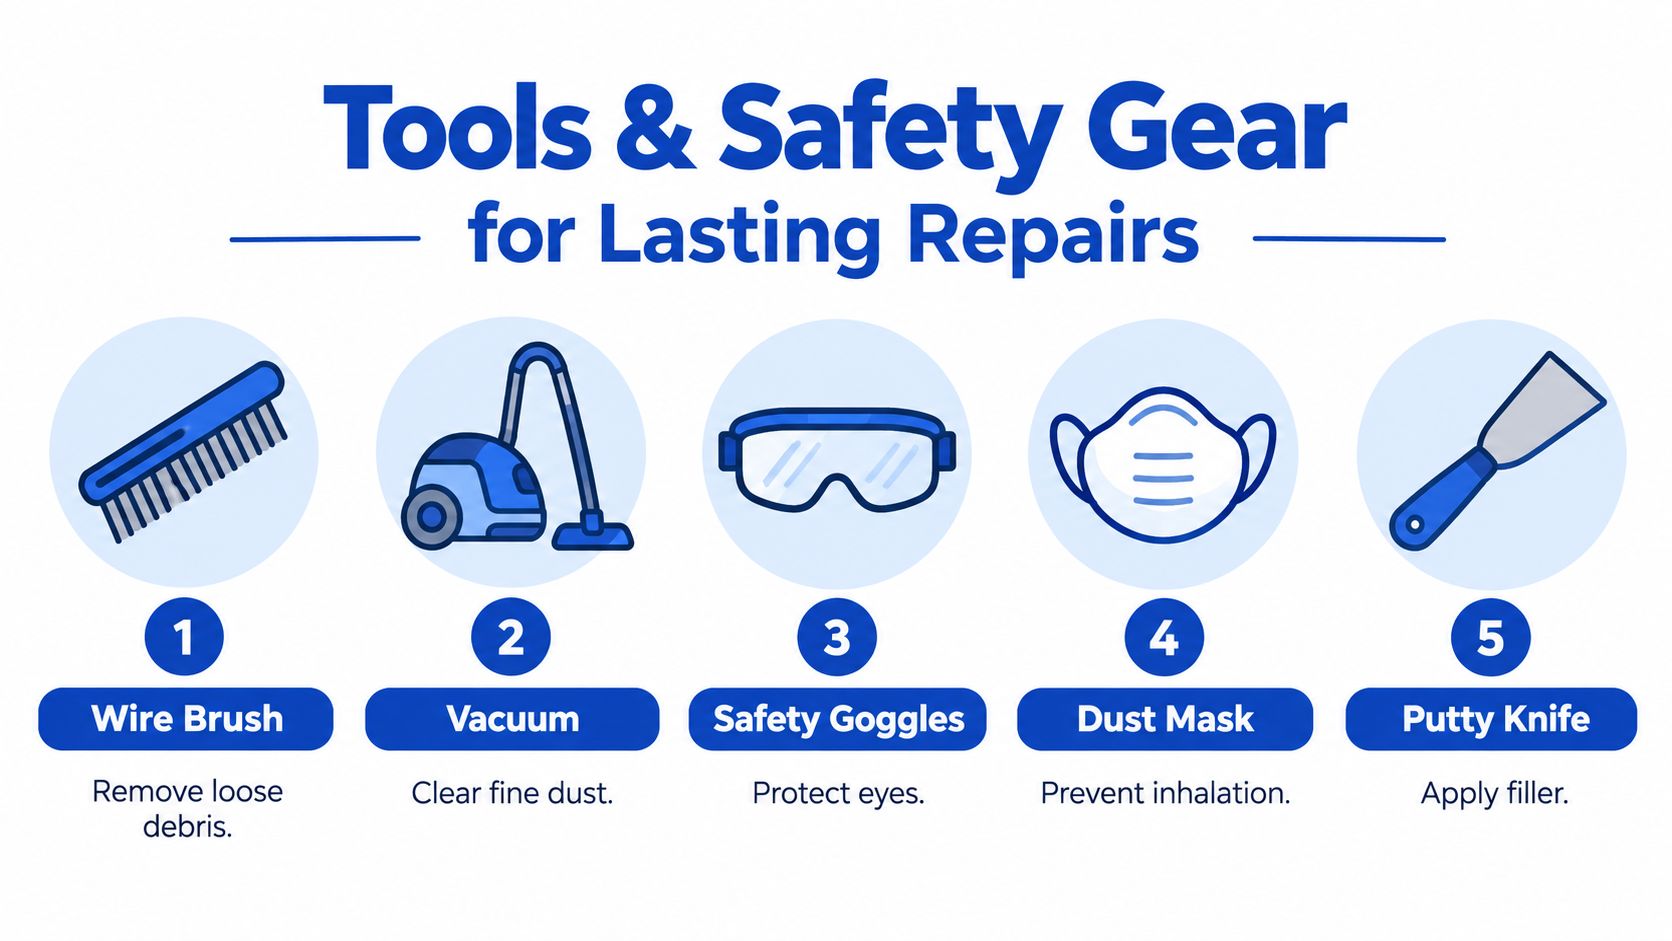
Prepare the concrete in sequence
A dusty garage may need repeated vacuuming because sweeping redistributes fine powder. In a basement, a surface can look dry while the crack remains damp inside. Blot visible moisture, improve ventilation, and postpone the repair if the product requires a dry substrate.
Put on goggles and a mask before chasing or brushing concrete. Keep the work area free of foot traffic, pets, and vehicles while the filler is open and curing. This surface repair demonstration shows the kind of controlled preparation and placement that prevents avoidable bond problems.
How to Apply Cement Crack Filler and Cure It for Maximum Bond
Application should be controlled, not rushed. The filler needs contact with sound concrete at the sides and bottom, and deep repairs need a placement strategy that limits voids and shrinkage.
For a deeper or vertical crack, cut the opening to at least 6 mm wide and 20 mm deep where appropriate, then clean it again. That profile isn't a universal instruction for every product, so compare it with the manufacturer's requirements before removing sound concrete.
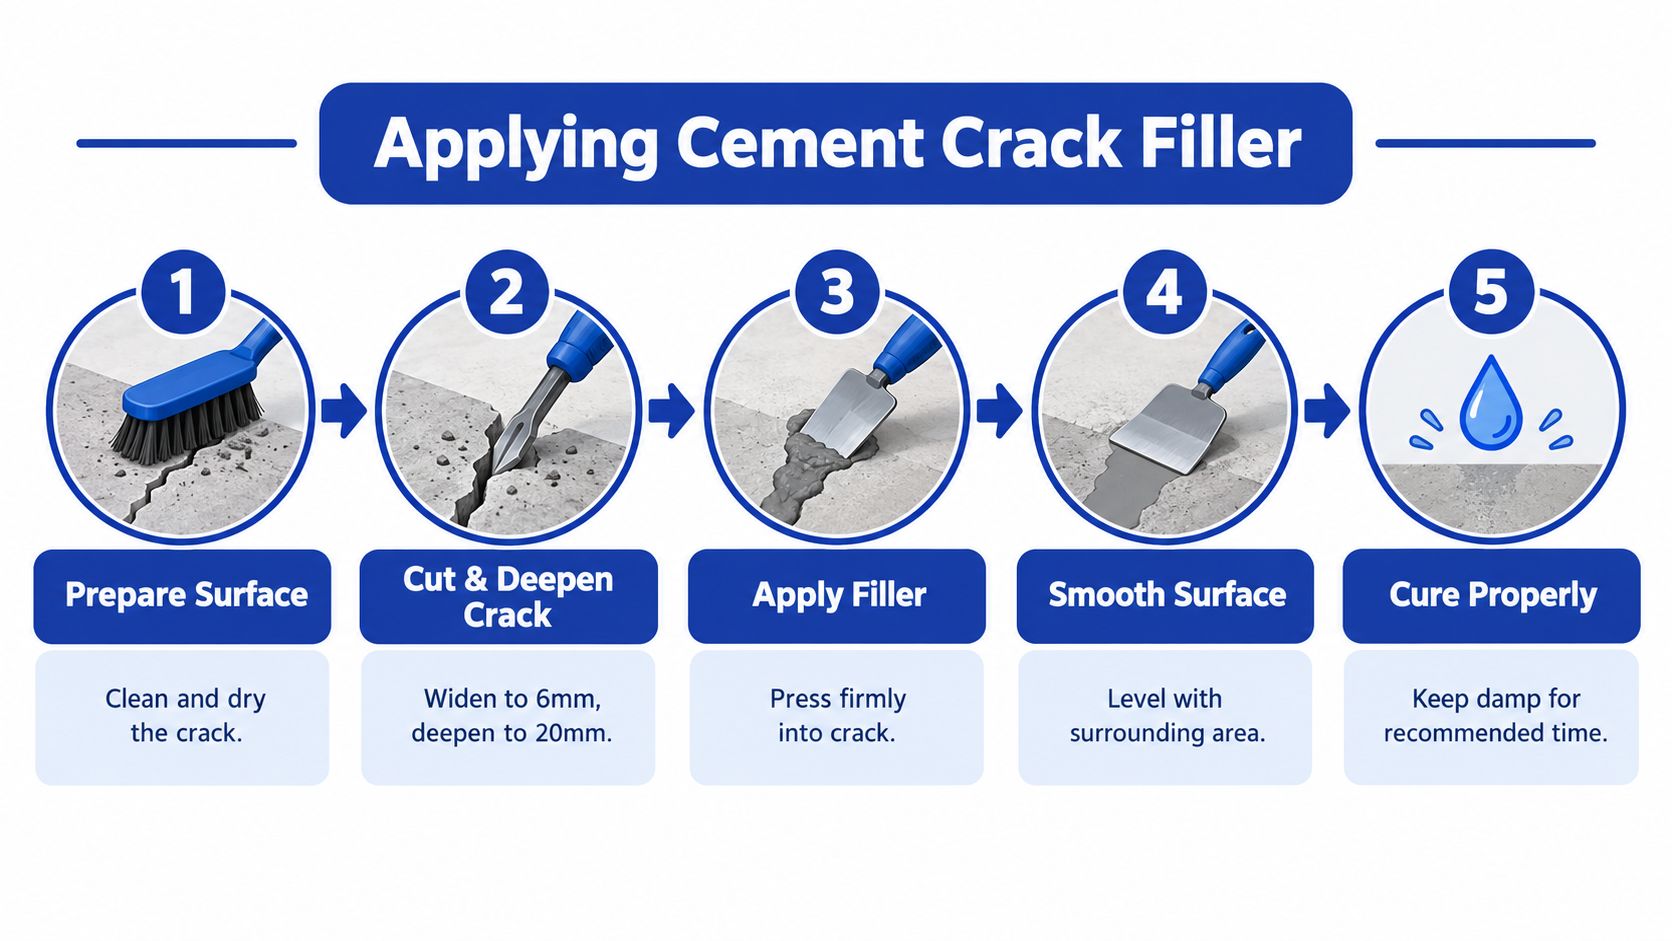
Place the filler without trapping voids
For a cartridge product, use the specified nozzle opening. DAP's Liquid Cement Crack Filler technical guidance gives a practical opening of about 1/4 inch to 3/8 inch, or 6 to 9 mm, and recommends 1/4 inch layers with at least 24 hours between applications. See the technical guidance for concrete crack repair before adapting those dimensions to a different product.
For a mixed cementitious or polymer-cement system, measure accurately and mix only what you can place within the working time. One proprietary cementitious system specifies at least 30 seconds of initial mixing, followed by 1.5 minutes after adding liquid, but that timing belongs to that system, not every powder filler. Over-activating an accelerator can make a repair brittle, so don't add extra accelerator to make the material set faster.
Press the filler to full depth with a narrow tool, nozzle, or trowel. Work from the bottom upward where possible, compacting each pass against the sides. Strike the final surface flush with the surrounding concrete, unless the product instructions call for a different profile.
Build deep repairs in lifts
A deep crack is where rushed repairs usually fail. Fill the first layer, allow the specified interval, then add the next. Settlement is normal in many repair materials, so a second application may be necessary even when the first pass looked full.
On horizontal surfaces, some systems call for re-application before final set. Vertical repairs may require multiple passes because gravity pulls material downward. Don't smooth the surface repeatedly after the material has begun setting, because that can disturb the bond and draw water to the surface.
Dampening is formulation-specific. If the instructions require a damp substrate, moisten the concrete without leaving standing water. If they require dry concrete, wait. Never apply a cement crack filler into running water unless the product is specifically designed and approved for that condition.
Protect the repair from rain for the period stated by the manufacturer. A product may feel touch-dry quickly while remaining uncured below the surface. Keep vehicles and foot traffic off the area until the full cure window has passed. Many consumer-grade products call for at least 24 hours before normal use, as reflected in the Concrete Resurfacing Products joint filler guidance, but the package instructions remain the final authority.
Common Mistakes Troubleshooting and When Filler Will Not Hold
A failed repair usually leaves clues. If the filler peels out in a strip, the sides were probably dusty, weak, oily, or damp. If it remains in place but the crack reappears through the center, the concrete may be moving or the material may have been placed too thickly.
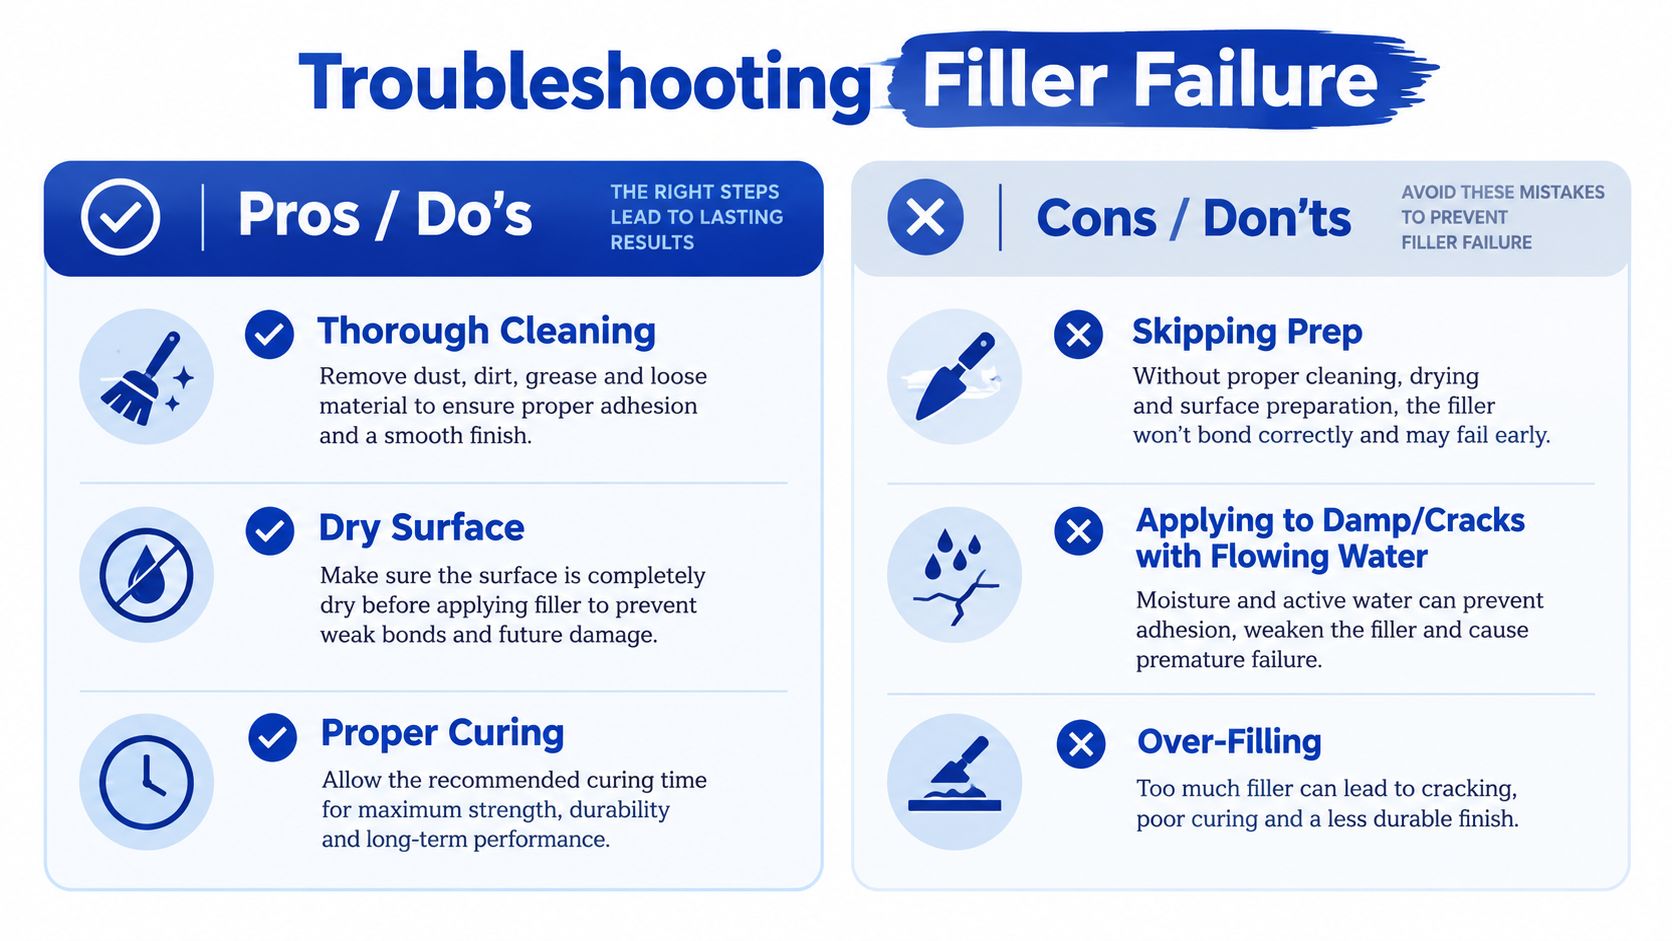
Diagnose the failure before patching again
Weather makes timing less forgiving. Some products can touch-dry in roughly 30 minutes, while other guidance requires 24 hours of rain protection, so a dry surface at application doesn't guarantee safe exposure shortly afterward. Cold conditions can slow curing, and wet conditions can prevent the bond a dry-weather product needs. Choose a product for the actual site conditions, not the conditions you wish you had.
The concrete restoration market shows why this distinction matters. One estimate values the global market at USD 18.70 billion in 2024, projects USD 19.94 billion in 2025 and USD 36.04 billion by 2034, with a projected 6.8% CAGR, according to Polaris Market Research's concrete restoration market estimate. That broader category includes far more than crack filler, but it reflects the recurring need to maintain aging concrete rather than replace every damaged asset.
Switch methods when the crack is active, structural, persistently wet, or connected to voids and settlement. Injection resins, flexible joint systems, pressure management, drainage work, or structural repair may be appropriate, but those choices require diagnosis. For cracks that affect load-bearing elements or continue to widen, guidance on finding a licensed structural engineer is more useful than another tube of filler.
Final Checklist Safety Tips and When to Call a Professional
Before you start, photograph the crack, record its location, and note whether the edges are level. Wear eye protection, gloves, and a dust mask during chasing and brushing. Keep the area protected from water, traffic, and cleaning until the product's full cure window has elapsed.
Use this final check:
Call a qualified professional if the crack widens, reopens, shows differential settlement, admits persistent water, or appears in a structural wall, footing, beam, column, or load-bearing area. You can use a local contractor search resource when the repair needs site-specific assessment rather than surface patching.
A good filler repair is small work, but it still rewards disciplined preparation and honest diagnosis. Don't spend an afternoon making a moving or water-driven crack look finished. Fix the cause when necessary, then use filler where it has a fair chance to bond and last.
HomeProBadge helps homeowners find verified home service professionals with identity, licensing, insurance, reviews, and proof-of-work tied to real projects. If your concrete crack needs more than a surface repair, visit HomeProBadge to compare credible local help and make the next step with better evidence.