

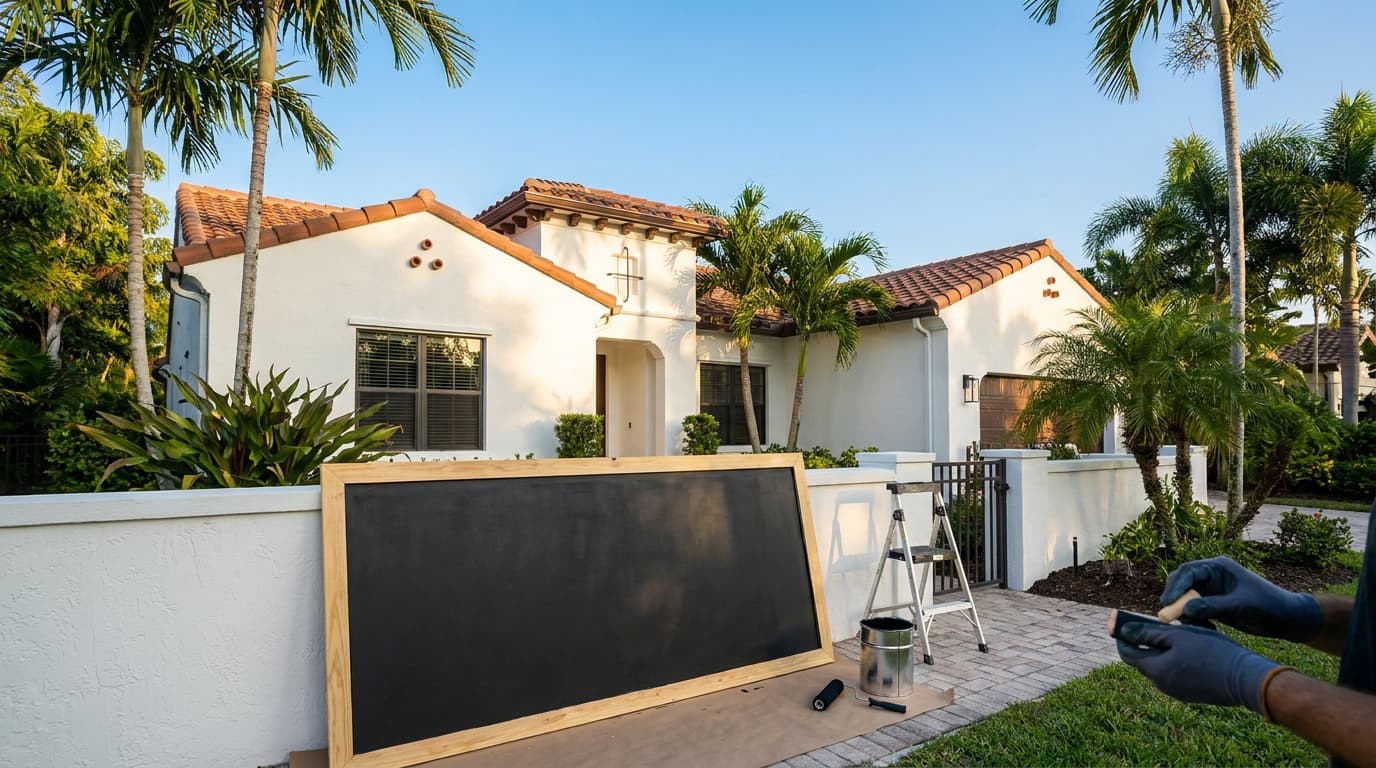

You're standing in a kitchen that needs a reset. Maybe it's the family message wall that never got built, maybe it's a café feature you're bidding, or maybe it's a kid room that's one good idea away from becoming useful. Chalkboard paint how to sounds simple until you realize the finish has to do three jobs at once, accept chalk, release chalk cleanly, and survive real wiping without turning blotchy or scratched up.
The difference between a wall that works and one that annoys you for years usually comes down to prep, coat count, and patience. The paint itself matters, but the surface underneath and the way you let it cure matter just as much. If you treat it like decorative wall paint, it'll act like decorative wall paint. If you treat it like a writable surface, it'll perform more like the tool it's supposed to be.
What a Chalkboard Wall Demands of You
A parent decides to clear the refrigerator chaos with a kitchen wall, the tape comes out, and the first question lands fast. Is this just a matte black accent, or does it need to work as a real writing surface every day? Those are different jobs, and chalkboard paint only holds up when the finish is built for the second one.
A chalkboard surface has three hidden jobs
The first job is uniform matte texture. If the sheen changes from one pass to the next, or the roller leaves a rough patch, chalk will erase unevenly and the wall starts to look worn long before the coating gives out. On a decorative wall, a little variation can hide. On a chalkboard wall, it shows every day.
The second job is a properly cured top film. Home Depot recommends letting each coat dry for at least 1 hour and then waiting 72 hours before use, while DIY Doctor recommends at least three thin coats with 1 to 2 hours between coats for smaller projects and 2 to 3 days of curing for larger surfaces, with a chalk rub before normal use to prevent ghosting. Those timing rules are not filler. They are part of how the coating becomes durable and eraseable. The same kind of discipline shows up in the guide to wall preparation before painting, and chalkboard work asks for that same care.
Practical rule: a chalkboard wall that gets rushed usually fails in the same places first, roller marks, uneven texture, and poor chalk release.
The third job is a seasoned surface. Even a good coating can ghost if it has not been conditioned correctly, and that is where many Instagram projects fall apart. A chalkboard wall is not finished when the paint dries. It is finished when the surface has been layered, cured, and prepared to take repeated writing without fighting back.
That matters on more than one substrate. A kitchen wall, a kid room, a café menu board, and a restaurant note wall all take abuse in different ways, and the surface has to match the use. A smooth, hard-wearing finish can handle daily chalk better than a quick cosmetic coat, while a poor base coat will show wear fast no matter how careful the paint job looked on day one. Adjacent surfaces need their own prep too, which is why the same caution used in the granite sealing guidance applies around countertops, trim, and hard edges.
A chalkboard wall also demands patience from the person painting it. Thin coats, full cure time, and a surface that has been treated for actual use matter more than the color itself. Skip those steps, and the wall may look finished while still behaving like a fresh coat that cannot hold up to chalk, erasing, and daily handling.
Surface Prep That Decides Everything
Prep is where most chalkboard jobs are won or lost. A wall that looks fine from across the room can still have residue, gloss, dents, or edge failure waiting to show up once the chalk goes on. If you've ever seen a chalkboard that looks streaky even before the first note is written, prep usually caused it.
Clean, sand, fill, and mask with intent
Start by cleaning the surface well. Kitchens and kid spaces collect oils, handprints, and leftover cleaners, and chalkboard paint doesn't forgive that kind of contamination. If the wall is glossy, scuff it lightly so the coating can bite instead of skating across the top. Fill nail holes and dents, then sand those spots flush so they don't telegraph through the finish.
Mask the edges with painter's tape and score them cleanly so the lines don't tear when the tape comes off. On furniture, the joints and corners matter more than the broad face, because that's where peeling usually starts first. If you're up against a countertop or a hard edge, the granite sealing guidance is a good reminder that adjacent surfaces deserve their own prep, not a one-size-fits-all approach.
Primer choices depend on the substrate
Drywall often gets by with thorough cleaning and a light scuff if the surface is already sound. Raw wood, glossy laminate, and metal usually need a bonding or specialty primer, because those surfaces don't give the chalkboard coating much to grip. Skip that step on furniture and the top can peel at the high-wear spots fast, especially around handles and corners.
A contractor who's done this more than once will often keep the prep checklist simple.
The big mistake is thinking the coating will hide defects. It won't. It reveals them. If the surface isn't ready, the paint doesn't save you, it just makes the flaws darker.

Picking the Right Application Method
A dense foam roller is the default for most interior walls because it leaves less texture and helps keep a wet edge. That matters on chalkboard paint, where thick nap texture can hold dust and make erasing less satisfying. For trim, edges, and furniture details, a brush still earns its keep.
Match the tool to the job
A roller wins on broad, flat drywall. A high-quality angled brush wins on corners, inset panels, and small craft pieces where control matters more than speed. Spray has a place too, but only when the surface is large or unusually shaped and you already know how to control overspray and masking.
Here's the simplest way to choose.
A thick nap roller is the wrong tool for this job. It leaves a pebbly surface that looks fine wet and frustratingly rough when dry. That roughness can trap chalk dust and make the board harder to wipe clean, which defeats the point of the coating.
Use the tool that gives the flattest film, not the tool that covers fastest.
If you're comparing methods for a hire, this is also where planning matters. The right crew doesn't just bring paint, they bring the tools that make the finish behave. For finding that kind of help, the how to find local contractors resource is a useful starting point.

Thin Coats, Proper Curing, and the Math Behind Both
A chalkboard surface needs to behave like a thin writable film. Heavy buildup gets in the way fast, because the coating has to accept chalk, release it, and clean off without turning into a thick decorative shell. Slathering it on like exterior trim paint gives you more problems than payoff.
The coat sequence that holds up
Home Depot recommends applying the paint with a foam roller, letting each coat dry for at least 1 hour, then adding a second coat and, if needed, a third coat for a smoother finish, followed by 72 hours of curing before use. DIY Doctor is even more specific, recommending at least three thin coats, with 1 to 2 hours between coats on smaller projects and 2 to 3 days of curing for larger surfaces. That schedule is part of the work, not a delay you can ignore.
Thin coats level better and dry more evenly. They also leave fewer roller marks, which matters more than people expect once the wall gets used every day. A loaded roller can make the surface look fine while it is wet, then leave streaking, rough texture, and weak chalk release after it dries.
What the cure window is really doing
Curing is more than “dry to the touch.” The paint still needs time to settle into a stable writable film, and early use can leave ghosting, uneven erasing, and wear that shows up quickly in busy spaces. That is why the wait matters on walls, not just on sample boards.
For larger DIY mixes, some guides stretch the drying and curing window even further. Newline Painting's waiting between paint coats guidance is a good reminder that patience between layers keeps the finish clean instead of muddy. If you want a parallel for how cure timing changes with coating type, the spray paint cure timing article is useful context.

Painting Walls, Furniture, Metal, and Glass
A chalkboard wall in drywall behaves very differently from a chalkboard dresser, a metal locker, or a glass frame. That's why substrate choice matters so much. The same coating can look great on one surface and start failing on another if the underlying material fights adhesion or movement.
Surface by surface, the rules change
Drywall is the easiest case. Clean it, scuff any sheen, and build your thin coats evenly. On a sound wall, that's usually enough to get a good writable surface.
Wood furniture is less forgiving. Grain, tannins, and moving joints can telegraph through the finish, so a bonding primer matters if you want the coating to stay put. If you're looking at an upcycle project, the how to upcycle furniture guide is a solid companion piece for the prep side of the work.
Metal needs adhesion help too. A locker, mailbox, or appliance panel can chip at the edges if the primer is wrong or skipped, especially where hands touch it repeatedly. Glass is the most fussy of the group. It often needs an adhesion promoter or a surface treatment that gives the paint something to hold onto, otherwise it can peel in strips the first time someone wipes it down.
| Surface | Prep Required | Primer Needed | Recommended Coats |
|---|---|---|---|
| Drywall | Clean, scuff if glossy, patch defects | Usually not if the wall is sound | 2 to 3 thin coats |
| Wood furniture | Sand, fill, clean, tape edges | Yes, bonding primer is strongly recommended | 2 to 3 thin coats |
| Metal | Degrease, scuff, clean thoroughly | Yes, bonding or etching primer | 2 to 3 thin coats |
| Glass | Clean extremely well, light abrasion or adhesion treatment | Yes, adhesion help is needed | 2 to 3 thin coats |
The failure point usually shows up at the edges first. If the substrate moves, flexes, or resists the coating, the chalkboard finish gives you a warning before it gives up completely.
The DIY Grout Mix Versus Buying Commercial Paint
The homemade chalkboard recipe is popular for a reason. Houzz gives the classic mix as 1 part non-sanded grout to 8 parts latex paint, and it even scales the recipe as 1 tablespoon grout with 1/2-cup paint for a small batch or 1 cup grout with 1/2 gallon paint for a larger one. That formula made chalkboard paint feel accessible in DIY culture, and for some projects it still is.
Where the grout mix works, and where it doesn't
The DIY mix can be a smart call for small signs, craft plaques, homework boards, or low-traffic kid projects. It's cheap to test, easy to tweak, and fine when the goal is casual use rather than daily abuse. It's less convincing on kitchen walls, café features, and other surfaces that get erased constantly.
The tradeoff is finish quality. Homemade mixes can dry rougher and dustier than commercial chalkboard paint, especially if the grout isn't mixed thoroughly or the coat goes on too heavy. That roughness can hold chalk residue, and once the surface starts holding residue, cleaning gets worse, not better.
Trade-off: cheaper material cost often buys you more touch-up work later.
Three failure modes to diagnose early
The first is bubbling or peeling at the edges. That usually points to weak adhesion, skipped primer, or a substrate that wasn't cleaned well enough. The fix is boring but real, sand back the loose paint, prime properly, and recoat.
The second is uneven texture that holds chalk dust. This often comes from a thick nap roller, a heavy pass, or a DIY mix that wasn't blended smoothly. The fix is to sand lightly, rebuild with thinner coats, and use the right roller.
The third is ghosting, where old writing shadows stay behind after wiping. That's often a seasoning problem or a surface that went into use too early. In that case, reseason the board with chalk after the coating has fully cured, then wipe it down clean before regular use.
Commercial paint earns its keep when consistency matters. It's made for a more predictable film, and that matters on walls that need to look clean after months of repeated use. The question isn't whether homemade chalkboard paint can work. It's whether the surface you're coating can tolerate a little unpredictability without turning into a maintenance project.
Seasoning, Cleaning, and Creative DIY Uses

A chalkboard finish usually looks finished before it is ready to behave well. After the wall has cured, rub the whole surface with white chalk, let it sit for about an hour, then wipe it clean. That seasoning step helps the coating take the first real marks without holding on to stubborn shadows later.
Keep the surface usable, not just pretty
Routine cleaning should start dry. Wipe off dust and chalk residue first, then use a damp microfiber cloth if the surface needs more help. Skip abrasive cleaners and hard scrubbing, because they wear down the coating faster than ordinary chalk use ever will. A chalkboard wall that gets handled lightly can stay useful for years, while one that gets scrubbed hard starts losing eraseability much sooner.
The best uses are the ones that get touched every day. A mudroom drop zone works because schedules change constantly. A pantry door inventory board works because the surface gets updated often. Kids' playroom walls, tabletop homework stations, and planters or toolboxes near outdoor areas can also make sense, as long as the substrate and the paint formula match the environment. That is where the trade-off shows up clearly. A wall in a dry hallway has a much easier life than a toolbox dragged around a garage.
The longer-term failures usually show up slowly. Ghosting, sheen loss, and chipped edges do not happen overnight, they show up after repeated erasing, cleaning, and handling. That is why the maintenance habit stays simple, season the surface, clean it gently, and respect the coating's limits. The finish holds up best when it is treated like a working surface, not a decorative one.