

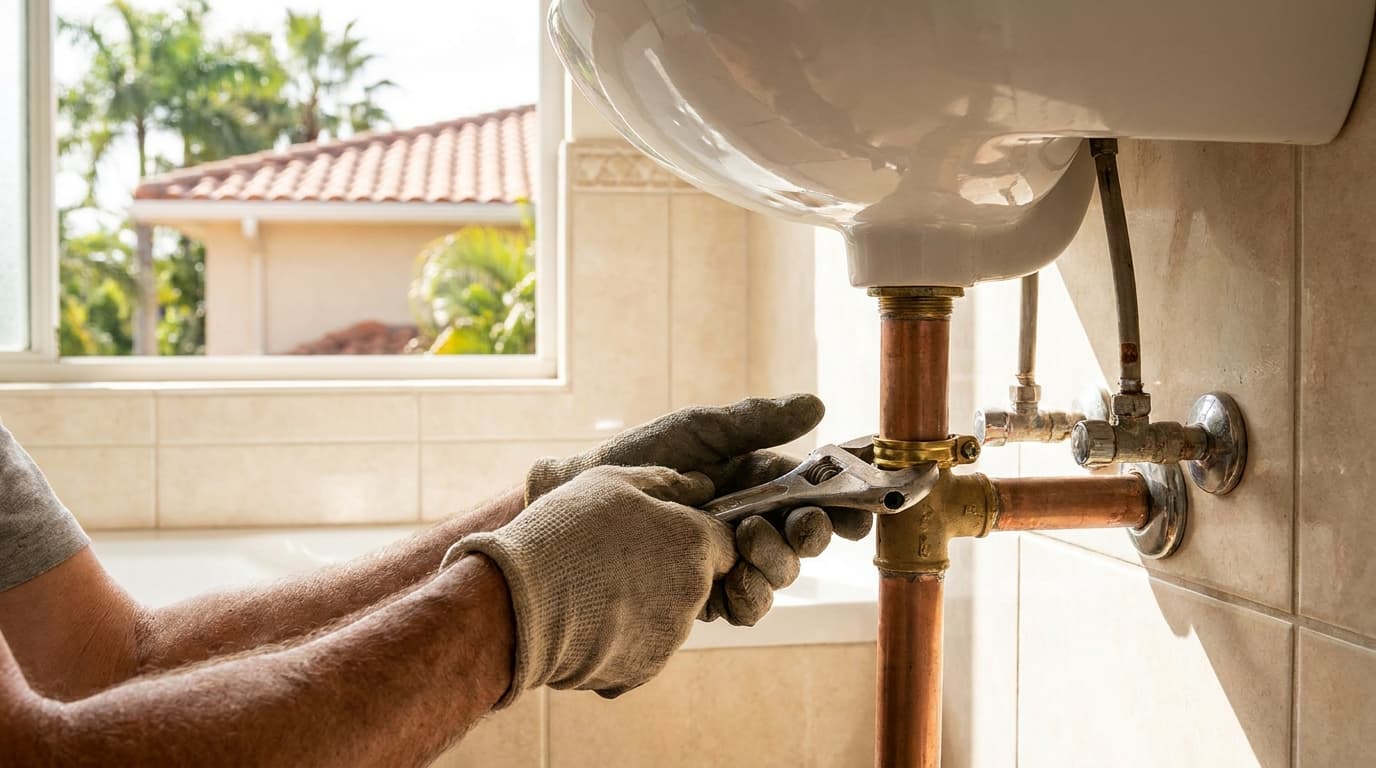

You're staring at a sagging run in a basement, a copper line that knocks every time the heat kicks on, or a new PEX line that needs to stay tight to the joists. The clamp looks like the simplest part of the job. It isn't. The wrong clamps for pipe can crush thin wall tubing, lock in thermal expansion, start galvanic corrosion, or leave a filled water line bending between supports.
Treat the clamp as part of the load path, not as a loose fastener. It has to match the pipe's outside diameter, the filled weight, the mounting surface, and the job you want it to do, which might be hanging, guiding, or anchoring. A clamp can look tight and still be mechanically wrong.
ze a Clamp to Your Pipe](#how-to-size-a-clamp-to-your-pipe)
- What a Correct Fit Looks Like
- Why the Benchmark Is Only a Starting Point
- Recheck After a Heating Cycle
Clamp Types at a Glance and Where Each One Fits
Start with the mounting condition, then narrow by pipe material. This table covers the common pipe clamp types you'll meet on residential and light commercial work.
| Clamp type | Typical pipe | Best use | Main limit |
|---|---|---|---|
| Band or strap clamp | Copper, PVC, light steel | Wall-mounted light runs | Not for heavy filled pipe |
| Clevis hanger | Steel pipe | Horizontal overhead runs on a rod | Needs correct rod size and spacing |
| U-bolt | Steel pipe | Holding pipe to a structural member | Can crush thin-wall tubing if over-tightened |
| Two-piece plastic clamp (DIN 3015 type) | Plastic and steel pipe | Mobile hydraulics and industrial lines | Confirm material and size range |
| Beam clamp | Steel pipe | Gripping a steel beam flange | Seismic use needs listed hardware |
| C-clamp | Steel pipe | Attaching to a flange | Not a seismic restraint by default |
| PEX suspension clamp | PEX tubing | Residential plastic runs | Follow the manufacturer load data |
Three Different Jobs
A clamp can hold a pipe against a wall, hang it from above, or grip it to structure. Those are different load paths. A band clamp screwed to a stud carries a light copper run just fine because the wall takes the weight directly. A clevis hanger does the opposite, it lets a steel pipe hang from a threaded rod, so the rod, its anchor, and the spacing all become part of the support.
A U-bolt or beam clamp ties the pipe to steelwork. That's strong, but strength creates its own risk. A U-bolt run down hard on thin wall tubing will dent the pipe before it feels tight in your hand. A beam clamp is only as good as its grip on the flange, and its rating for hanging a pipe doesn't mean it's rated to restrain that pipe sideways.
Practical rule: Pick the clamp for the surface you're attaching to first, then check that it suits the pipe. Reversing that order is how good pipe ends up on the wrong hardware.
The wall, ceiling, or beam narrows your choice fast. You can't hang a clevis where there's no structure above to take a rod. You shouldn't rely on a light strap where a filled steel line needs real dead load capacity. You also can't treat a PEX suspension clamp, designed for light plastic runs on joists, as a substitute for steel pipe hardware.
Find your pipe material and mounting surface in the table. If either one points to a limit you can't satisfy, change the clamp, don't tighten your way past it. Once you've got the type, sizing is where the fit is won or lost.
How to Size a Clamp to Your Pipe
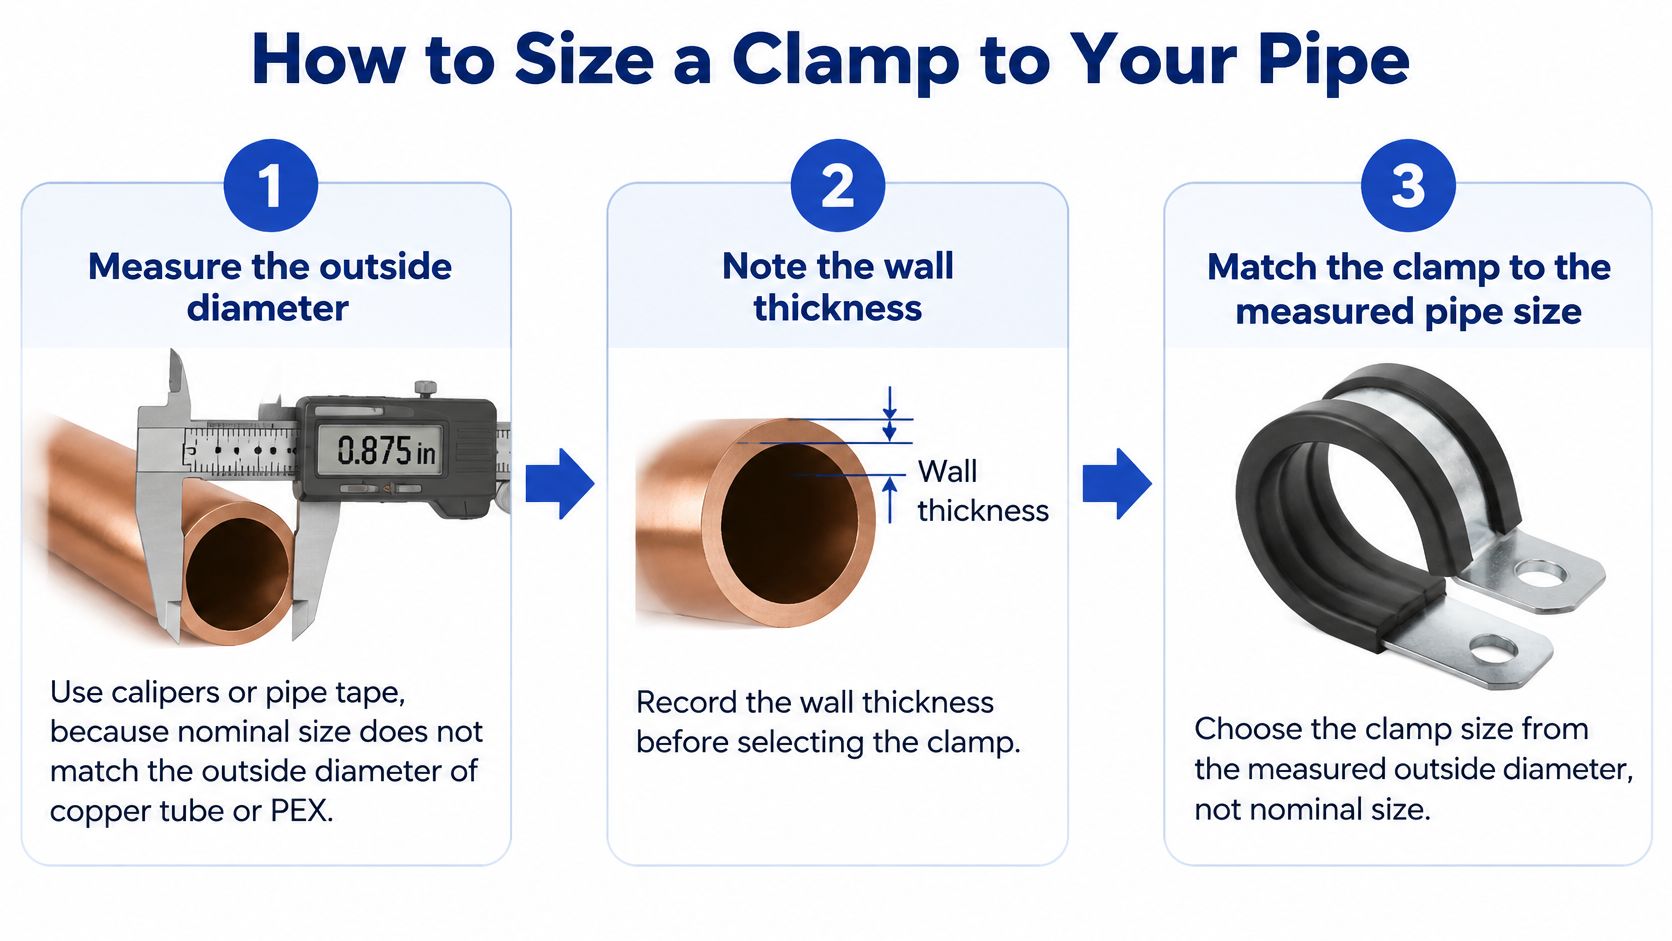
Sizing starts with a measurement, not with the size printed on the pipe. The infographic below shows the basic sequence before you work through the full procedure.
The short video below walks through the handling side of the fit, which is useful if you're training a junior tech on feel and bearing.
What a Correct Fit Looks Like
A correctly sized clamp doesn't let the pipe rotate in your hand. It doesn't slip under light hand pressure along the pipe. There's no visible dent, no flattened spot on plastic, and no gap at the edges of the bearing face.
Look for even bearing all the way around the contact area. If the clamp touches at two high spots and floats elsewhere, it's the wrong size or the wrong shape for that outside diameter, even if the fastener pulled down tight. I would swap the clamp at that point rather than add torque. Extra torque on a poor fit damages pipe, it doesn't fix geometry.
Support Spacing Benchmarks for Water Lines
Spacing is where a good clamp on the wrong span still fails. The benchmark table below is for standard-weight carbon steel pipe carrying water, and it's a starting point for checking a run.
| Nominal pipe size | Typical maximum span |
|---|---|
| NPS 1 | 2.1 m |
| NPS 2 | 3.0 m |
| NPS 3 | 3.7 m |
| NPS 4 | 4.3 m |
| NPS 6 | 5.2 m |
These figures come from published B31.1-based spacing tables in the U.S. Nuclear Regulatory Commission piping support document, which indicates approximately 2.1 m for NPS 1, 3.0 m for NPS 2, 3.7 m for NPS 3, 4.3 m for NPS 4, and 5.2 m for NPS 6. That same framework under ASME B31.1 requires horizontal supports to prevent excessive sag, bending, and shear stress while accounting for concentrated loads from valves, flanges, and fittings.
Why the Benchmark Is Only a Starting Point
Water filled pipe imposes substantially greater dead load than air or gas service. A span that holds a compressed air line dead straight can let the same pipe sag once it's full of water. That's the most common spacing error, copying a span from a lighter service.
Insulation, fittings, vibration, seismic forces, and vertical runs can all require closer spacing than the table shows. Insulation adds weight along the whole span. Vibration works fasteners and bearing points over time. A vertical run loads clamps differently from a horizontal one, so don't transfer horizontal spans to a riser without a separate check.A valve, flange, or tee is a concentrated load, not just another piece of pipe. Put a support at that fitting so the clamp carries the weight directly. Leave a heavy valve hanging in the middle of a span and you'll get local bending at the connection, stressed joints, and a line that drifts out of alignment.
A clamp near a valve is carrying that valve. Space it for the fitting, not for the straight pipe beside it.
The table also assumes static loads. Pulsation, water hammer, and seismic forces need their own check, because a span that's fine under steady weight can move, hammer, or overload its anchors under dynamic load.
How to Check a Run
Mobile systems make the same point in a tighter space, and if you're working on a recreational vehicle it's worth taking time to understand your RV's water system before you assume house spacing habits transfer directly. Record pipe material, diameter, fluid, spacing, fitting locations, and anchorage substrate so the layout can be verified later.
Fixed Points Versus Sliding Supports
Say a hot water copper riser is clamped rigidly right beside a tee. The line heats up, the copper grows along its length, and the rigid clamp won't let it move. That growth turns into force on the tee, its joints, and anything connected to them.
That's the core problem described in guidance on pipe clamps for thermal expansion and fixed and guided points, which notes that a rigid clamp used as an unintended anchor can convert temperature induced expansion into axial force and overstress pipe walls, threaded joints, anchors, or equipment nozzles. The clamp looked secure. Mechanically, it was in the wrong role.
Anchors Hold, Guides Steer
A fixed point, or anchor, is where the pipe must not move. You place anchors deliberately, usually to control where expansion goes and to protect equipment connections. Everything about that point, the clamp, the fasteners, and the structure behind it, has to take the resulting force.
A guided or sliding support does the opposite job. It lets the pipe move along its axis as temperature changes, while keeping it in line laterally. The pipe stays aligned, doesn't sag, and doesn't build up the force a locked clamp would create.
The opposite error is just as damaging. An overly loose clamp permits impact, vibration, and uncontrolled lateral movement. On a hydronic or HVAC line cycling every day, that shows up as knocking, worn bearing points, and a pipe that slowly migrates out of position.
Field check: If you can't say whether a clamp is supposed to anchor the pipe or let it slide, you don't know if it's installed correctly yet.
Hydronic heating, HVAC, and hot water plumbing are where this matters most because temperatures swing with every cycle. Final anchor and guide locations, and the loads on them, come from piping stress design, not from evenly spacing identical clamps. When equipment nozzles, long straight runs, or big temperature swings are involved, I would get that layout engineered.
Keep an inspection record for each support. Note clamp type, measured diameter, anchor or guide role, liner condition, fastener torque where specified, and the clearance left for thermal travel. Tighten enough to prevent migration without crushing thin wall tubing or restricting designed movement, and confirm the liner suits any dissimilar metal contact at that point.
Matching Clamp Materials to Pipe and Environment
A single load number on a product page doesn't tell you whether a clamp suits your pipe. One manufacturer's anchor data in Victaulic's anchor literature lists capacities ranging from 460 pounds for a 2-inch nominal pipe to 4,860 pounds for a 12-inch pipe, while warning that higher loads require welding the clamp to the pipe. Same product family, wildly different capacity, and a condition attached to the top end.
Actual suitability depends on outside diameter, attachment method, insulation, material pairing, temperature, vibration, and corrosion environment. That guidance also says the anchor must be installed directly on the pipe, not over insulation, and that galvanic corrosion must be considered. Read those conditions before you trust the headline capacity.
| Pipe and clamp pairing | Main risk | Protection to specify |
|---|---|---|
| Copper pipe with steel clamp | Galvanic corrosion | Nonmetallic isolation liner or copper-compatible clamp |
| Galvanized steel pipe with stainless clamp | Galvanic difference between metals | Isolation liner |
| Stainless pipe with stainless clamp | Low galvanic risk | Stainless hardware for wet areas |
| PVC or polyethylene pipe with bare metal clamp | Crushing, abrasion, UV damage | Padded liner or UV-resistant polymer clamp |
| Insulated pipe with any clamp | Moisture trapped under insulation and clamp load | Clamp directly on pipe, not over insulation |
| Outdoor or chemical exposure | Coating breakdown | Stainless or polymer clamp with set inspection intervals |
Why Each Fix Works
Galvanic corrosion needs dissimilar metals in contact with moisture present. A nonmetallic isolation liner or dielectric separation breaks the metal to metal path, which is why copper on a bare steel clamp is a pairing to avoid in a damp basement or exterior wall. The liner also stops the clamp edge from fretting the pipe surface.Plastic pipe fails differently. PVC and polyethylene don't rust, but a bare metal clamp can crush, abrade, or point load them, and sunlight degrades unprotected plastic outdoors. A padded liner spreads the bearing load, and a UV-resistant polymer clamp handles exterior exposure without the hard edges of steel.
Wet and chemical environments attack coatings and fasteners first. Stainless hardware holds up where plated steel rusts through at the threads, and stainless or polymer combinations balance stability with environmental resistance. That's also where set inspection intervals matter, because coating breakdown is gradual until the fastener lets go. The same cavity and moisture logic applies under a sink, which is why our guide to bathroom sink drain pipe connections and materials is a useful companion when you're pairing hardware in a wet, enclosed space.
The strongest looking clamp can be the wrong one if its coating, liner, fastener, or direct contact corrodes the pipe or crushes plastic. Check the manufacturer's data for your exact outside diameter and environment, apply any derating they specify, and don't treat a catalogue capacity as a universal guarantee.
Common Clamp Mistakes and How to Fix Them
The failure you'll see most often is a pipe sagging between supports. It usually traces back to spacing chosen for an empty or air filled line, then kept when the line went into water service. The other usual cause is a missing support beside a heavy valve or flange, so the span carries a concentrated load it was never spaced for.
| Symptom | Likely cause | Fix |
|---|---|---|
| Pipe sags between supports | Spacing set for air rather than water, or no support near a heavy fitting | Add a support and reduce the span |
| Clamp slides along the pipe | Undersized or loose clamp | Replace with the correct size and tighten to hold |
| Thin-wall pipe dents | Over-tightened clamp with narrow bearing | Use a wider bearing band or a liner |
| Noise and vibration | Rigid clamp with no isolation | Add an isolator or convert to a guide |
| Joint pulls apart | Fixed clamp blocking thermal movement | Change the clamp to a guided or sliding support |
| Rust staining at clamp | Bare metal contact or damaged coating | Install a liner and replace the damaged clamp |
Recheck After a Heating Cycle
Don't judge a fix only at installation, when everything's cold and still. Run the system through a heating and cooling cycle and check again. Thermal movement is what exposes a clamp that's acting as an unintended anchor, a guide with no travel clearance, or a loose support that only knocks when the equipment runs.
That cycle check matters on boiler and hydronic work especially, where a stressed joint can turn into a leak at the equipment. If you're tracing water at the boiler itself rather than at a support, Bender's Oil Service boiler leak guide covers the equipment side of that diagnosis. For a line that has already failed under stress, our notes on burst pipe repair and what to stabilize first cover the immediate steps before you rebuild the supports.
Fix the cause in the table, then prove the fix through one full temperature cycle. A clamp that's quiet when cold can still be wrong when hot.
One rule governs all of these repairs. When a fix changes the load path, the spacing, or the seismic duty, recheck the whole support arrangement rather than patching a single clamp. Adding one support, converting an anchor to a guide, or swapping clamp materials changes what every neighbouring clamp carries.
Confirm Seismic Duty and Clamp Choice Before Installing
A pipe clamp is not automatically a seismic restraint. Beam, riser, clevis, and C-clamps are built to carry vertical dead load. Resisting horizontal earthquake forces is a separate duty, with separate listed hardware and separate design.
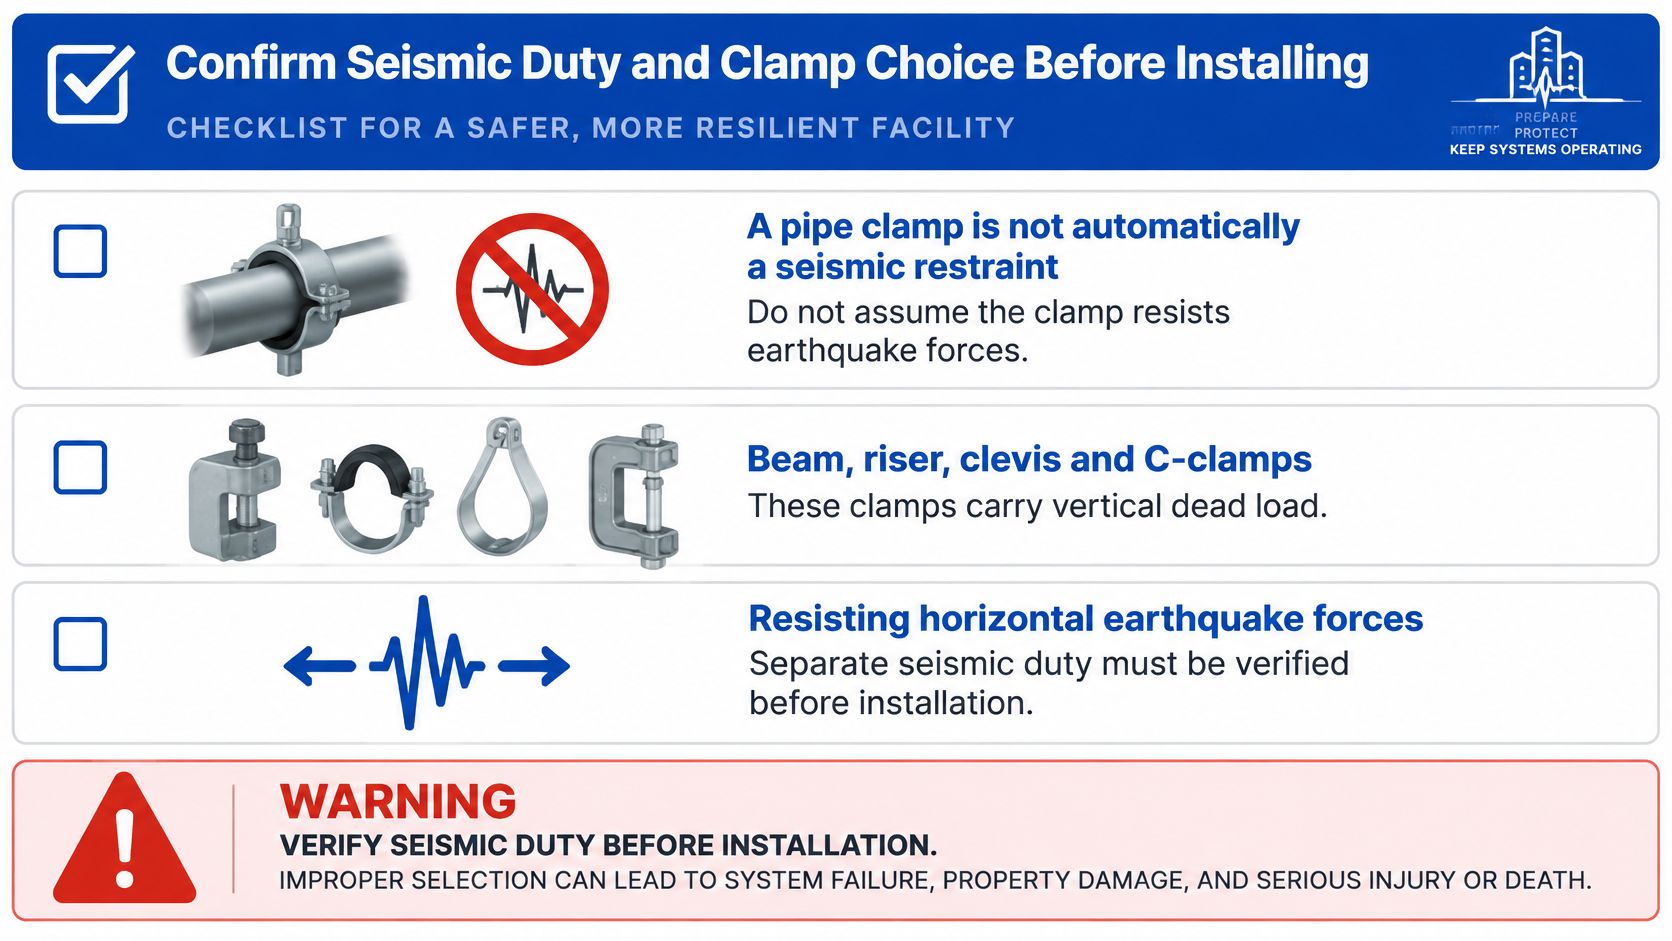
The distinction is spelled out in seismic guidance for fire protection piping systems, which states that transverse restraints are required on feed and cross mains, and on branch lines or other piping at least 2.5 inches in nominal diameter in higher seismic design categories. It also says C-type clamps, including beam and large-flange clamps, must not attach seismic braces to the structure unless they've been tested and listed for both horizontal seismic loads and pipe dead load.
Tightening a clamp harder doesn't convert it into a rated restraint. Listing does. Some jurisdictions go further and require engineered or stamped seismic restraint details with compliance to NFPA 13/14, plus beam clamp selection by load, beam flange width, and rod size. If your work touches fire sprinkler or other safety critical piping, confirm what your jurisdiction demands through our overview of plumbing permit requirements and when engineered details are needed before you order hardware.
Pre-Installation Checklist
Run this before the first clamp goes on the pipe.
If any answer is unknown, stop and consult an engineer or the authority having jurisdiction. That's not a delay tactic, it's the correct sequence. An unlisted clamp on a seismic brace is a failed inspection at best.
After installation, record clamp type, diameter, spacing, role, liner, and torque, with before and after photographs in the job file. Our before/after tool is built for pressure washing, roof cleaning, painting, landscaping, flooring, HVAC repair, plumbing, electrical, pool service, window cleaning, junk removal, and general contracting, so a plumbing support job fits the same photo record you'd keep for any other trade. Run this checklist on the next job before the first clamp goes on the pipe.
Document your next pipe support job the way you installed it, with measured diameters, clamp types, spacing, and before and after photos tied to a verified job report your customers can trust. HomeProBadge helps home service pros turn that proof of work into a public profile, structured reviews, and shareable job reports without pay per lead marketplaces. Visit HomeProBadge to set up your verified profile and start recording your clamp and piping work on your next job.