



You've finished setting the tile, the lines look clean, and the room is finally starting to resemble the project you pictured. Then the epoxy grout goes into the bucket, the timer starts, and you realize the material doesn't behave like the cement grout you've used before. The mix begins tightening while you're still packing joints, the sponge water turns cloudy, and a faint film starts appearing on the tile faces.
That moment is where many good tile jobs go bad. Epoxy grout installation is a chemical process with a physical application technique attached to it. Temperature, batch size, mixing speed, joint fill, cleanup timing, and cure conditions all affect the finished result. Treat it casually and epoxy can leave pinholes, voids, slumping, or a haze that becomes far harder to remove after it hardens.
ze and surface film](#haze-and-surface-film)
- Where DIY stops making sense
Why Epoxy Grout Demands a Different Approach
The joints look ready, the tile faces are clean, and the room seems under control. Then the resin and hardener are combined. From that point, epoxy is no longer waiting for you. Its chemical reaction is progressing while you spread, shape, and wash the joints. A batch that feels workable at the start can become stiff before the cleanup is complete.
Cement grout gives an installer more room to pause. You can mix a practical amount, cover a broader area, adjust the technique, and return to a joint before the material becomes unmanageable. Epoxy requires a different sequence. Batch size, room temperature, mixing speed, joint depth, application pressure, and wash timing all affect the result.
The common mistake is assuming, “I know how to grout, so I'll handle epoxy the same way.” That leads to oversized batches, areas that are too large to clean on time, and delayed washing. Dense residue then begins bonding to the tile surface. The failure usually comes from the workflow, not from a defective product.
Epoxy grout installation is a chemical process with a physical application technique attached to it. Treat each batch as a timed operation. Prepare the work area first, know where the joints will be packed, and have the cleanup materials within reach before combining the components. Leaving the installation to fetch a tool can cost more time than the joints allow.The material earns its added difficulty in demanding locations. Commercial kitchens, healthcare rooms, laboratories, pool surrounds, industrial areas, and premium residential showers may face frequent moisture, staining, chemical exposure, difficult cleaning routines, or heavy traffic. Low absorption can reduce the maintenance burden over the service life of the installation, but it does not compensate for poor preparation or late cleanup.
Where the added difficulty earns its keep
Epoxy grout generally does not require sealing because it absorbs very little moisture, as summarized in DataIntelo's epoxy grout market coverage. The surrounding installation may still need protection. Porous natural stone can require a compatible sealer, and the tile, grout, sealer, and cleaning products should be tested together before the full installation.
The decision is not whether epoxy is stronger. Ask whether less recurring grout maintenance enough to justify higher upfront material cost, labor, and installation risk matters on this project. A lightly used decorative backsplash may not justify the extra handling. A commercial kitchen or wet-room floor has a stronger case because the joints face moisture, soil, chemicals, and repeated cleaning.
Review the practical differences in absorption, sealing, cleaning, and installation in this guide to epoxy vs cement grout before buying material. Appearance still matters. For a backsplash, grout color and joint layout should be considered with cleaning demands, including the choices discussed in this guide to the best backsplash for white cabinets.
Why adoption keeps growing
Epoxy grout has moved beyond specialist work. One industry report estimates the global market at USD 1.13 billion in 2025, projecting USD 1.68 billion by 2031 and a 6.85% CAGR. It also estimates that pure epoxy represented 57.90% of market share in 2025, while infrastructure accounted for 45.62% of end-use demand. Mordor Intelligence's epoxy grout market report provides that market context.
Practical rule: Choose epoxy because the environment justifies its performance, not because the label promises a tougher finish.
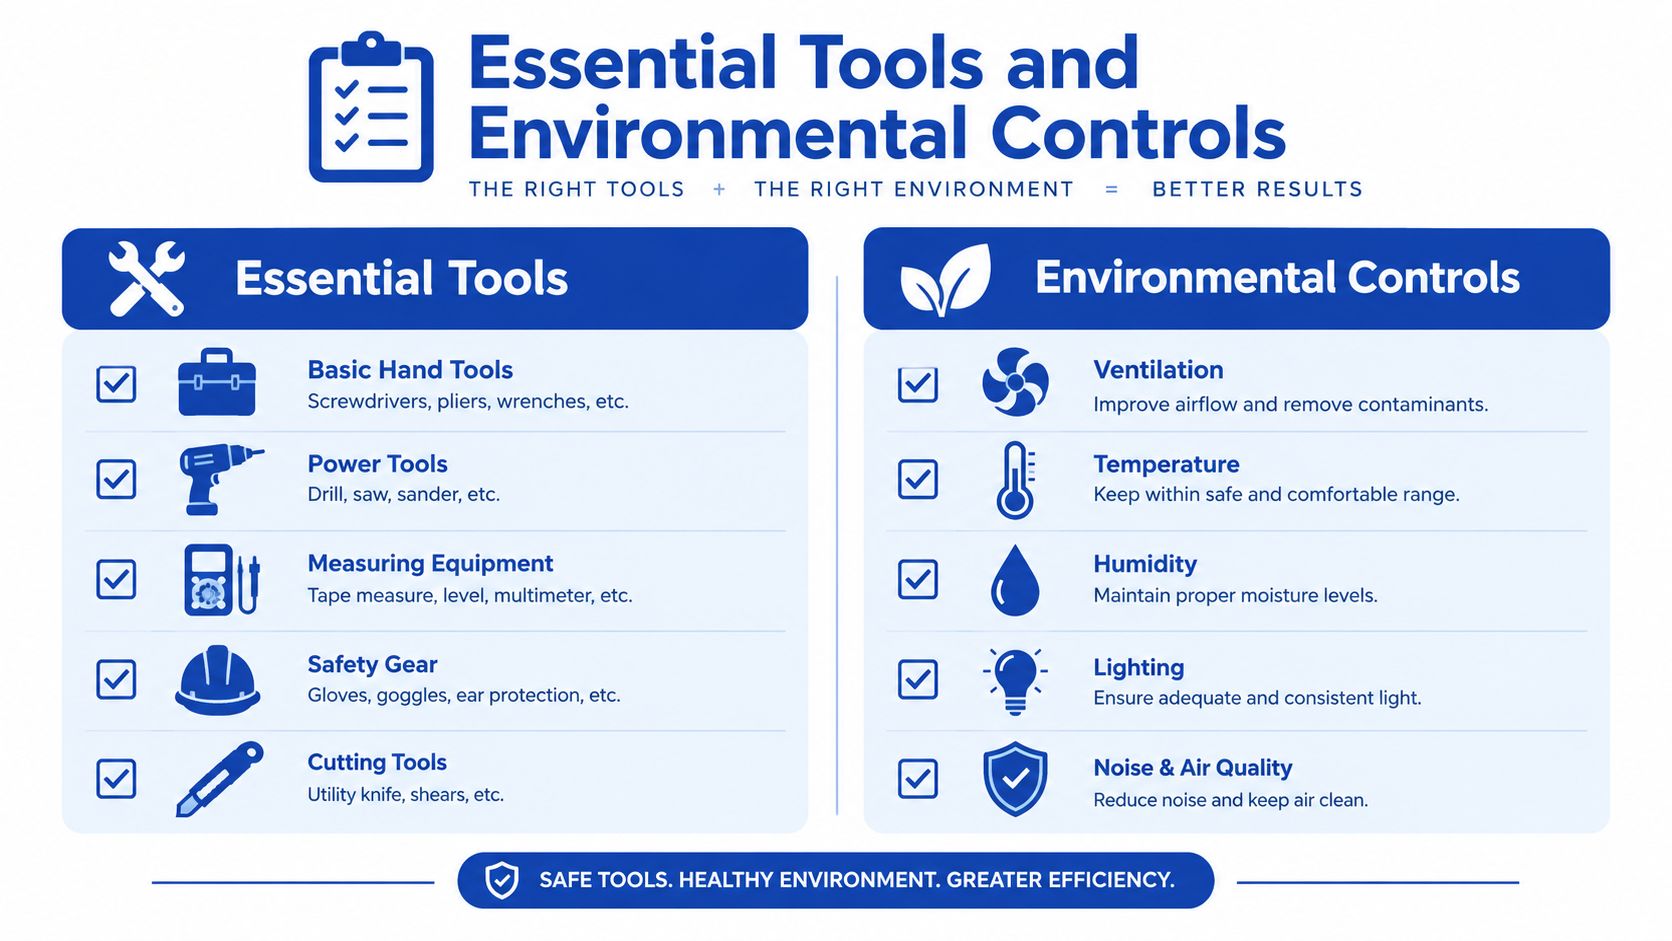
Essential Tools and Environmental Controls
The best epoxy grout technique can't rescue a damp substrate, a cold room, or a missing cleanup tool. Before opening the components, stage the entire work area so you won't need to leave the installation halfway through a batch.
You'll need an epoxy-rated rubber float, chemical-resistant gloves, suitable mixing containers, a heavy-duty low-speed drill and paddle, measuring equipment for accurately dividing components, and dedicated cleanup sponges. Keep separate buckets and tools for epoxy. Cement grout residue and ordinary porous sponges can interfere with cleaning, shed material into the joints, or leave you chasing contamination across the tile surface.
Prepare the room before the resin arrives
The substrate must be dry, sound, clean, and stable. Remove dust, loose adhesive, standing water, and anything that could prevent the grout from bonding properly. Check that the joints have the correct depth and are free from tile-setting material. Epoxy follows the condition of the joint. If the joint is blocked, damp, or inconsistent, the finished surface will show that preparation failure.
Control the temperature before mixing. Epoxy grout performs best when the substrate surface is typically between 60°F and 90°F, while some systems specify a narrower working range of approximately 65°F to 95°F, as described in the Sika epoxy grout installation procedure. Measure the surface, not just the air. A cold slab can remain outside the useful range even when the room feels comfortable.
Humidity and moisture need the same attention. Ventilate the room without creating drafts that blow dust into open joints. Don't grout over a substrate that still carries construction moisture, and don't assume a bathroom is ready just because the tile surface looks dry.
Stage the workflow
Put the float, mixing paddle, timer, sponges, clean rinse water, waste container, and approved epoxy cleaner within reach. If the tile is porous or textured, confirm whether it needs pre-treatment before grouting. Protect adjacent finished surfaces and establish a route for removing dirty water without crossing the fresh work.
For a backsplash near a range, planning the work zone and protecting the area behind the appliance is especially important. This guide to backsplash behind stove is useful for thinking through that transition before grout reaches the wall.
Don't start mixing until the person responsible for cleanup is ready. On larger or more detailed work, two people are often more reliable than one person trying to spread, pack, shape, wash, rinse, and inspect at the same time.
Mixing Ratios and Time-Bound Application Techniques
Epoxy grout can look workable in the bucket and still be approaching the point where it will no longer pack or clean properly. Treat the mix as a chemical process with a fixed working window. Read the product data sheet before opening the kit, and never estimate the component ratio by eye. If a partial batch is allowed, weigh each component precisely and preserve the specified proportion. A small error in Part A or Part B can alter the cure and leave a joint that does not perform as intended.
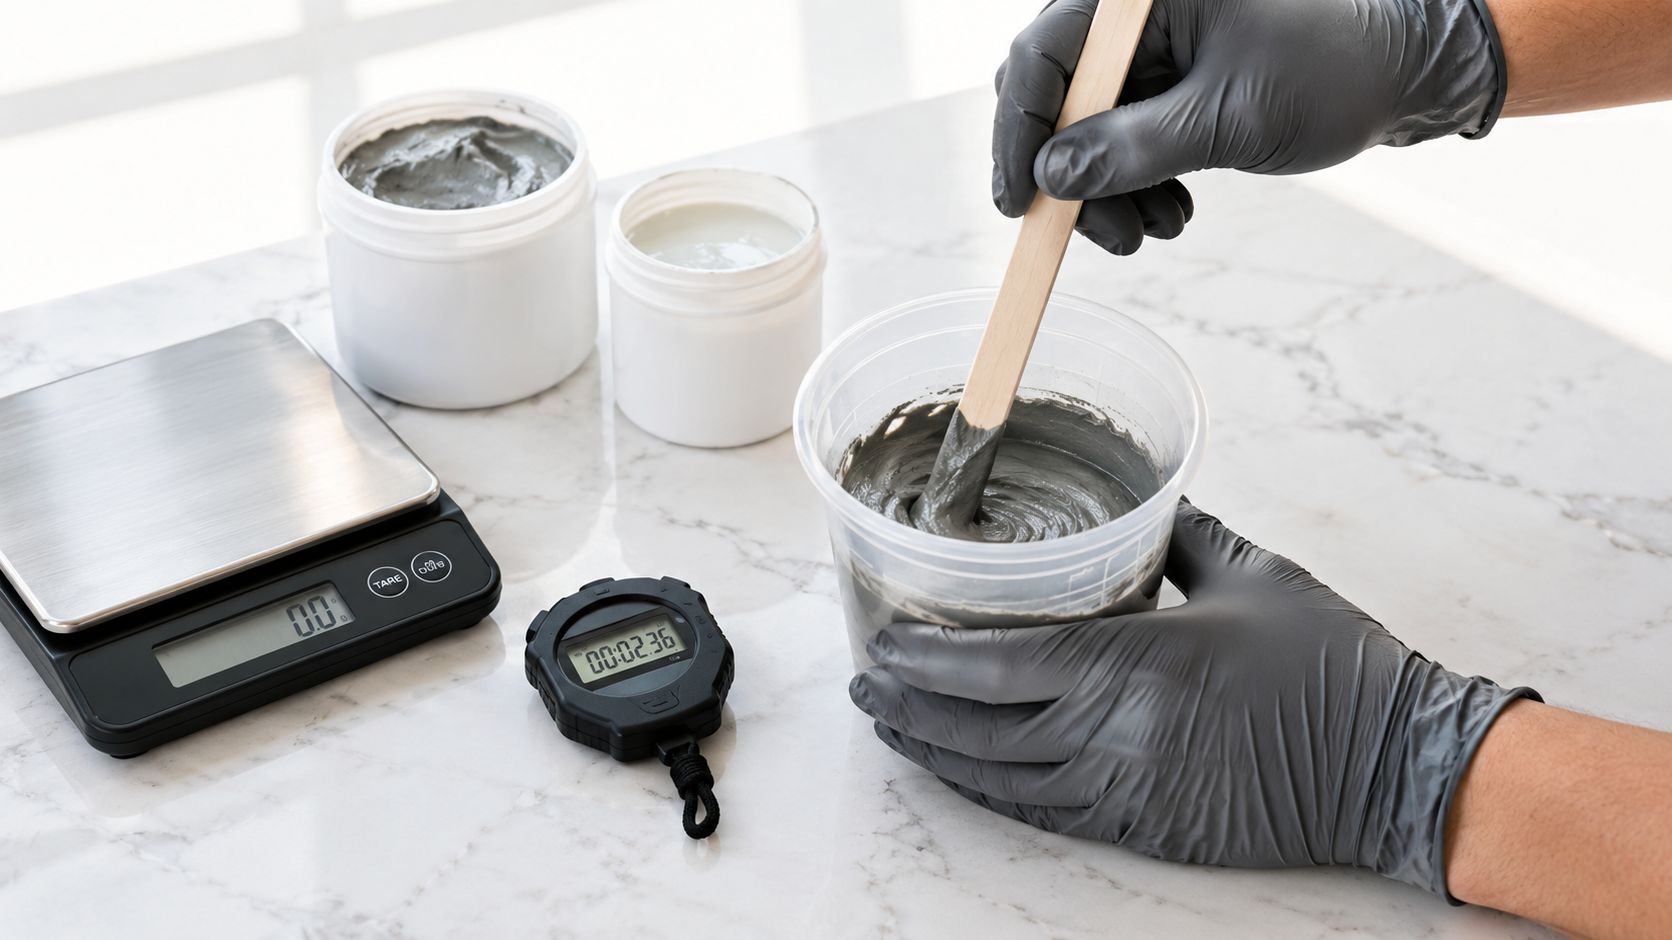
Manufacturers commonly direct installers to combine Part A and Part B thoroughly, mix only manageable batches, and grout roughly 1–2 m² at a time. Mechanical mixing should remain at 300 RPM or less, while the initial set window is often about 15–30 minutes. Use those figures as working benchmarks, not as permission to disregard the instructions for the product on site. Temperature, batch size, and the surface can change how quickly the material becomes difficult to place.
Mix slowly and completely
Start the timer as soon as the components meet. Scrape the sides and bottom of the container during mixing, including the material caught in the corners. Use a slow, controlled motion. High speed pulls air into the resin, and those bubbles can show later as pinholes or weak-looking spots in the joint.
Do not add water to loosen the grout. Do not leave a mixed batch in the bucket while tools or tile are being prepared. Once the material starts to stiffen, forcing it into the joint usually gives poor compaction and a rough, incomplete finish. A smaller batch is cheaper than having to remove failed grout.
Use this sequence:
Pack the joint, do not skim it
Hold the epoxy float at approximately 90 degrees to the tile surface and move diagonally across the joints. The angle drives the dense grout into the joint instead of dragging it over the top. Make firm passes from different directions where the layout permits, then check for low areas before the material firms up.
Aim for 100% joint fill. Pinholes and voids show that insufficient material or pressure reached the bottom of the joint. On vertical work, use manageable passes and maintain enough pressure to keep the grout seated. Slumping can indicate excessive heat, an overfilled joint, or a batch that is already losing workability.
Work in complete zones of 1–2 m², rather than spreading as far as the material initially allows. A large floor can encourage a wider spread, but that also creates a cleanup area that may exceed the available time. For unusual tile surfaces, the grouting vinyl tile guide reinforces why the substrate and grout system must be considered together.
The video below shows the sequence, but it does not replace the product instructions or a test area.
Before mixing, assign one person to watch the timer and another to manage the wash when the job requires it. Repeat the same controlled cycle: mix, spread, pack, shape, wash, rinse, and inspect. Start the next zone only after the current one is under control.
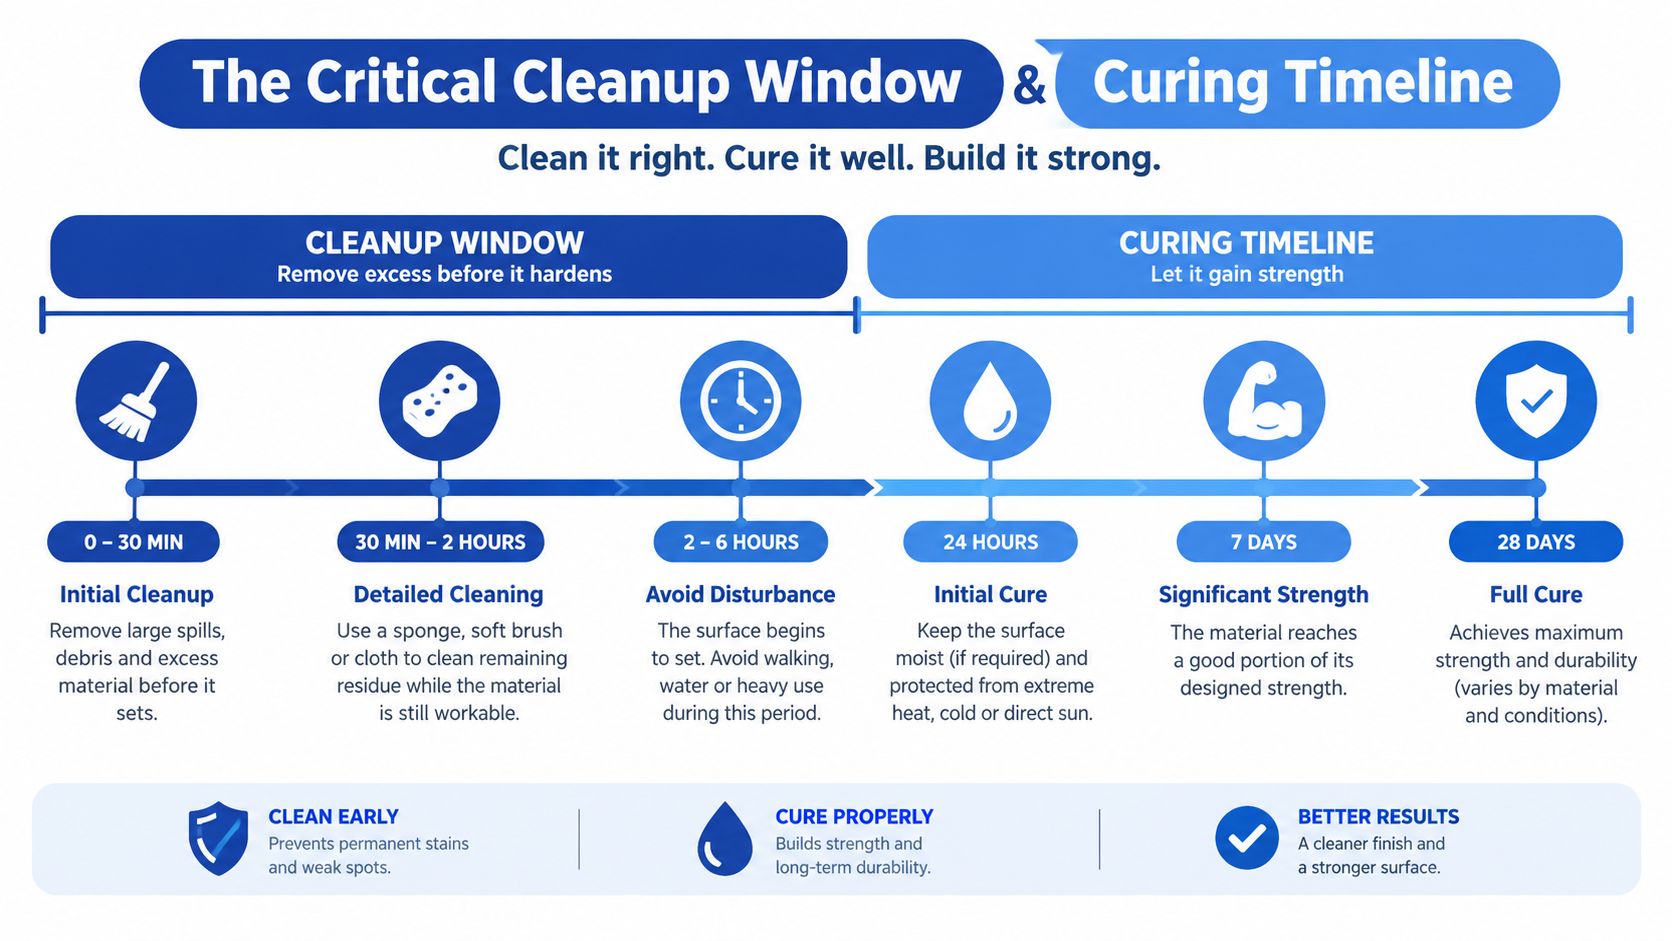
The Critical Cleanup Window and Curing Timeline
The room can look well grouted and still be heading toward an expensive repair. A setter may pack the joints cleanly, then postpone washing until the entire floor is finished. By that point, the epoxy film on the tile can shift from workable residue to bonded resin. Textured, porous, and polished surfaces make removal harder, and cured residue may require scraping or chemical treatment that can mark the finish.
Epoxy cleanup follows a chemical clock. Start within the product's stated working window, use the approved cleaner at its specified dilution, and keep fresh water available. A stronger mixture does not automatically clean faster. Excess cleaner, abrasive pads, or aggressive pressure can dull the tile, alter the joint profile, or spread resin across a larger area.
Wash the tile without washing out the joint
After finishing a small zone, hold the float nearly upright and remove excess grout with diagonal passes. Keep the joints full and shaped. Follow with the first wash while the film remains workable, using controlled movements instead of flooding the surface.
Use a dedicated sponge and rinse it often. Turn to a clean face as soon as resin loads the sponge. Dirty water transfers residue from tile to tile. The sponge should be damp, not dripping, and should pass across the tile without dragging along the joint. Too much water or pressure can soften and reshape the surface.
Use this sequence:
Inspect from the side as well as directly above. Haze may be invisible in overhead light, then show clearly when light crosses a glossy tile, glass, polished stone, or textured face.
Understand the cure stages
The initial set is the period when placement and cleanup become progressively harder. It does not mean the installation is ready for use. Typical manufacturer benchmarks include about 18 hours before foot traffic at 75°F, 24 hours before normal traffic, and 72 hours before heavy traffic, as outlined in the Custom Building Products technical guidance. Treat those figures as product guidance, not a universal schedule. Temperature, humidity, joint depth, substrate conditions, and formulation all affect the cure.
Protect the installation throughout the cure. Keep other trades from washing tools over it, dragging ladders across it, or exposing it to standing water before the product permits that use. The surface may feel firm while deeper material is still curing, particularly in cool or damp conditions.
If there is any doubt about washing now or later, wash within the product's stated window. Epoxy residue almost never becomes easier to remove with time.
Troubleshooting Common Installation Failures
The assumption that “I can clean it off later” causes more epoxy trouble than an imperfect first pass. Once the material has cured on a tile face, removing it may require scraping, specialized chemistry, or mechanical work that risks scratching the surface. Diagnose the problem while the grout is still workable.
Pinholes and voids
Small holes, bubbles, or craters usually point to air entrapment, incomplete packing, or contamination in the joint. Over-aggressive mixing can introduce air, while a float held too shallow can leave the material sitting across the opening instead of filling it.
If the grout is still workable, press fresh material firmly into the defect with the float or a suitable tool, then strike the joint clean. Don't merely wipe across the top. The repair must reach the bottom of the void and reconnect with solid material around it.
After cure, a shallow defect may need careful preparation before a compatible skim repair. Remove loose material, clean the area, and follow the product manufacturer's repair guidance. Deep or widespread voids are a sign that the installation needs a broader assessment, not random surface filling.
Slumping and low joints
Vertical joints can slump when the batch is warm, the joint is overfilled, or the installer moves too quickly without enough packing pressure. A low line may also result from washing too aggressively while the grout is still mobile.
Correct a soft joint immediately by adding a small amount of fresh material and compacting it with controlled pressure. Keep the repair local. Spreading more grout across a large wall after the batch has begun to firm can create a visible texture or color difference.
Haze and surface film
Cloudy residue can come from delayed cleanup, dirty wash water, incorrect cleaner dilution, or moisture and humidity conditions that interfere with the surface. Treat the tile face and the joint separately. The goal is to remove the film without eroding the joint or changing its profile.
If the residue is still fresh, use the specified wash process and clean sponges. If it has hardened, stop experimenting with household chemicals. Check the technical sheet for a compatible haze remover and test it in an inconspicuous location first.
Leaks behind the tile
Epoxy grout resists water, but it isn't a substitute for a waterproofing membrane, shower pan, movement joint, or properly sealed penetration. Water appearing below a shower or at the base of a wall may originate behind the tile rather than through a sound grout joint.
Inspect the waterproofing assembly, drain connections, corners, changes of plane, and penetrations before removing grout. Regrouting a failed waterproofing system treats the symptom and leaves the cause in place.
Long-Term Maintenance and When to Hire a Professional
Epoxy grout pays off after installation because it resists routine staining without a sealer. Care focuses on removing surface soil, soap residue, grease, and mineral buildup. Manufacturer guidance and market coverage describe this as a low-maintenance system, as summarized by DataIntelo's epoxy grout information.
Use a cleaner compatible with both the tile and grout. Sweep or vacuum floors before wet cleaning so abrasive grit does not get worked into the surface. In showers, remove standing water and residue regularly. Clean corners, changes of plane, and movement joints with the same care as the grout lines.
Where DIY stops making sense
A small, flat, accessible project may suit a careful DIY installer who can control the room, measure components accurately, organize cleanup, and follow the product schedule without interruption. The risk rises with large-format tile, intricate mosaics, vertical walls, textured or porous tile, pool surrounds, commercial kitchens, and wet rooms. These conditions shorten practical working time and make cleanup harder to recover if the epoxy begins curing on the tile.
Hire a qualified professional when removal would be costly, waterproofing is involved, or the room cannot stay within the required environmental conditions. Ask how the installer manages small batches, joint compaction, cleanup timing, substrate moisture, and curing protection. This guide to choosing a contractor can help you check credentials and past work before signing a contract.
A capable installer will explain epoxy's chemical clock, stage the workspace, protect the tile, and schedule work around the cleanup window. That preparation protects the tile investment.
If you need an installer, use HomeProBadge to find verified home service professionals with credentials and proof of past work. Compare project evidence before requesting a quote, and choose someone who treats preparation, timing, and disciplined cleanup as part of the installation.