



You're in the attic with knee pads on, a flashlight in one hand, and a drill in the other. Insulation hides most of the framing, and you're trying to decide whether the spot above the dining room is safe for a ceiling fan, a light, or a repair. The question sounds simple: how far apart are ceiling joists?
In most U.S. homes, the quick answer is 16 inches on center. 24 inches on center is also common, while 12 inches and 19.2 inches appear in specific framing systems. Older homes may have irregular layouts, so a tape measure is more reliable than a rule of thumb. Contractor guidance on ceiling joist spacing describes these common layouts and explains why the actual choice depends on load, lumber, span, and code.
Guessing matters. Miss a joist and your fixture may have no structural support. Hit one unexpectedly while drilling for recessed lighting, plumbing, or a temporary repair, and you can damage framing or wiring. If you're also checking an attic after a roof problem, keep structural work separate from short-term weather protection, such as these temporary flat roof leak fixes from ZEV Roofing & Construction. The safe answer starts with understanding what the spacing measurement means, then verifying what your house has.
Standing in Your Attic Wondering Where the Joists Are
Mark's attic inspection began with a flashlight moving across blown insulation and one hand pressed against exposed framing. He could see boards running in one direction, but the next joist disappeared beneath the insulation. Before cutting for a fixture or adding storage, he needed to know which members carried the ceiling.
Those boards were ceiling joists, running parallel from one bearing point to another. In a house built decades ago, the pattern may be less orderly than a standard plan suggests. Hand-built framing, chimney openings, stairwells, repairs, or later remodeling can leave one area evenly laid out and another with a doubled or shifted joist.
Spacing alone does not decide whether a ceiling is safe. A longer span puts more bending demand on each joist. Deeper lumber can carry that span more effectively, while snow load, a heavy ceiling, or stored items above the room adds weight. Two attics with similar spacing can therefore need different framing, just as two shelves with the same bracket spacing may hold different loads depending on their length and material.
Practical rule: Treat any expected spacing as a starting clue. Find the actual joist before you cut, drill, mount a fixture, or place heavy storage.
Mark also needed to separate structural work from temporary roof protection. After a roof problem, temporary flat roof leak fixes can limit water entry, but they do not confirm that the ceiling framing can support a new load.
A stud finder may help from below, although insulation and ceiling finishes can confuse it. From the attic, expose a small area carefully and trace the framing to its bearing points. If a joist ends near an opening, the roof has carried unusual snow, or the planned load is substantial, stop and ask a qualified professional to verify the structure.
What On Center Really Means in Residential Framing
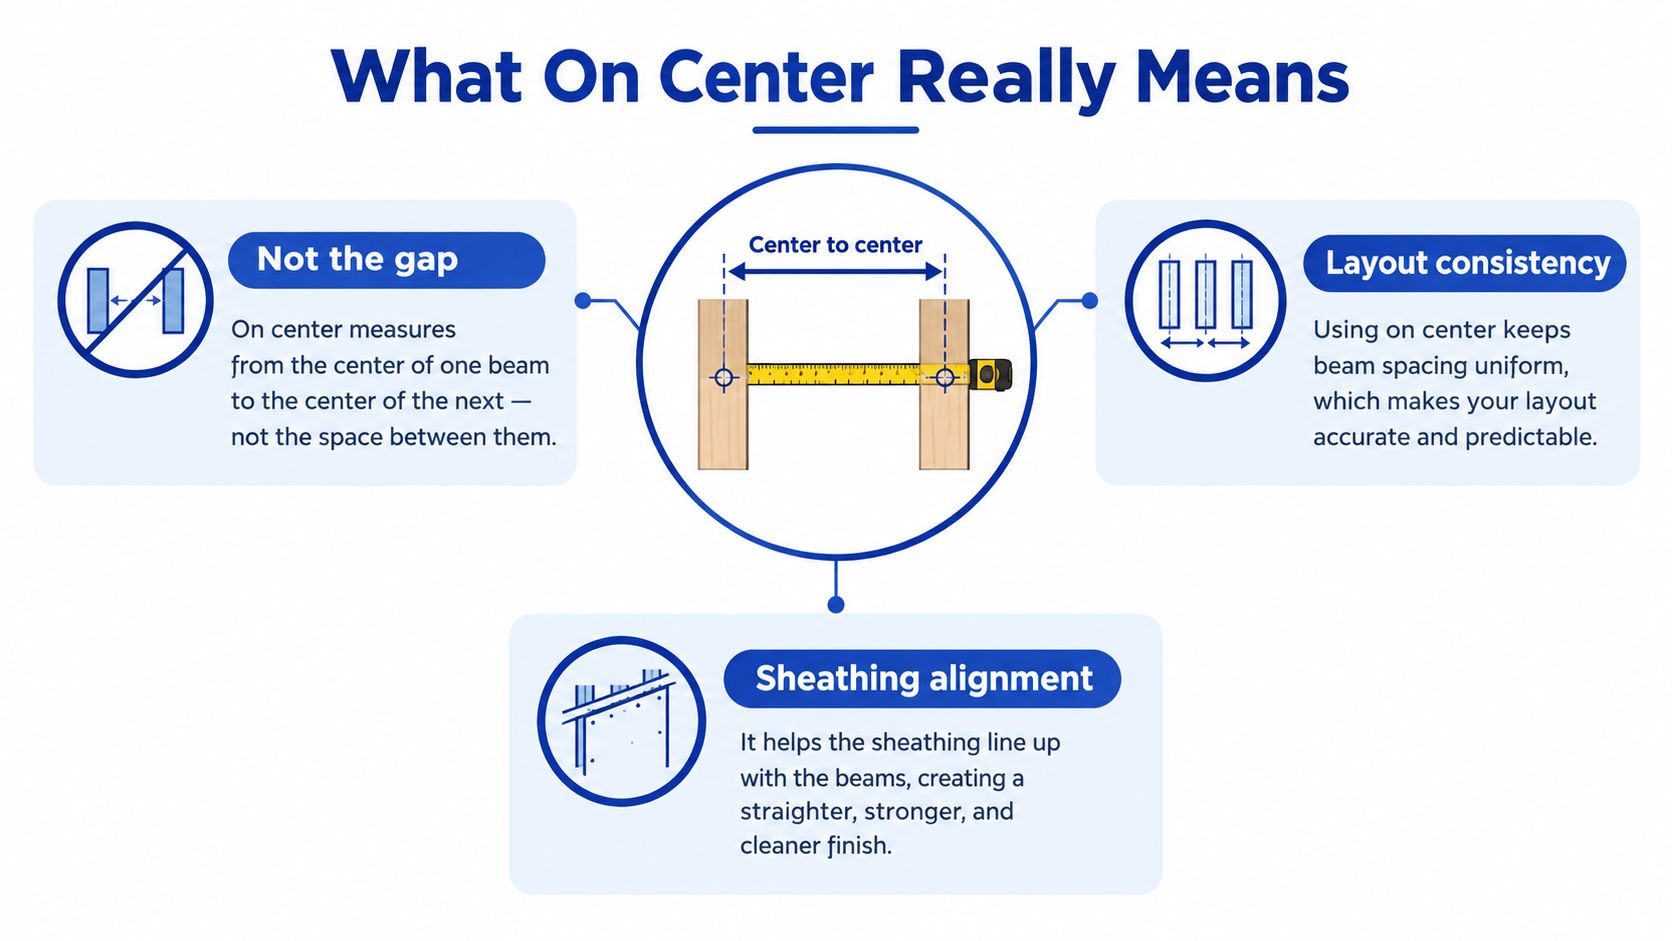
On-center, or o.c., means center to center. It doesn't describe the open gap between two boards. Framers use the centerline because it creates a consistent layout for studs, joists, rafters, trusses, drywall, sheathing, and insulation even when the actual lumber width varies.Take a nominal 2x10. Its actual width is about 9.25 inches, not a full ten inches. If those joists are set at 16 inches on center, the open space between their edges is roughly 6.75 inches. At 24 inches on center, the visible gap between the same boards is about 14.75 inches. Those gaps are smaller than the spacing number because the lumber occupies part of the distance.
Why framers use centerlines
A framer laying out a wall doesn't measure from the edge of one stud to the edge of the next. The centerline gives every member a predictable position. That matters when installers place drywall fasteners, cut insulation, align roof sheathing, or transfer measurements from a plan to the building.
Drywall sheets commonly come in 48-inch widths, so framing at 12, 16, or 24 inches on center creates regular attachment points across the sheet. The exact fastening pattern still depends on the board, finish, code requirements, and framing direction, but the module stays predictable.
How to measure it yourself
Find the center of one joist, mark it, then find the center of the next joist and measure between the marks. Don't measure from one near edge to the next near edge and call that on-center spacing. If you do, every comparison with a plan, span table, fixture bracket, or insulation product will be wrong.
The same rule applies to wall studs and roof rafters. Whenever a contractor says “16 inches on center,” ask where the centerline falls, especially if you're measuring through drywall where the board edges aren't visible.
Why Joist Spacing Varies From Home to Home
Standing in an attic, you may see joists set close together in one house and much farther apart in another. That difference reflects the whole framing system, not a single rule such as “16 inches is standard.” The builder had to match spacing to the span, lumber, loads, and intended use of the space.
Four variables control the layout
Span is the distance a joist crosses between bearing walls, beams, or other supports. A short span may allow wider spacing. A longer span may call for joists placed closer together, deeper lumber, or an engineered member. Lumber depth strongly affects stiffness. A deeper joist can usually cross farther than a shallower joist with the same species and grade. The applicable span table still determines whether that combination meets its requirements. Species and grade also change the result. Douglas fir-larch, Southern Pine, Hem-Fir, and SPF have different design values. Two boards with the same nominal dimensions may therefore have different allowable spans. Load includes the ceiling finish, insulation, light framing, stored items, equipment, and environmental forces such as snow. A ceiling beneath an unused attic presents a different design problem from one beneath an area used for storage. Code guidance also separates ceiling joists supporting drywall ceilings from other conditions. (IRC-based ceiling design guidance in New York City's code library)A published span reference shows the tradeoff for a Douglas fir-larch No. 2 2x6 ceiling joist. Its allowable span drops by more than five feet as spacing widens from 12 to 24 inches on center. (IRC-based ceiling joist span reference)
Sample span limits for ceiling joists
| Joist size | Species | 12" o.c. | 16" o.c. | 24" o.c. |
|---|---|---|---|---|
| 2x6 | Douglas fir-larch No. 2 | 20 ft 8 in | 18 ft 8 in | 15 ft 4 in |
| 2x4 | Common span-table example | Not listed in the cited example | About 10 ft 9 in | About 9 ft 3 in |
| 2x6 | Common span-table example | Not listed in the cited example | About 16 ft 11 in | About 13 ft 11 in |
The second group comes from a ceiling joist span table comparing 2x4 and 2x6 members as spacing widens. (Ceiling joist span tables) Do not transfer a table from one species, grade, load, or jurisdiction to another without checking its assumptions.
For a homeowner, the practical lesson is simple: spacing cannot be judged by itself. A 24-inch layout may be suitable with the right depth, span, and loads, while the same spacing may be inadequate elsewhere. Storage, heavy fixtures, unusual snow exposure, or signs of sagging are good reasons to have a structural professional review the framing.
Common Spacings Compared With Span Limits at a Glance
Standing in an attic, you may see joists spaced at 12, 16, 19.2, or 24 inches on center. These layouts are not interchangeable. Tighter spacing gives each joist a smaller share of the ceiling load and can support a longer span. Wider spacing uses fewer members, but each joist carries more load and may need greater depth or stronger support.
Reading a span table correctly matters more than memorizing its figures. The Douglas fir-larch No. 2 example from the previous section shows how spacing, member size, and span must be read together. Its figures apply to that specific 2x6 joist, species, grade, loading, and support arrangement, not to every ceiling.
| Spacing (o.c.) | Nominal joist size | Allowable span, Douglas fir-larch No. 2 | Typical use |
|---|---|---|---|
| 12 inches | 2x6 | 20 ft 8 in | Longer spans where tighter framing is justified |
| 16 inches | 2x6 | 18 ft 8 in | Common residential ceiling layout |
| 19.2 inches | 2x6 | 17 ft 4 in | Intermediate layout in selected framing systems |
| 24 inches | 2x6 | 15 ft 4 in | Wider layout when size and loads permit |
Read the table as a matched system
Use each row as a complete design condition, not as a ranking of good and bad spacing. Spacing and lumber depth work together. A long run at 24-inch spacing may require deeper solid lumber, engineered I-joists, roof trusses, or additional support. A shorter span may allow a different arrangement.
The ceiling's use matters too. Insulation and drywall create a basic load, while stored items or heavy fixtures add demand. Snow exposure can increase roof-related loading in some assemblies. Each joist serves the strip of ceiling between its neighboring joists, so widening the gaps gives that member a broader share to carry.
Check the actual span, lumber size, species, grade, supports, and expected loads against the applicable table or engineered design. Sagging, heavy storage, unusual snow exposure, or uncertainty about the framing warrants a structural professional's review.
How to Find and Measure Ceiling Joists Step by Step
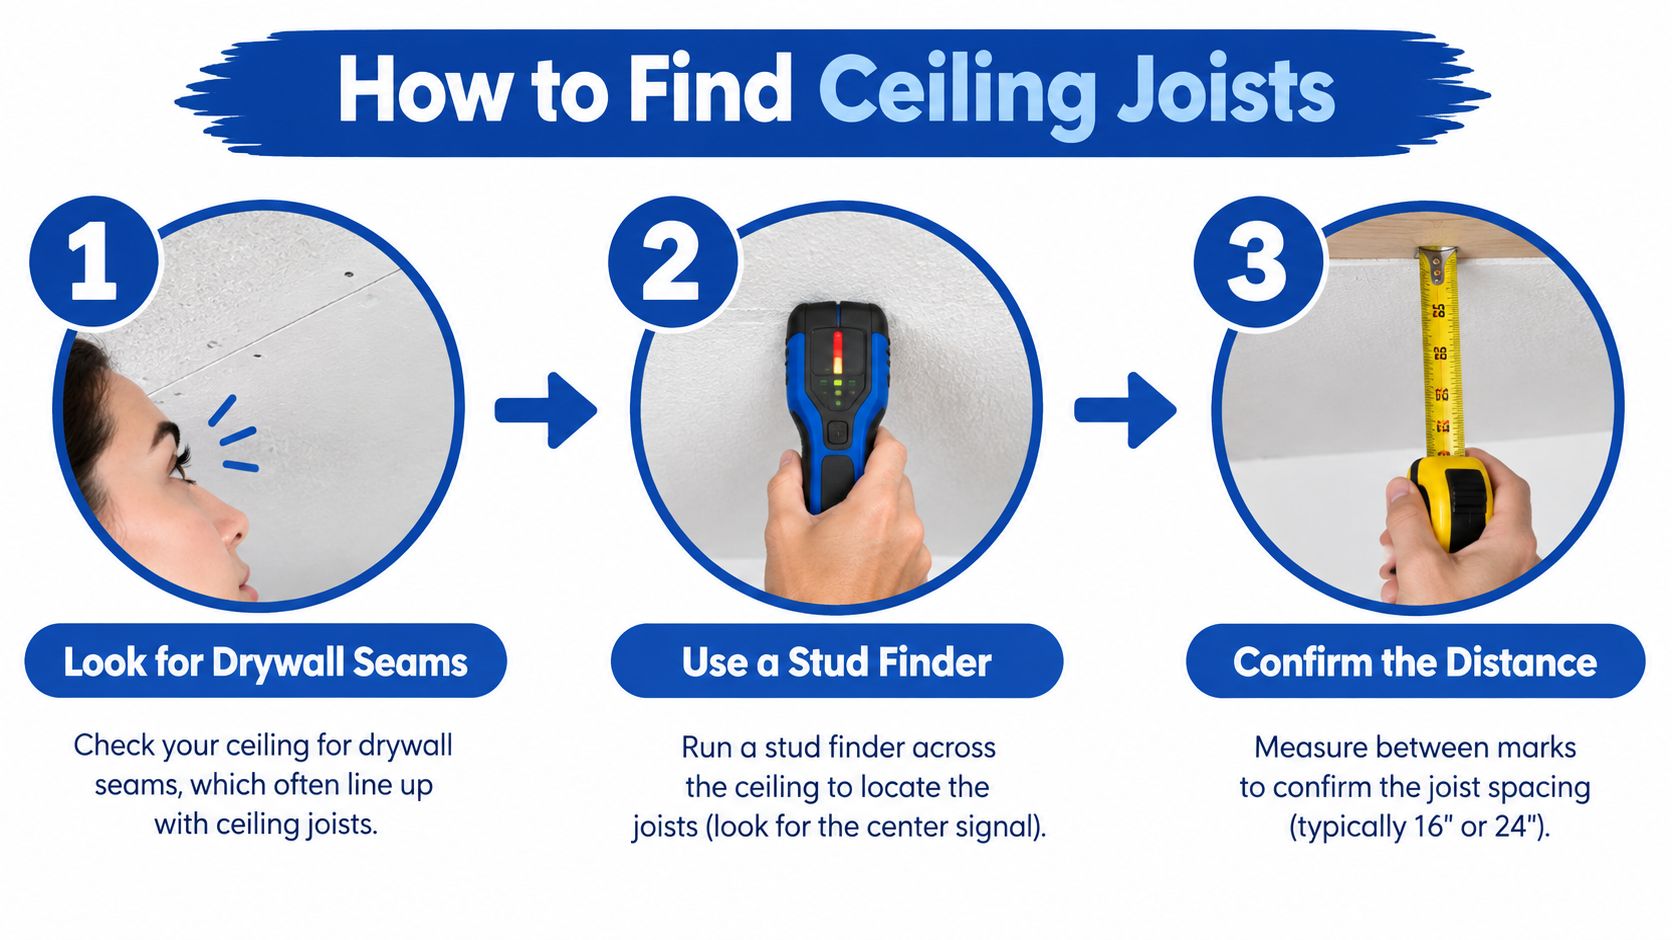
Start from the finished room if the attic isn't accessible, but verify from above whenever you can. Drywall seams, fastener lines, a stud finder, and a tiny probe can establish a pattern. The attic side confirms whether you're looking at a full joist, a doubled member, blocking, or a framing edge.
Use several checks instead of trusting one signal
A stairwell, chimney, bearing point, or mechanical opening can create double joists, headers, or blocking that interrupt the normal pattern. Those pieces support an opening, not necessarily the ceiling field, so don't use them as the only reference for spacing.
If your project involves covering exposed framing or planning a finished lower level, a finishing a basement ceiling guide from Trademaster Construction can help with the installation context. For a visual walkthrough of the detection process, use the video below.
What Spacing Means for Drywall Insulation and Fixtures
Joist spacing affects what you install beneath the framing and what you can safely attach to it. The difference between 16 and 24 inches on center may be invisible after painting, but it changes fastener locations, insulation fit, and fixture support.
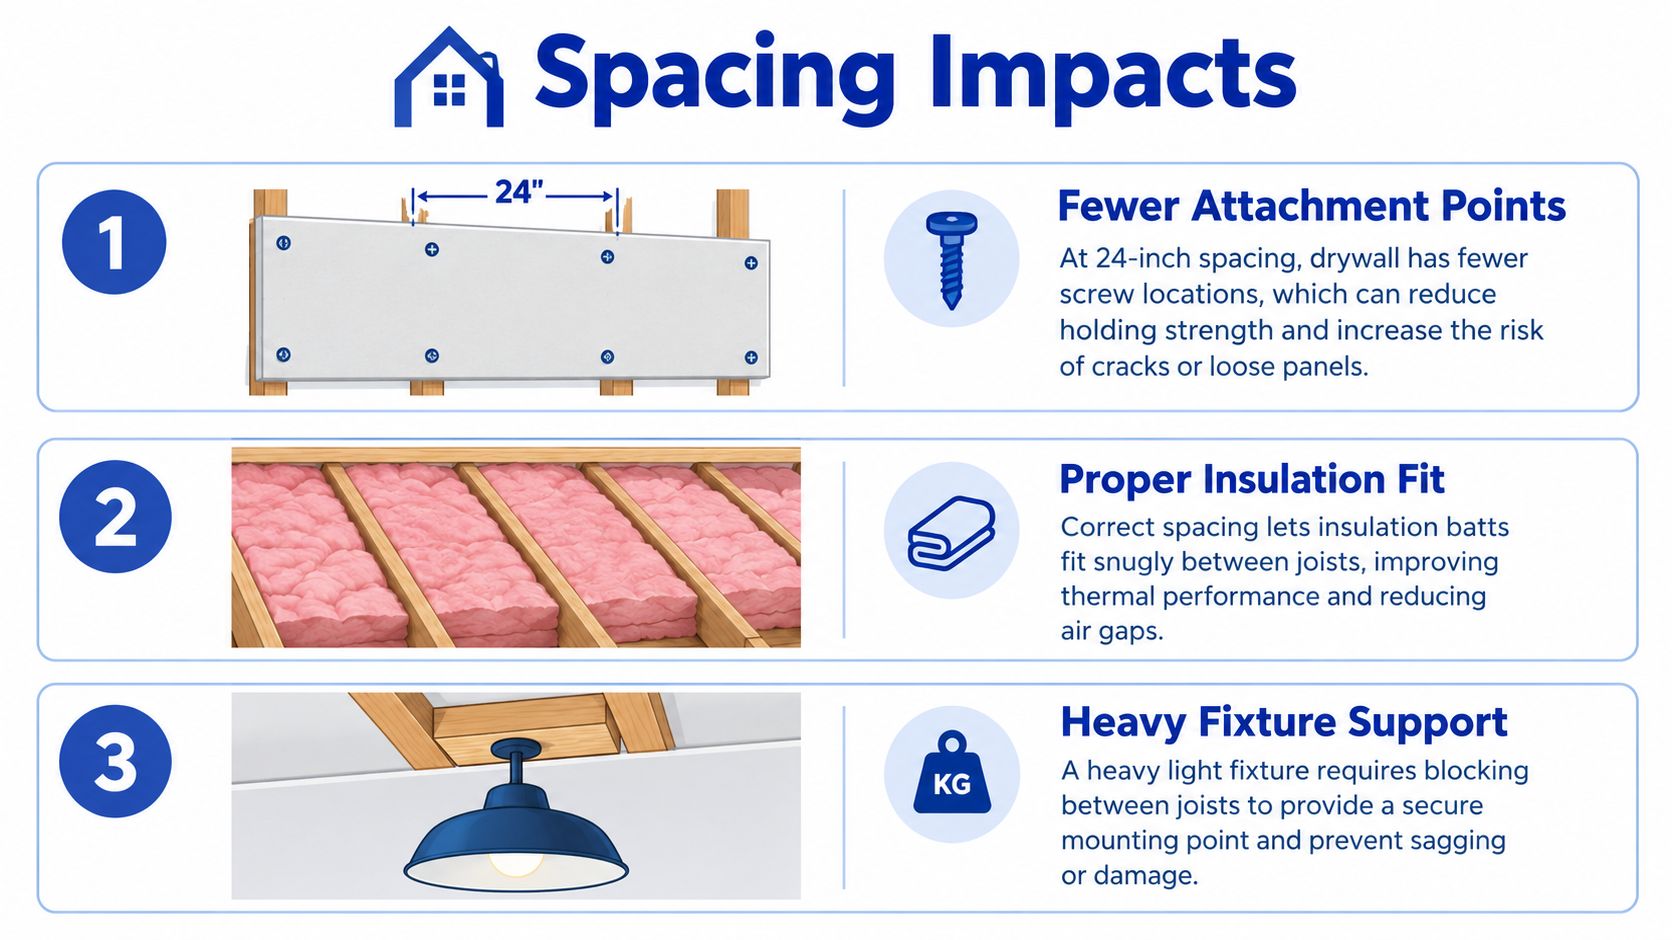
At 24 inches on center, a drywall ceiling has fewer framing lines available for fastening than one framed at 16 inches on center. The board may feel more flexible between supports, depending on its thickness, orientation, finish, and the complete assembly. Follow the board manufacturer's installation instructions and local requirements rather than assuming a heavier board solves every structural or finishing concern.
Insulation has to fill the cavity
Many batt products are made to fit common framing modules. If the cavity doesn't match the insulation width, the installer may leave gaps, compress the batt, or cut many small pieces. Any of those mistakes can reduce the assembly's performance and make air-sealing harder.
Spacing also leaves clues. A ceiling with repeated wide cavities may have 24-inch framing, while narrow cavities often point to 16-inch framing, but insulation can be shifted or poorly installed. Measure the framing itself instead of identifying it by the insulation alone.
Fixtures need a real attachment point
A ceiling fan needs a fan-rated electrical box attached to framing or to properly installed blocking. A recessed light may need clearance from joists, insulation, wiring, and other building components. A heavy chandelier can require a dedicated support arrangement rather than a standard electrical box.
With wider spacing, you may have fewer convenient mounting locations. That doesn't mean you must abandon the fixture. It means you may need blocking between joists, a listed support brace, or a different mounting position. If you're also choosing a ceiling finish, review how surface patterns and texture interact with fastener placement in this guide to different drywall textures.
Trusses Vaulted Ceilings and High Snow Load Cases
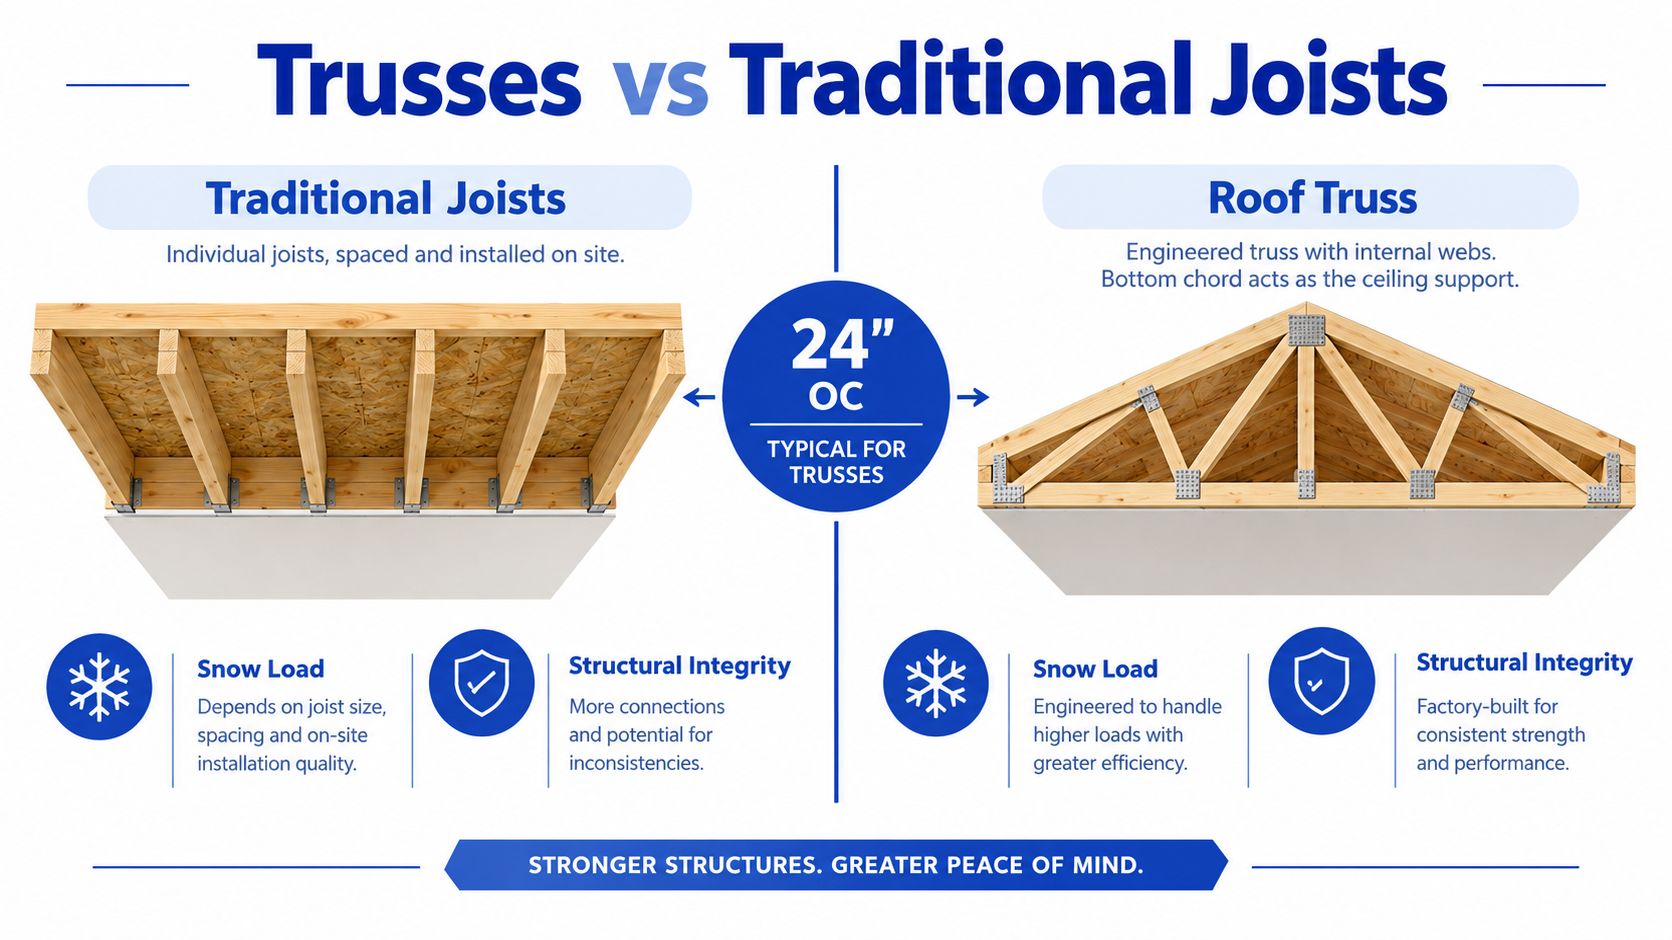
A trussed roof isn't framed like a simple ceiling with independent joists. A manufactured roof truss has top and bottom chords connected by internal webs, and its bottom chord usually supports the ceiling finish. 24 inches on center is common for trusses, but the spacing alone doesn't tell you how much additional load the system can carry.
Never cut, notch, drill, or remove a truss chord or web because it appears inconvenient. Those members form an engineered load path, and a small alteration can change forces throughout the truss. Look for the truss design drawing, which may be attached to or marked on the truss, before adding storage, equipment, or a new opening.
Geometry changes the job
In a vaulted or cathedral ceiling, rafters may also function as the ceiling framing. Their spacing often follows the roof layout, but the sloped geometry changes insulation, ventilation, drywall fastening, fixture mounting, and storage options. A flat attic floor and a sloped ceiling may have similar spacing while behaving very differently under load.
Snow is another design variable. Code resources distinguish roof and ceiling connections, tie requirements, bracing, and load conditions, with the applicable design changing by slope, snow load, and the roof system. (Ceiling joist and rafter connection requirements)
If you live where snow loads are significant, don't apply a warm-climate rule of thumb to an attic conversion. A permit review may also be necessary before you add a platform, finish a vaulted ceiling, or modify a truss. Homeowners dealing with that question can review general building permit requirements, then confirm the local rules with the building department.
For a plain-language overview of the parts and purpose of roof trusses, RRSATX explains roof trusses in a way that's useful before you enter the attic with tools.
When to Trust Your Measurement and When to Call a Pro
You can usually trust your measurement when the joists form a uniform pattern, the spacing matches a recognizable layout, the lumber appears sound, and the bearing areas show no sagging, cracking, or water damage. A stud finder followed by a small pilot probe can confirm a suspected location before you install a box, but the probe isn't a substitute for checking what's above the ceiling.
Stop and get qualified help when the framing doesn't make sense. A licensed structural engineer or experienced general contractor should review the work if you find:
A licensed structural engineer can evaluate the span, species, grade, load path, deflection, and proposed alteration rather than judging the job from spacing alone. If permits, inspections, or past work are part of the concern, keep the documentation with your project records.
For a ceiling fixture or attic project, measure the joists, photograph the framing, and write down the span before buying materials. HomeProBadge lets homeowners search for verified professionals and review credentials and proof of past work, so visit HomeProBadge when your measurements point to a job that needs qualified help.