



Your microwave dies at the worst possible moment. Breakfast is cold, the display may be dark, and the first instinct is to grab a screwdriver. That instinct can turn a simple appliance failure into a lethal electrical accident.
A microwave oven is different from most countertop appliances because its high-voltage capacitor can retain a dangerous charge after the power cord has been removed. The U.S. Consumer Product Safety Commission reported an annual average of two electrocution deaths from 2006 through 2008 involving consumers who attempted microwave repairs, as documented in this microwave repair safety reference. The practical rule is simple: check the parts you can reach safely from outside, then stop before internal high-voltage work.
Before You Repair Microwave Oven Safety Rules You Must Follow
A dead microwave may be a failed outlet, a tripped breaker, a control problem, or a component failure inside the cabinet. You can't identify the internal cause safely by removing the cover unless you have the training, documentation, insulated tools, and test procedures required for that work. Unplugging the oven removes incoming power, but it doesn't automatically remove the charge stored inside.
The high-voltage capacitor is the dividing line between reasonable homeowner troubleshooting and professional service. It can hold lethal voltage after unplugging, and a casual touch, screwdriver probe, or misplaced meter lead can cause a severe shock. The U.S. Consumer Product Safety Commission safety report recommends that microwave repair be performed by qualified personnel, not treated as casual do-it-yourself appliance maintenance.
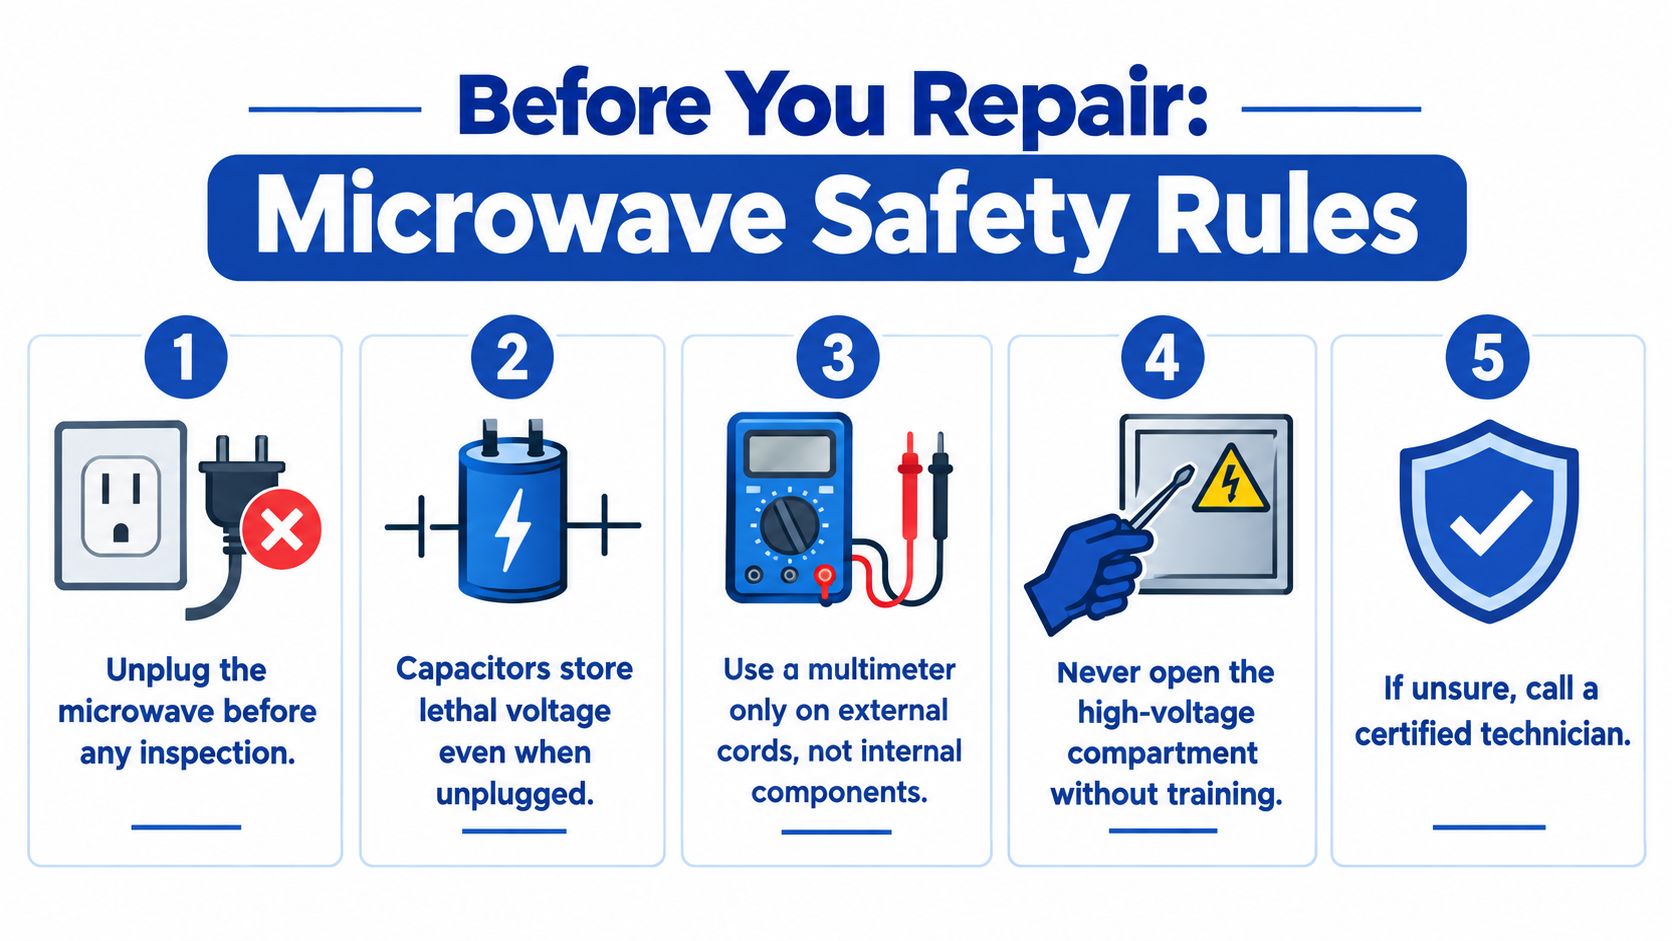
Decide what you can check
Before touching the appliance, identify its type and location. A small countertop unit is often easier and cheaper to replace, while a built-in or over-the-range model may justify a professional diagnosis because installation, trim, ventilation, and matching dimensions complicate replacement.
Safe external checks include:
Hard stop: If the microwave sparks, smells burnt, trips the breaker, or runs while leaving food cold, unplug it and arrange qualified service. Don't remove the cover to “take a quick look.”
Write down the manufacturer, model number, serial number, and installation details before requesting service. A clear description helps a technician identify the correct service information and model-specific parts. If you're hiring a contractor, use a practical guide to choosing a qualified contractor, and ask whether the technician performs post-repair safety testing.
Tools Parts and Preparation for Safe Troubleshooting
Safe troubleshooting starts with the right boundary, not a larger toolbox. A homeowner needs tools for external inspection and documentation. A trained service technician needs additional equipment for controlled internal diagnosis, capacitor discharge, live-test decisions, and safety verification.
Start with a flashlight, a clean cloth, the oven's manual, and a phone camera. Photograph the model label and the installation before moving a built-in unit. Capture the condition of the door, cavity, waveguide cover, turntable, and control panel. These images preserve evidence of the original condition and help prevent confusion when a service professional evaluates the appliance.
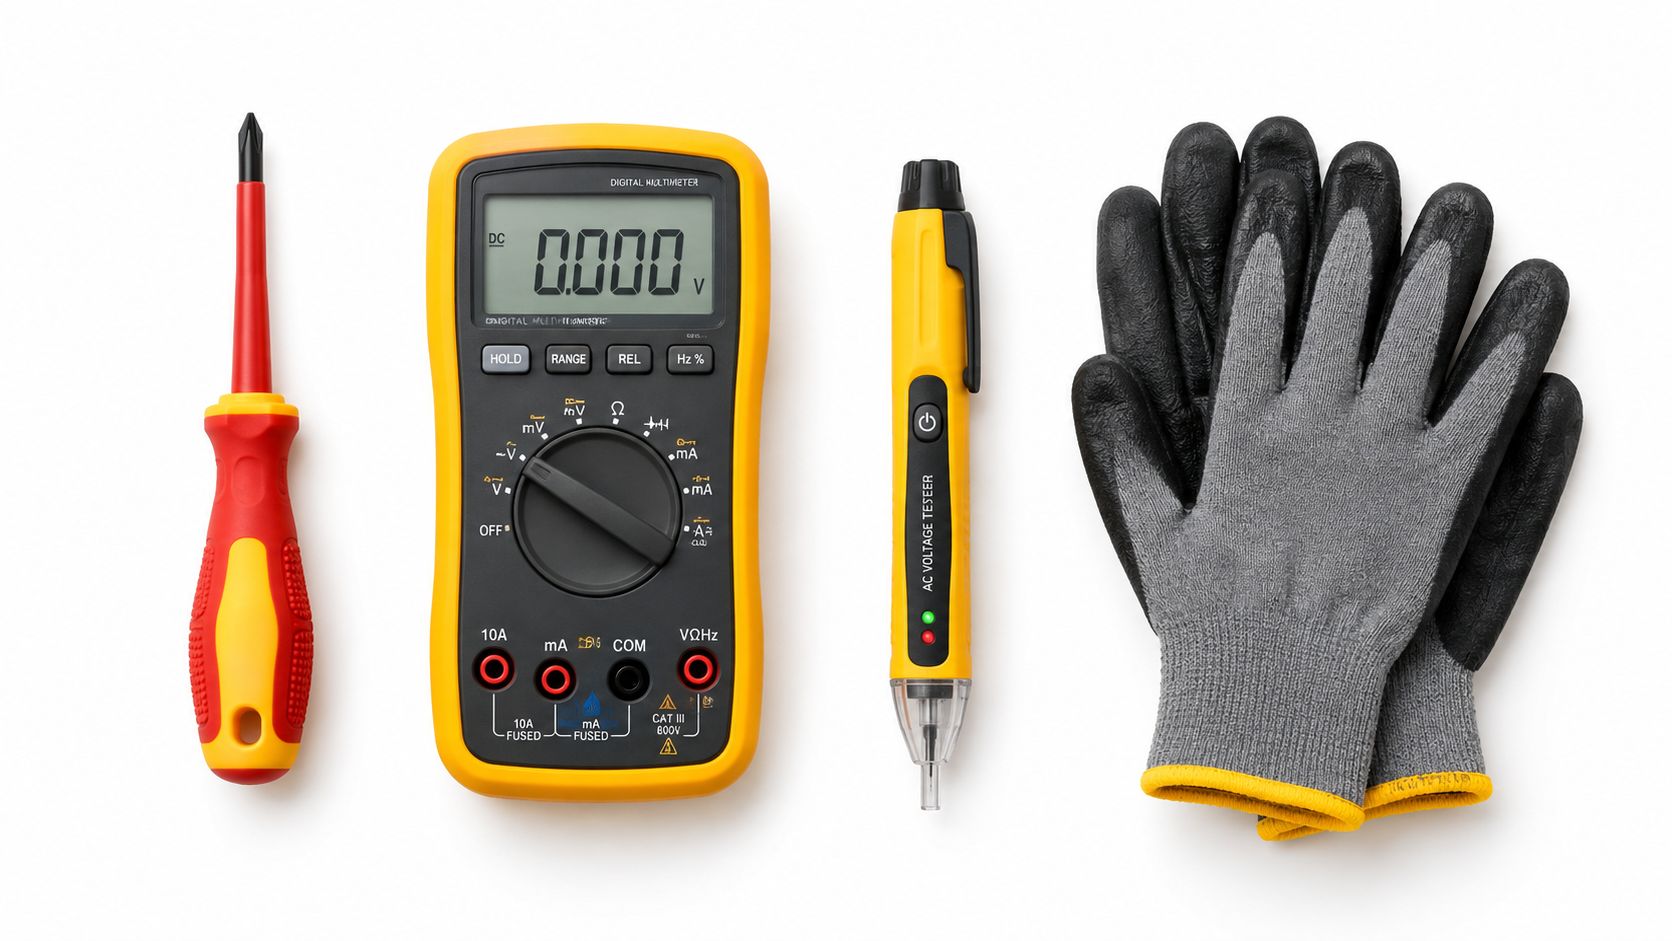
What belongs in a homeowner's kit
A non-contact voltage tester can help with general electrical awareness around an installation, but it doesn't prove that a disconnected microwave's internal capacitor is safe. A multimeter may be appropriate for checking an external cord or outlet under suitable conditions, but it shouldn't be used casually on internal microwave components.
Keep the inspection process limited to these actions:
What belongs in a professional kit
Internal microwave work requires manufacturer documentation, insulated tools, appropriate test instruments, and a controlled discharge procedure. A qualified technician de-energizes the unit, waits for the capacitor to discharge, and uses the model's service information before testing components. During carefully controlled live testing, the technician may disconnect magnetron leads to prevent accidental microwave generation, then discharge the capacitor again after switching power off.
The microwave repair FAQ and technical safety guidance describes a structured process that includes pre-inspection, model and serial capture, ordered component tests, exact parts identification, RF leakage testing, and full operating-cycle verification. That sequence matters because a replacement component alone doesn't prove that the oven is safe.
Don't buy a capacitor discharge tool or high-voltage probe as a substitute for training. Equipment reduces certain risks, but it doesn't teach fault isolation, correct test points, safe reassembly, or the required final leakage checks.
Common Microwave Problems and What They Really Mean
Symptoms tell you which direction to investigate, but they don't authorize cabinet removal. The same visible problem can come from a simple external condition, a door interlock fault, a control-board issue, or a failure in the high-voltage power section.
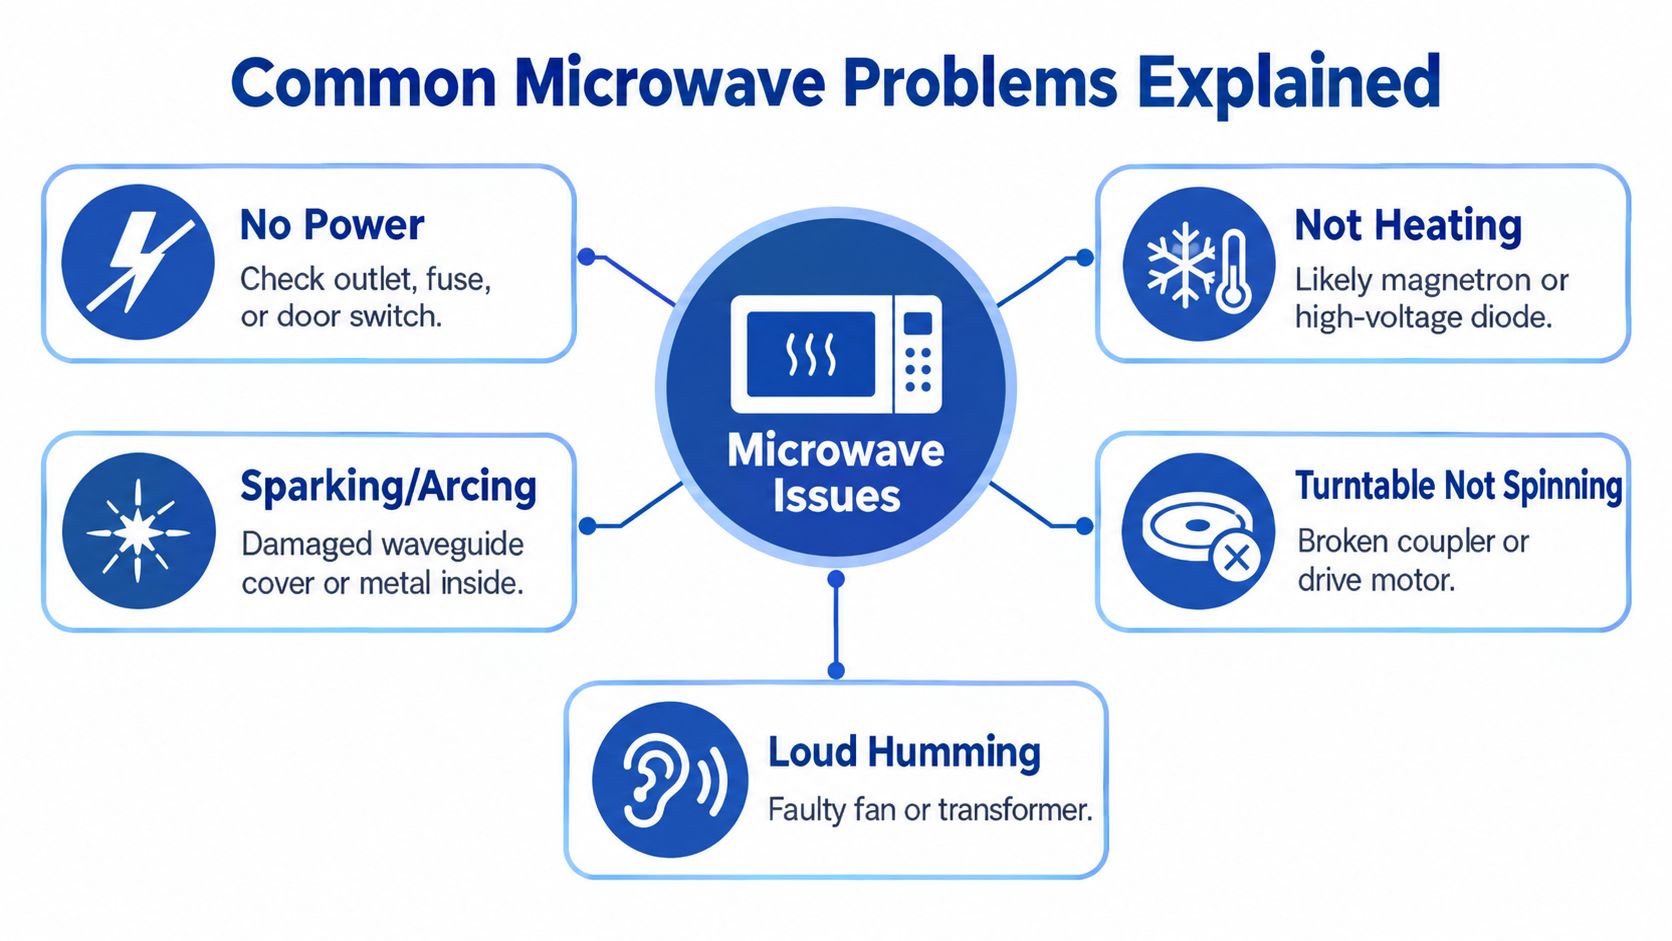
No power
Start at the wall. Test the outlet with another suitable device, inspect the plug and cord for visible damage, and check the home's breaker or ground-fault protection. If the outlet works but the microwave remains completely dead, an internal fuse, thermal protector, wiring fault, or control-power problem may be involved.
A blown fuse isn't automatically the whole diagnosis. Fuses often open because another component or wiring condition created excessive current, so replacing one without finding the reason can produce another failure. Internal fuse replacement belongs to a qualified technician unless the manufacturer expressly provides a safe, external procedure for that model.
Runs but doesn't heat
A microwave that turns on, illuminates, rotates, or runs its fan while leaving food cold has likely separated its control functions from its heating system. Possible internal causes include the magnetron, high-voltage diode, capacitor, transformer, inverter, or related wiring.
You can perform a controlled water-load test only from normal operating conditions, using a suitable microwave-safe container and the manufacturer's instructions. If the oven runs but doesn't heat, stop there. Don't open the cabinet to test the magnetron or capacitor.
Sparking or arcing
Stop using the oven if you see sparks. Remove any obvious metallic item only after unplugging the appliance, then inspect the cavity for food residue, a damaged waveguide cover, chipped coating, or exposed metal. A dirty cavity can create arcing, but repeated sparking can indicate damage that makes continued operation unsafe.
Manufacturer guidance states that some cavity damage caused by arcing, chipping, or peeling paint isn't repairable and the microwave should be discontinued. Review the GE guidance on cavity damage and microwave safety before deciding whether the unit should be serviced or replaced.
Turntable doesn't spin
Check whether the glass tray is seated correctly, the roller ring is aligned, and the underside coupler is clean and intact. Some ovens can still heat without rotation, but uneven heating makes normal use unreliable.
If those external checks don't solve the problem, the drive motor or internal wiring may have failed. A technician can distinguish a broken coupler from a motor or control fault without guessing at parts.
Loud humming or grinding
A new loud hum, grinding sound, burning smell, or vibration deserves immediate attention. A fan, turntable drive, transformer, inverter, or magnetron may be involved, and the sound alone can't identify which component has failed.
Unplug the appliance and document when the noise occurs. A unit that trips the breaker, smokes, or produces an acrid odor shouldn't be repeatedly restarted for comparison.
How to Diagnose Your Microwave Without Risky Disassembly
A reliable diagnosis follows an order. Jumping straight to the part that seems most likely creates misdiagnosis, especially when a door problem can imitate a control fault and a high-voltage failure can leave the rest of the oven apparently normal.
Start outside the cabinet
First, verify the outlet, plug, cord condition, breaker, and installation. Check that the door closes fully and that the latch engages without force. Don't bypass a door switch, tape the latch closed, or operate the oven with the door damaged.
Next, operate the control panel without starting a heating cycle. Note error messages, unresponsive keys, a dark display, interior-light behavior, fan operation, and turntable movement. Write the symptoms down rather than relying on memory, particularly if the oven behaves differently after cooling.
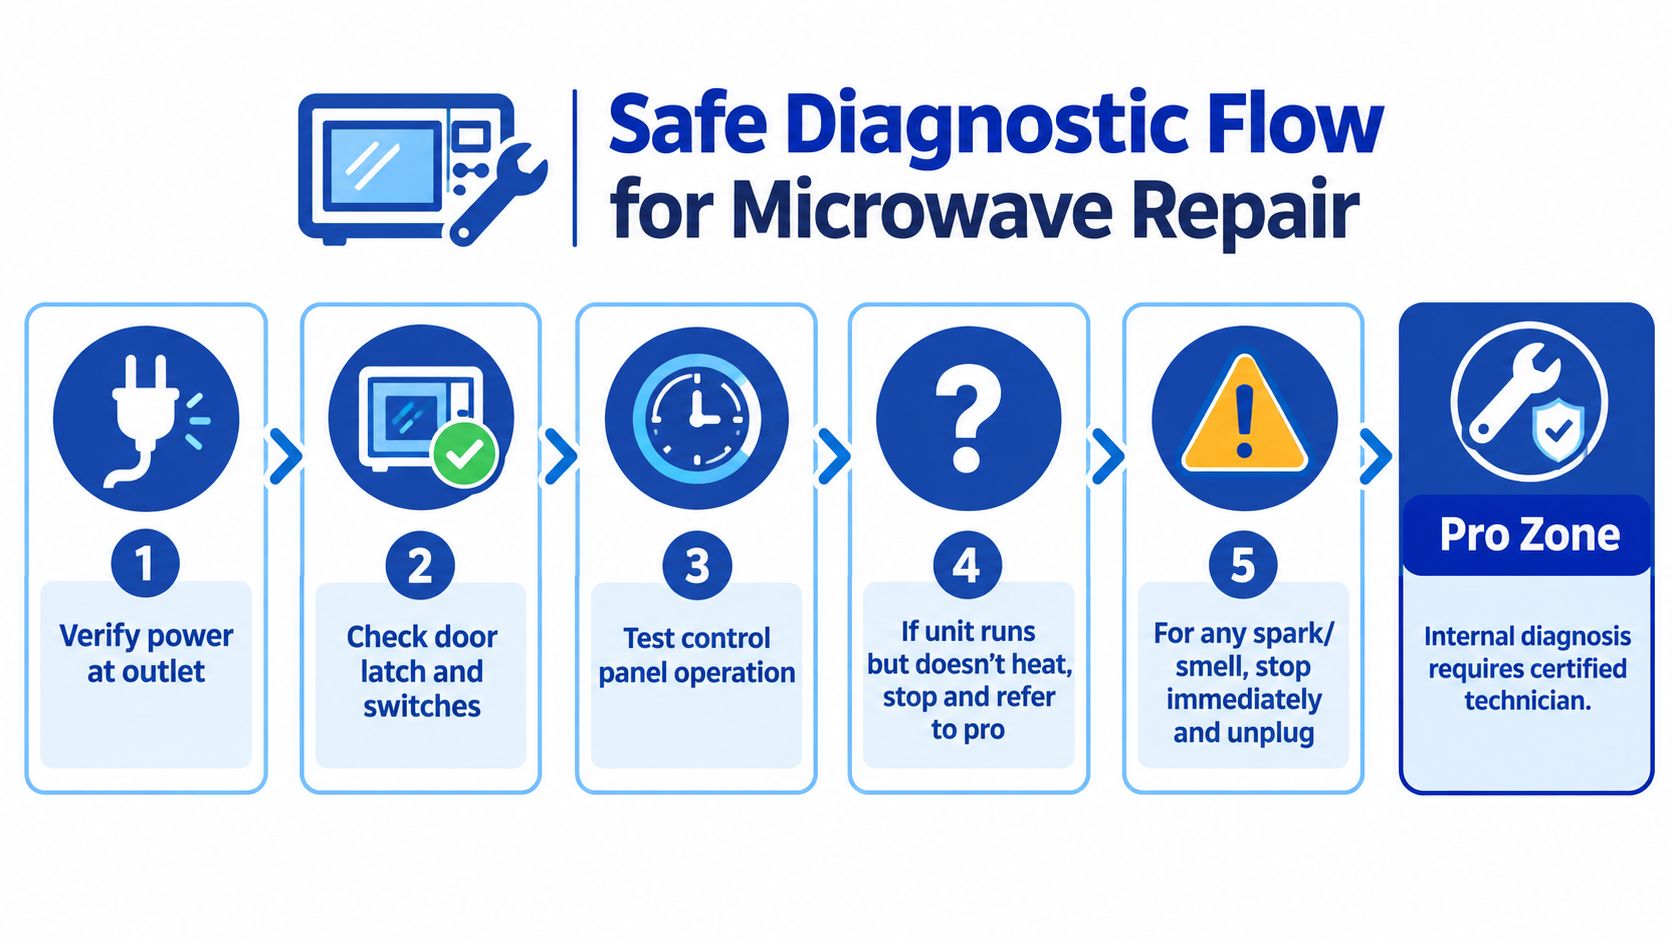
A full-power water-load run can help confirm whether the oven heats under a normal load, but stop the test if you see sparks, smell burning, hear a new harsh noise, or notice smoke. The purpose is to separate a user-interface complaint from a heating failure, not to stress a damaged appliance.
Know when professional testing begins
Continuity checks on an accessible cord or a correctly identified external conductor may be reasonable for someone trained to use a meter safely. Internal continuity testing is different. It requires disassembly, component identification, and a discharged high-voltage section, so it belongs in the professional zone.
A technician's workflow may progress through cord, fuse, conductors, visual damage, temperature-related checks, and high-voltage components before reaching the magnetron. The documented microwave diagnostic procedure emphasizes that RF leakage testing and complete cooking-cycle validation are essential after repair. A microwave isn't repaired because it powers on.
The useful diagnostic question isn't “Can I reach the part?” It's “Can I test, replace, reassemble, and verify the oven without bypassing a safety system?”
Occupational exposure also reinforces the need for disciplined procedures. One repair-shop study cited in the technical material found that worker exposure could reach up to twice the accepted maximum power-density level. That finding doesn't make professional work impossible, but it does show why shielding checks, controlled testing, and proper procedures matter.
This video can provide additional visual context, but it isn't a substitute for model-specific service documentation or qualified training.
Repair or Replace Costs Parts and When to Call a Pro
The cheapest repair is the one that solves the actual fault without creating a second failure. A fuse or door interlock may be a sensible professional repair, while a control board, magnetron, or unavailable high-voltage component can change the decision. For built-in and over-the-range models, removal, installation, trim fit, and matching ventilation can matter as much as the failed part.
Microwave adoption created a large residential repair category. Raytheon filed a U.S. patent for Percy Spencer's microwave cooking process in 1945, the first public microwave appeared in a Grand Central Terminal vending machine, and the company began selling the Radarange commercially in 1947. The first unit stood nearly five feet tall, weighed 750 pounds, and cost about $5,000 at the time, equivalent to roughly $53,000 in 2016 dollars. By 1997, more than 90% of U.S. households owned a microwave, according to this history of appliance adoption and failure.
That history explains why replacement is often practical for basic countertop appliances, but it doesn't make replacement the automatic answer for an integrated wall unit.
| Factor | Countertop Unit | Built In or Over Range Unit |
|---|---|---|
| Fault type | External power, door, tray, or control symptoms may justify a service quote, but replacement can be straightforward. | Door interlocks, fuses, and control boards may be worth diagnosing because installation and fit are more involved. |
| Parts availability | A common replacement may be easier to source, while an older or unusual model can still become difficult to support. | Availability and lead time can dominate the decision, especially when an exact board or trim component is unavailable. |
| Physical fit | A replacement usually doesn't need to match cabinetry. | Dimensions, mounting hardware, ventilation, and electrical requirements must match the installation. |
| Cavity damage | Severe arcing, chipped coating, or peeling paint may make continued use inappropriate. | The same damage can make a costly integrated unit unsuitable for repair. |
| Best next action | Compare a service quote with the price and convenience of a suitable replacement. | Get a model-specific diagnosis and parts check before ordering a replacement appliance. |
For manufacturers, repair shops, and maintenance teams, the broader MRO resource from American Additive Manufacturing offers useful context on maintenance, repair, and operations planning. The same principle applies here: identify the exact component, confirm availability, and understand the downtime before committing to the job.
Ask for an itemized quote that separates diagnosis, labor, parts, installation, and safety testing. If you hire outside help, review guidance on bonded and insured contractors and confirm that the technician is equipped to test the repaired oven, not merely replace a guessed component.
Keep Your Microwave Running Longer and Prove the Work
Prevention is mostly ordinary kitchen discipline. Wipe spills from the cavity, keep the waveguide cover clean, remove food residue before it burns, and never run the oven empty. Don't use metal or foil unless the manufacturer specifically permits the exact use, and stop operating the microwave when the door, seal, latch, cavity coating, or waveguide cover shows damage.
The turntable also deserves attention. Keep the glass tray seated on its roller ring, clear debris from the coupler area, and avoid forcing a tray that doesn't rotate freely. A clean cavity and correctly aligned tray reduce avoidable operating problems, but they can't correct a failed high-voltage component.
Ask for proof after service
A professional repair should leave a record. Request the model and serial number, reported symptom, diagnosed cause, part number, work performed, and any remaining limitations. For microwave service, ask specifically whether the technician completed RF leakage testing and a full operating-cycle verification after reassembly.
Before-and-after images can clarify cavity condition, door damage, wiring access, and finished installation. Service businesses can use construction photo documentation practices to organize those records and connect the visual evidence to the actual job.
Verified reviews are more useful when they identify the work performed rather than offering a vague compliment. A homeowner should be able to see whether the contractor handled a built-in microwave, replaced a door interlock, diagnosed a no-heat complaint, or recommended replacement because parts were unavailable.
A trustworthy repair record answers three questions: What failed, what changed, and how did the technician prove the oven was safe afterward?
If your microwave is dead, sparking, smoking, or running without heat, unplug it and record the symptoms before contacting a service professional. HomeProBadge helps homeowners find verified service providers and helps professionals attach credentials, job photos, verified reviews, and proof-of-work to their public profiles, so visit HomeProBadge to compare documented professionals and present your repair work with clearer evidence.