



You're standing at the kitchen sink with a mug in one hand, staring at a ring of rust around the drain, a chip that catches every sponge, and enamel so dull it never looks clean. The sink still feels rock solid. That's the paradox that makes cast iron sink refinishing worth considering. The heavy iron body underneath is often the best part of the fixture, while the thin porcelain-enamel surface on top is what stains, scratches, and wears out first.
Why Refinish Instead of Replace
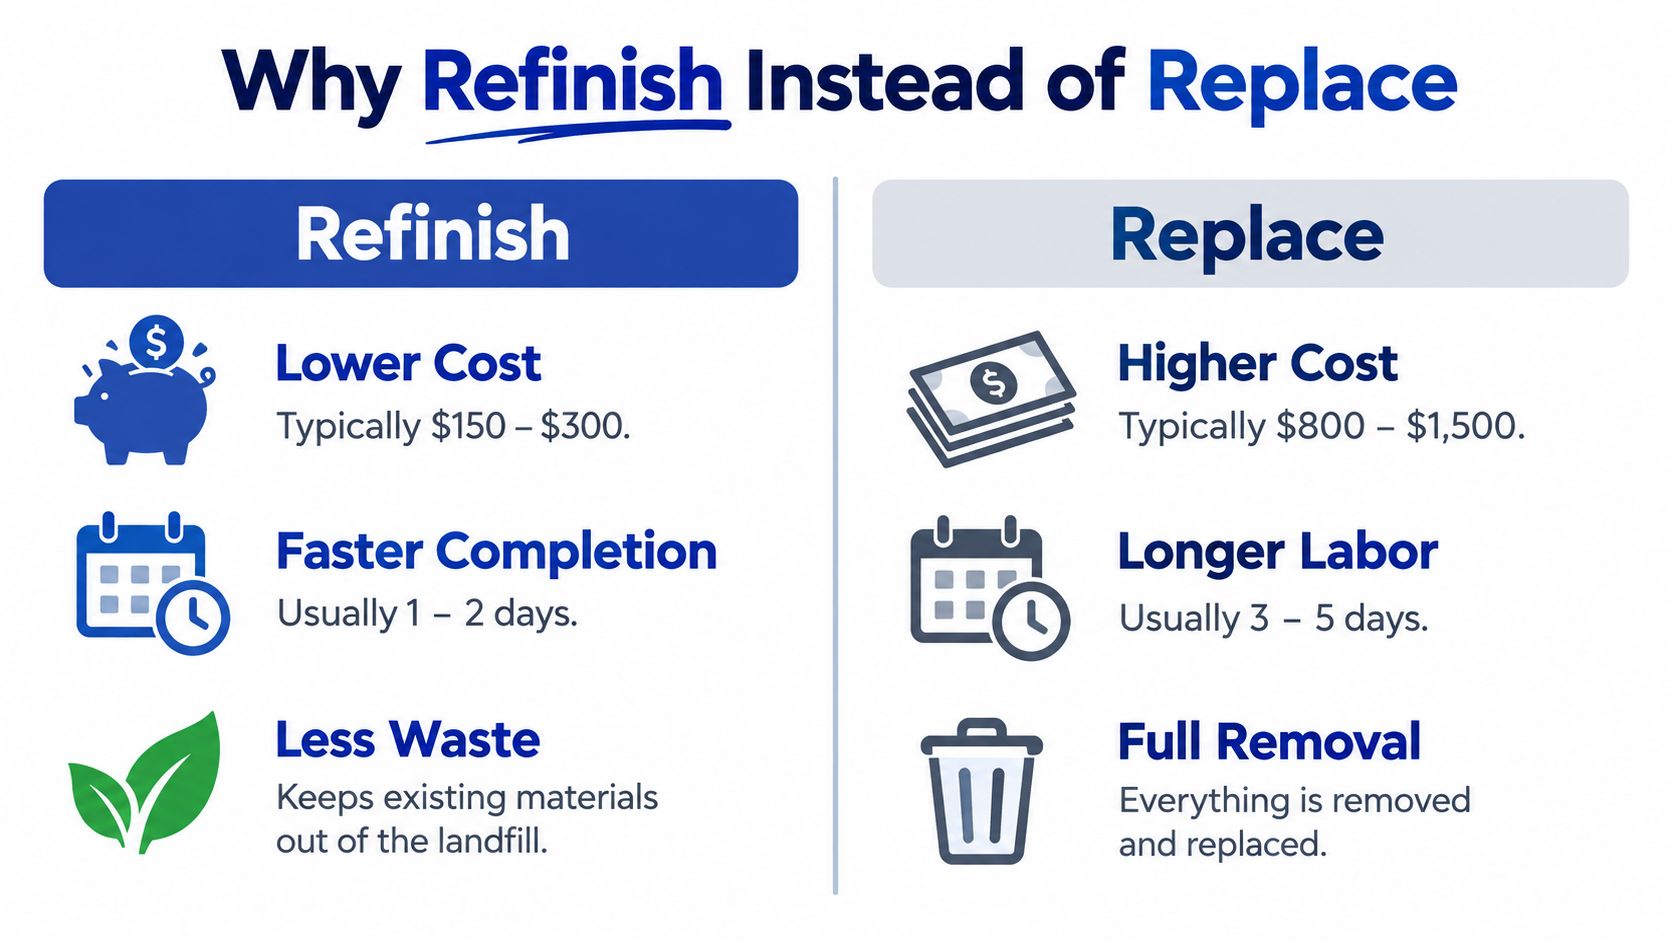
Replacement sounds simple until you picture the actual job. A cast iron sink is heavy, sealed to the countertop, and tied into plumbing that may not line up with a modern basin. Pulling it can mean disconnecting supply and drain lines, cutting caulk and mounting clips, modifying the countertop cutout or cabinet, and hauling out a fixture that needs two people to move safely.
Refinishing leaves that infrastructure alone. In the U.S. residential market, professional cast iron sink refinishing commonly costs about $450 to $800, and a properly prepared and maintained surface generally lasts about 10 to 15 years. Price shifts with basin size, access, rust, and prep time, but you avoid demolition and disposal costs that stack up fast during replacement.
The Iron Is the Asset
Cast iron earned its place because it doesn't flex, dent easily, or sound hollow under cookware. When the body is structurally sound and damage sits in the enamel, you're restoring a wear surface, not rescuing a failed fixture. That's a very different decision from coating a cracked or rusted-through basin and hoping for the best.
This matters most in farmhouse, historic, and mid-century kitchens. A replacement sink with different dimensions can force new countertop work or erase period character you wanted to keep. Homeowners planning a broader surface update sometimes pair sink work with a laminate countertop refresh process for the same reason, preserving the layout while renewing tired finishes around it.
Treat refinishing as a documented service-life extension. Photograph the damage, the prep, the materials, and the finished surface so the record proves you fixed defects, not just glossed over them.
That mindset changes how you work. You slow down for inspection, you don't skip safety screening, and you judge success by adhesion and cure, not by how shiny the sink looks on day one.
Tools, Materials, and Safety Setup
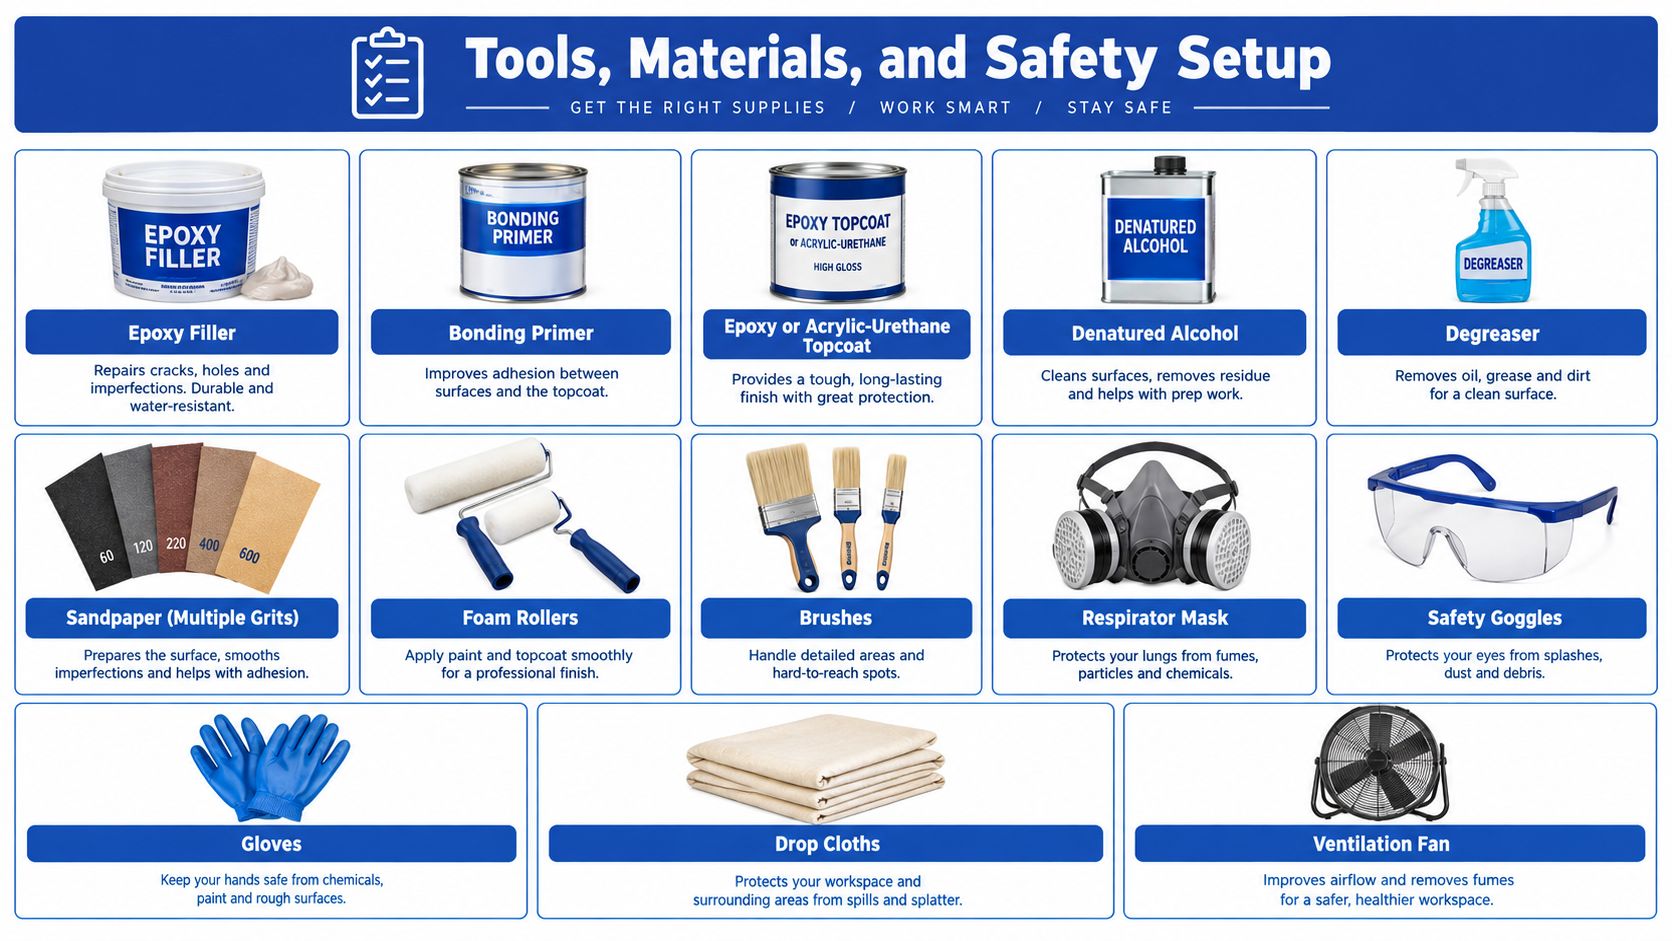
Don't start sanding and discover halfway through that you're missing primer or the right respirator. Lay everything out first, check compatibility between products, and make your go or no-go decision before the sink is torn apart.
What You Need on Hand
Mixing brands casually is a common mistake. A primer that isn't matched to your topcoat and substrate can undermine the whole job, even if each product is good on its own.
Screen for Lead Before You Disturb Anything
Check the home's build date first. The EPA Renovation, Repair and Painting framework applies to paid work that disturbs lead-based paint in pre-1978 housing, and sanding or stripping an older finish is exactly the kind of disturbance that raises the question. If your home falls in that era and you can't confirm the finish is lead-free, a lead-safe certified contractor is the right call, not a DIY experiment.
Ask direct questions before hiring anyone. How will they contain dust? How will they clean up? Where will exhaust air go? A vague answer is a disqualifying answer.
Set Up the Room
Remove the faucet, drain, and overflow hardware, then strip every trace of old caulk. Seal doorways with plastic sheeting so dust and overspray stay in the kitchen, and position your fan to exhaust air outside, never toward an HVAC return or a neighbor's open window. Decide in advance when children and pets can re-enter, because solvent fumes don't care about your schedule.
Surface Prep From Degreasing to Profiling
Most failed finishes don't fail during spraying. They fail here, because oil, soap film, or loose coating stayed on the surface. A durable workflow depends more on substrate preparation and cure control than on the topcoat itself, and many epoxy systems need approximately three to seven days for full cross-linking and water resistance. Prep is the job. Coating is the reward for doing prep right.
Clean, Then Clean Again
Scrub the basin with a strong detergent to cut grease, soap film, and mineral deposits. Rinse, dry, and repeat with a wax-cutting cleaner, because kitchen sinks absorb years of cooking oils that a single wash won't remove. Pay extra attention around the drain flange and faucet deck, where residue hides in seams.
Next, remove rust and any failing coating down to a sound edge. Loose material left behind becomes the weak layer your new finish clings to, and it will let go first.
Coating and Rust Removal Methods Compared
| Method | Best For | Mess Level | Lead Risk |
|---|---|---|---|
| Wet sanding | Profiling intact enamel, feathering repairs | Moderate, slurry stays contained | Lower dust, still requires screening on older finishes |
| Mechanical abrasion | Heavy rust, thick failing coating | High, generates significant dust | Highest disturbance, containment critical |
| Chemical etch | Creating profile where manufacturer specifies it | Low dust, chemical handling required | Lower dust, follow product safety directions closely |
Repair Chips and Profile the Surface
Fill chips, pits, and exposed metal with waterproof two-part epoxy filler, slightly overfilling each repair. After it cures, sand the filler flush and feather the edges into surrounding enamel so you can't feel a ridge with a fingertip. A repair you can feel is a repair you'll see through the topcoat.
Then abrade the intact enamel to create a uniform profile for adhesion, working from coarser to finer wet/dry paper as the workflow specifies. If you're unsure how fine abrasives behave on delicate surfaces, this overview of fine-grit sandpaper selection and use helps you avoid oversanding repairs or polishing enamel so smooth that primer can't grip.
The finger test: Drag a clean, dry finger across the basin. If it picks up dust, chalk, or an oily smear, you're not done prepping.
Vacuum with HEPA filtration, wipe with a tack cloth, and let the surface dry completely. Trapped moisture under primer is a future blister waiting for warm dishwater.
Primers and Coatings Applied the Right Way
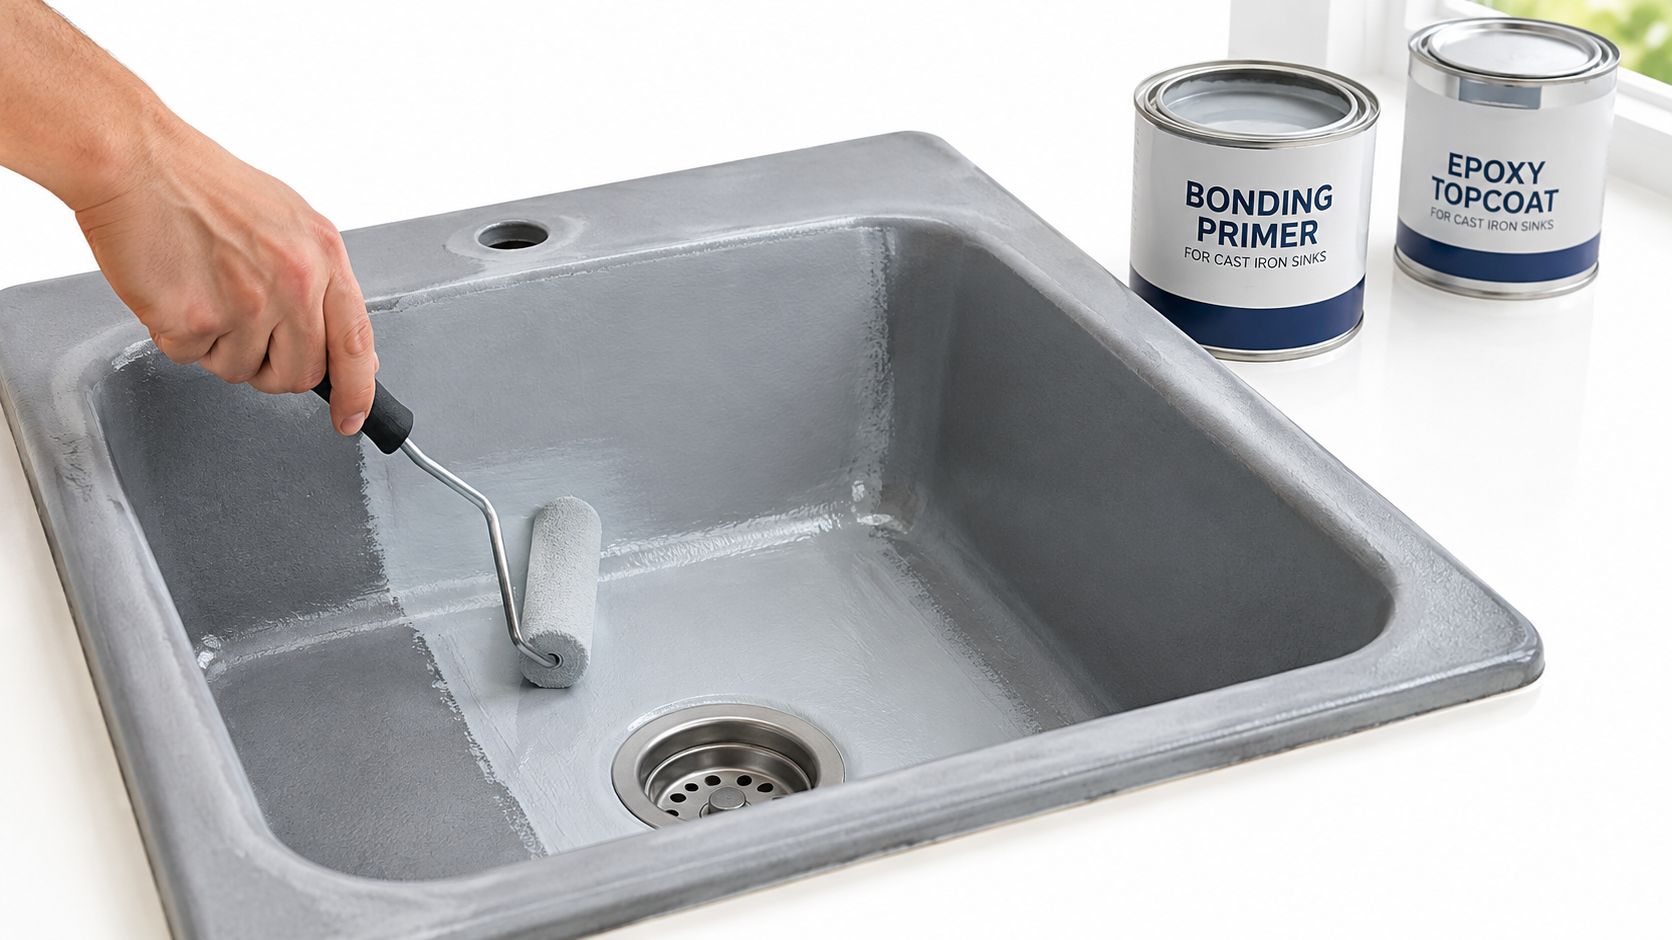
With prep finished, discipline matters more than speed. The image below shows the even, controlled application you're aiming for during the primer stage.
Compatibility Comes First
Use a bonding primer matched to your topcoat and rated for enamel and cast iron substrates. Solvent-based systems often bite harder but demand stronger ventilation, while water-based options are easier to live with indoors but must still be rated for sink service. Don't substitute based on what's already in your garage. The same compatibility logic applies when you choose a durable kitchen cabinet finish, where primer and topcoat pairing decides whether the finish survives daily handling.
Mask carefully before you spray. Protect the countertop seam, drain opening, and surrounding fixtures, and press tape edges down firmly so coating doesn't creep underneath.
Thin Coats Win
Apply primer in even, overlapping passes, then respect the manufacturer's flash time. Follow with two or three thin topcoats instead of one heavy coat. Heavy coats run, sag, trap solvent, and build thick edges that peel later. Thin coats level better and cure more reliably.
Watch a full application sequence before your first attempt so pass speed and overlap feel familiar.
Observe the recoat window on your product label rather than guessing. Spray too soon and you trap solvent. Wait too long and you may need to scuff before the next coat bonds.
Finally, remove masking before the coating fully hardens. Pulling tape from a cured film tears the edge and creates a ragged line you'll stare at for years. Pull slowly, at a low angle, away from the fresh finish.
Curing, Ventilation, and Safe Return to Service
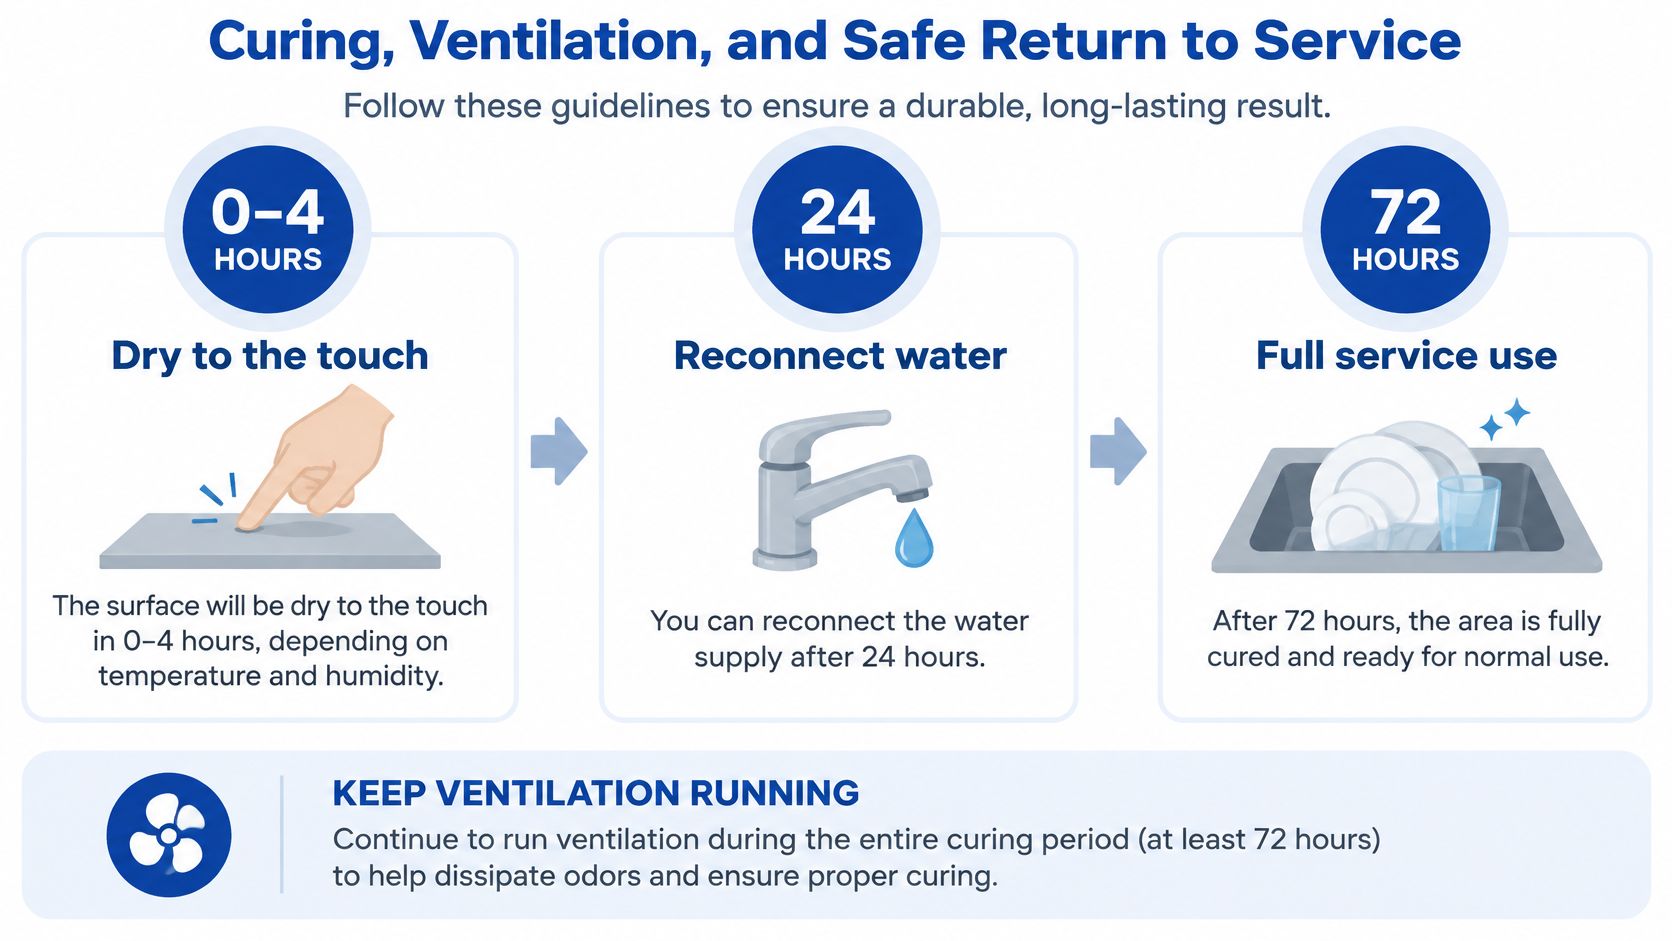
A sink that feels dry isn't a cured sink. Dry to the touch only means surface solvent has flashed off. Underneath, the coating is still cross-linking, and standing water during that window can soften, blush, or lift a finish that looked perfect hours earlier.
Read the Timeline in Stages
Think in milestones rather than a single finish line. First comes dry to the touch, then safe handling and hardware reinstallation, then light use, and only later full water exposure. Epoxy and acrylic-urethane systems need a multi-day cure before they earn that last milestone, as noted in the prep section above. If you want a useful primer on how cure differs from surface dryness, this guide explaining how long spray paint takes to fully cure covers the same chemistry in plain terms.
Temperature and humidity inside your kitchen affect every stage. Cold or damp conditions slow cross-linking and can dull gloss, so keep the room within the range your coating label specifies instead of cranking heat or opening windows on a humid day.
Keep Air Moving Out
Run exhaust ventilation through application and into the early cure period, directing fumes outside and away from HVAC returns. Shutting the fan off as soon as spraying ends leaves solvent vapor sitting on a soft surface. Keep children and pets out until odor has cleared and the manufacturer says re-entry is appropriate.
If the water-exposure window on the label hasn't passed, the sink is still a work in progress, no matter how finished it looks.
Reconnect plumbing carefully when the timeline allows, avoid dragging tools across the basin, and hand-tighten hardware with padding where metal meets fresh coating.
Common Problems and How to Fix Them
Problems usually announce themselves in the first week, and each one points back to a specific mistake. Learn to read them instead of panicking or recoating blindly.
Diagnose by Symptom
Document and Maintain
Photograph every defect, your suspected cause, and the repair. Those dated records protect you if a pro did the work, and they teach you something if you did it yourself.
Going forward, clean with non-abrasive cleaners only. Abrasive pads and harsh chemicals chew through refinished coatings, and dropped cast iron cookware chips them just like original enamel. Dry standing water around the drain line instead of letting it sit overnight.
When to DIY and When to Hire a Pro
DIY makes sense under a narrow set of conditions. You have localized chipping, a sound iron body, good exhaust ventilation, no unresolved lead concerns, and enough patience to honor a multi-day cure without a working kitchen sink. You also need honest spray skills, because thin, even coats are harder than they look.
Red Flags That Mean Hire Out
When you get quotes, compare them against what painters and finishers charge in your area using a reference like this breakdown of typical painter pricing and what drives it. Ask each pro about prep steps, containment, coating system, cure time, and what their documentation looks like.
A well-kept refinishing record, with dated before-and-after photos, materials used, and care instructions, is proof of work that serves both sides of the hire.
Whether you spray it yourself or hire it out, judge the job a month later, not an hour later. A finish that survives daily dishwater without softening, peeling, or staining earned its keep.
If you're a refinishing pro, turn your next cast iron sink job into verified proof of work with dated before-and-after photos, structured reviews, and a public profile homeowners can trust, and if you're a homeowner, use the same records to hire with confidence. Visit HomeProBadge to create your profile or find a verified pro near you.